HomeAbout the BlogMeet the ChefsMeet the EpicutiesMeal IndexContact Us
Showing posts with label Fruit. Show all posts

Tuesday, October 29, 2013

Raw Green Applesauce

I know that I have yet to post on Green Smoothies as I promised and as my penpal reminded me Smile, but I sat down to do it and realized that it was going to be much more involved than I had originally thought… and I just have not had the time. I wanted to try a few new recipes before I do that big post, but while I was searching I found this recipe at RawFamily.com. I love raw recipes! Its not a movement that I see myself joining, but raw usually translates to “easy” and “healthy” and I need to start frequenting more raw recipe websites and cookbooks!
Anyway, I found this recipe and I had to try it! It was just what a raw recipe should be – easy, fun. I enlisted the help of Little Frances to help me make it! Its so fun to have extra hands in the kitchen as our epicuties get bigger!
Ingredients:
  • 4 apples
  • 1 banana
  • 2 to 3 cups chopped romaine lettuce
  • ½ teaspoon cinnamon
  • up to 2 cups water
Steps:
  1. Chop apples into pieces, removing the core.
  2. Place half the water and the rest of the ingredients together in a blender or a food processor.
  3. Blend/process!
  4. Add more water if needed until you reach desired thickness.photo (21)
Yield: 3 cups
Storage: This can be kept in the freezer for up to 2 months. In the fridge, I would recommend no longer than 2 or 3 days since it is a raw recipe.
Difficulty: 1 out of 5. Easy, like most of the recipes I post on here.
Timing: 8 months. This is about the average age for introducing greens to small babies from what I can find.  Some recommend earlier, some recommend later. If you have concerns, speak with your pediatrician.
Miscellaneous: Our applesauce turned out a little brown since I had bought a pre chopped and rinsed salad kit that contained both red and green romaine lettuce. I also made the mistake of adding all of the water at once so it came out a little more soupy than saucy!  I recommend starting with a more conservative amount of water and adding as desired.
Epicutie Ratings (see left side of the page for ratings):
Little Frances: Somewhat Yummy! Little Frances’ enthusiasm may be due to the fact that she helped make it but she seemed to like it. It lost her interest after a while.
photo (22)
Little Elizabeth: Yummy in the Tummy! I failed to take a picture of Little Elizabeth, but she has loved it all three times she has eaten it!

Monday, September 23, 2013

Whole Wheat Banana Pancakes


Bananas.  Oh bananas.  These are always plentiful in my house but sometimes, they get too ripe too fast for us, so I use them in other ways and this recipe is one way!  This recipe is from 100 days of real food, with some alterations for dairy free!

Ingredients:

  • 2 cups whole-wheat flour (I use King Arthur’s organic white whole-wheat flour)
  • 2 teaspoons baking powder
  • 1 ½ teaspoons baking soda
  • ½ teaspoon salt
  • 1 tablespoon honey
  • 2 large eggs, lightly beaten
  • 1 ¾ cups almond milk (or any other milk alternative, for those not avoiding dairy use regular milk!)
  • 2 tablespoons unsalted butter (we use Earth's Best Soy Free lactose free butter), melted
  • 2 ripe bananas, mashed
  • 100% pure maple syrup for serving

Steps:

  1. In a large bowl, whisk together the flour, baking powder, baking soda, and salt.
  2. In a separate bowl, mix together honey, eggs, milk, and 2 tablespoons of melted butter.
  3. Make a well (hole) in the center of the flour mixture and pour the liquid mixture into the center; mix to combine but do not over mix!
  4. Gently fold the mashed bananas into the batter with a spatula.
  5. Heat a griddle or sauté pan over medium-high heat (if you are using a pan swirl some butter in there, if using a griddle this isn't needed).  Add pancake batter using a 1/4 or 1/3 measuring cup.
  6. When the pancakes have begun brown on the bottom and start to bubble on the top, flip them over to cook the other side.
  7. Serve with maple syrup!
Difficulty:  2 out of 5; for pancakes, this is pretty easy!

Tip:  Freeze leftover for a quick breakfast another day!

Timing:  I serve pancakes as early as about 10 months since my babes show good chewing ability, but by 12 months I think these would be great for any toddler as long as they are cut up small!

Epicutie Rating:  (see left side for rating descriptions)
  • Little Joy:  Yummy in the Tummy!  My kids LOVE pancakes so I knew this would be a hit!
  • Little Asher:  Yummy in the Tummy!  He ate SIX PANCAKES!!!!!!!  I had to cut him off!
The batter

THE GOODS!!!!

"Helping"


He couldn't wait for me to get the camera out!

YUM!

Going back for more!

Thursday, September 19, 2013

Little Elizabeth’s First Food

So I know that I am way behind on my Green “Milkshake” post, but in the meantime, let me share with you Epicutie Elizabeth’s first food…

photo (12)

WATERMELON!!!

This was not pureed and she was two weeks shy of 6 months! I would have never been so unscientific with little Frances or given her solids before 6 months or something that she had to chew herself, but something about surviving parenthood the first time makes you more confident the second time around and sometimes you throw caution to the wind!

Also, here is how we celebrated her 6 month birthday…

photo (13)

FROZEN YOGURT!!!

That one was her daddy’s idea.

And yes, both foods got a “Yummy in the Tummy” rating Smile.

Monday, August 26, 2013

Banana Porridge


If you want easy---this is IT....Banana Porridge!   This is my go to breakfast for my kids and has been since they were both about 15 months old.

Ingredients:

  • Ripe Banana
  • 1/2 Cup Quick Oats 100% Oats Oatmeal
  • 1 Cup Water (or Milk)
  • Dash of Salt
Steps:
  1. Cut the banana into small pieces (I usually cut it lengthwise in an X and then slice horizontally making small triangle pieces.  Place in a large cereal bowl.
  2. Add oats, water and dash of salt into bowl.  Stir to combine.
  3. Microwave for two minutes.
  4. Remove from microwave and allow to stand for at least 5 minutes (so it can thicken).
  5. Serve...watch out its hot!
Yield:  I split this between my 21 month old and 3 year old and its JUST enough for them both so---two hearty toddler servings.

Note:  I have also used applesauce and cinnamon vs bananas and even strawberries too!

Timing:  As early as 9 months if they are good at chewing

Difficulty:  1 out of 5; easy as it gets!

Epicutie Rating:
Little Joy and Little Asher:  YUMMY IN THE TUMMY!  Sometimes Little Joy gets tired of having it day in and day out but she always gobbles it up and then sometimes says "so tomorrow we will have something new" :)

Tuesday, July 30, 2013

Chicken Avocado Quesadilla


 Since avocados have been on sale, this has become a regular at my house lately--and no one is complaining! We eat this for lunch or dinner!

Ingredients
  • 1 Cooked chicken breast (I throw a chicken breast in my steamer)
  • 1 avocado, sliced thinly
  • Shredded cheese (montery jack, monzerlla, Go Veggie! lactose free cheese--to make it dairy free)
  • Butter (Earth Balance Lactose Free butter alternative to make it dairy free)
  • Whole wheat tortillas
  • Lime
  • Salt
  • Pepper
Steps

  1. Preheat a griddle to 225-250 degrees.
  2. Shred chicken.
  3. Toss shredded chicken with a couple squeezes of lime, dash of pepper and dash of salt (optional).
  4. On one half of the tortilla, place a few thinly sliced avocado pieces (I actually mash it up and spread it on the tortilla for Little Asher who is texture sensitive), some shredded chicken and a little shredded cheese. Fold the tortilla in half.
  5. Put a thin layer of butter on the outside of both outside sides of the tortilla (I omit this on my quesadilla).
  6. Cook on griddle until both sides are browned.
  7. Allow to cool slightly and slice into triangles.

Miscellaneous: We usually eat this with crock pot vegetarian black beans (this recipe is next in the line up and I will link to it when available).

Tip:  Make the chicken ahead and put it in the fridge so that when it is time for dinner all you have to do is assemble and grill--easy!

Yield: Depends on how much chicken you use, but when we do one large chicken breast it feeds my family of four...which is about 6 quesadilla

Timing:  9-12 Months depending on your little ones ability to chew and grind and the number of teeth.  Little Asher was able to handle this cut up very small around 10 months and I would imagine Little Joy would have been around the same age had I tried it back then.

Difficulty: 2 out of 5; this is easy and can be partly made ahead.  Very few things get a 1 on difficulty from me; I reserve that for things I can do in my sleep!

Epicutie Rating (See left side of page for rating descriptions):
Little Joy:  Yummy in the Tummy; there is never a bit left of first helpings of this dish.  When she sees the griddle come out her exact words are "Is it pancakes or quesadilla??!  They are my favorite in the whole wide world!" LOL!
Little Asher:  Yummy in the Tummy; he usually finishes his before my husband and I finish ours!


Sunday, July 21, 2013

Healthy Avocado Turkey Burgers

I sorta just made this up on the fly, so I hope I get the proportions of everything down ok!!

Ingredients:

  • 1 lb ground turkey
  • 1/4 cup natural apple sauce (strain it to get some of the water out)
  • 1 tablespoon Parmesan
  • 3/4 to 1 tablespoon Dale's Seasoning sauce (this is basically soy sauce, pepper, paprika and garlic; you could substitute for 2 teaspoons no salt seasoning mix if you do not want the salt)
  • 1/2 teaspoon ground oregano
  • Nutritional Yeast
  • 1 ripe avocado
  • slices of cheese (optional)
  • buns
Steps:
  1. Combine first five ingredients ingredients into a bowl and mix thoroughly.
  2. Form into approximately five patties
  3. Sprinkle the tops of burgers with nutritional yeast (and bottom if you want; I put this on the burgers because they were SO sticky I was afraid they would stick to the flipper so its kind of superfluous)
  4. Grill burgers until internal temperature reaches 180 degrees; I like to make sure its DONE.
  5. Top burgers with diced avocado and cheese and serve.
Miscellaneous:  My kids love cheese so every time we have burgers I indulge, who doesn't love a good cheese burger.  My dairy intolerant son uses veggie slices.

Timing:  Burgers are challenging; I would not give this until at least 18 months OR you can do it bun-less, deconstructed and cut up very small starting around one if they have a head full of teeth like mine did!

Difficulty: 1 out of 5; I made this up on the fly so it HAD to be easy!

Epicutie Rating (see left side of page for rating descriptions): Double Yummy in the Tummy's
  • Little Joy:  Yummy in the Tummy; she scarfed down half a burger like it was nothing!
  • Little Asher:  Yummy in the Tummy; Although it was hard for him to chew and tear into, he polished of his half of the burger without encouragement!

Monday, December 31, 2012

Apple Cinnamon Pork Roast

I love slow cooker recipes   LOVE them.  The time just leading into dinner is so crazy-Daddy getting home from work, Little Asher just getting up from nap, Little Joy finishing nap and video time, dinner getting finished-its like a giant chaotic convergence!  Slow cooker meals allow me to do all the cooking/prep during a quiet time and minimize the chaos.

This recipe is inspired by one from Parents Magazine.  Enjoy!

Ingredients:

  • 2.5-3 lb pork loin roast (tenderloin if its on sale)
  • 1-2 tsp dried thyme
  • 1/2 tsp salt
  • 1/4 tsp ground black pepper
  • 1 tablespoon canola oil
  • 1 medium sweet onion cut into thin slices
  • 3/4 apple cider (or apple juice but cider is better)
  • 2 Jonagold apples, cored and thinly sliced (save the core)
  • 1 tablespoon lemon juice
  • 1/2 tsp ground cinnamon
  • 1 16 oz bag coleslaw mix (half the bag is actually plenty)
Steps:
  1. Trim edges of roast if it will not fit in your slow cooker.
  2. Sprinkle roast with salt, pepper and thyme.
  3. Heat oil in large pan.
  4. Place roast in hot oil and sear on all sides (until slightly brown) .
  5. Layer onion in bottom of slow cooker and place roast on top.
  6. Pour apple cider over roast.
  7. Cover and cook on high for 2-2.5 hours.
  8. While the meat is cooking, core apples and thinnly slice.  Toss the cores in the slow cooker.
  9. Place apples in a ziplock along with lemon juice and cinnamon.  Shake the bag well to coat the apples.  Place the apples in the fridge (this way everything is ready to serve).
  10. After meat is cooked (2-2.5 hours), remove cores, add apples and add slaw mix.
  11. Cover and cook for an additional 15-20 minutes.
  12. Remove roast and place on a platter.  Allow to rest for ten minutes.
  13. Using a slotted spoon transfer veggies to the platter and drizzle cooking juices over meat and veggies.
Timing:  Meat can be chewy, I would wait until one year.  Our pork was very tender though so depending on how experienced an eater you have, it could be offered earlier.

Storage:  Fridge 3-5 days.

Yield: 8 servings

Difficulty:  2 out of 5; Like I said, I love slow cooker meals and this one was different than the usual over cooked veggie slow cooker meals.  It cook about 15 minutes to prep everything and then a couple hours to cook---I would say that's easy!

Epicutie Ratings:
  • Little Joy:  Yummy in the Tummy minus the slaw.  I figured the kids wouldnt be keen on the slaw, but she loved the apples, onions and meat!
  • Little Asher:  Somewhat Yummy minus the slaw.  He liked the meat and apples ok...he doesnt LOVE anything thats not a fruit :/  He is my strong willed one, LOL!

Friday, November 2, 2012

Banana Cinnamon Waffles


I buy bananas a lot because my whole family loves them, but sometimes I buy a batch that seem to brown really fast.  That's when I want to have plenty of banana recipes in my arsenal. Furthermore, I am constantly looking for breakfast foods that will freeze well so that I can break up the week's breakfasts which are usually filled with cereals and oatmeals.  This recipe was inspired by one I found on a Cooking Light site.

Ingredients:

  • 1 1/4 cup all-purpose flour (you could replace 1/4 of this flour for 1/4 cup buckwheat flour for a nutty flavor)
  • 1/2 cup whole wheat flour
  • 1/4 cup ground flaxseed
  • 2 tablespoons sugar
  • 1 1/2 teaspoons baking powder
  • 1/2 teaspoon ground cinnamon
  • 1/4 teaspoon salt
  • 1 1/2 cups rice milk
  • 3 tablespoons butter, melted (I used Earth Balance dairy free, soy free butter alternative)
  • 2 large eggs, lightly beaten
  • 1 1/2 teaspoons vanilla
  • 1 1/2 large ripe banana, mashed
  • Cooking spray

Steps:

  1. Preheat waffle iron.
  2. Combine Dry ingredients in a medium bowl (flours, flaxseed, sugar, baking powder, cinnamon and salt) stirring with a whisk to combine.
  3. In a separate bowl combine milk, butter, eggs and vanilla.
  4. Add wet ingredients to dry stirring with a whisk; mix until combined but not too much!
  5. Fold in mashed banana.
  6. Coat iron with cooking spray
  7. Spoon batter onto hot iron spreading the batter to edges.
  8. Cook 3 to 4 minutes or until steaming stops; repeat procedure with remaining batter.
  9. Serve warm.

*Allergy Alert:  Contains Egg*

Timing:  One year due to the eggs however I would have given this as early as 9 months to my Epicuties because its soft and easy to chew; even my texture sensitive Little Asher thought they were soft and yummy.  Most pediatricians recommend avoiding whole eggs until one year.

Storage:  Fridge for 4 days and freezer for a month.  Wrap each waffle individually in plastic wrap and then place in a freezer bag.  Thaw in microwave or toaster oven.  Quick and healthy on hand breakfast!

Yield:  14 waffles (see photo below)

Difficulty: 2 out of 5; the only recipes I give a 1 to are those that require NO cooking.  This was quick to whip up; I even made it after I had both kids up and dressed and no one starved while waiting :)

Epicutie Rating:

  • Little Joy:  Yummy in the Tummy; She proclaimed "Oh mommy, this is good" after this first bite.  She did not consume as much as she usually does of foods she loves but we are learning with a toddler---some days they cannot eat enough to be satisfied while others they require very little food.  
  • Little Asher:  Yummy in the Tummy; after a liquid feeding and puree prunes he still ate an entire waffle.  He tends to be particular about textures, but this was soft enough for him to find YUMMY!
It made 14 of the smaller square so 7 of the big double squares


Signing MORE

Let me try one more to see if I like it

Signing MORE MORE


YUMMY IN THE TUMMY

I said "Give me your I like it smile if you like it" LOL!


Sunday, March 4, 2012

Pomegranates

In case you cannot tell from my lack of LTY blogging, things have been a little nuts at Little Frances’s house!  I have not been making too many new recipes.  However, we were recently introduced to a delicious new finger food that the entire household has fallen in love with, the pomegranate. I know that pomegranate sounds very exotic, at least to me it did  However, pomegranates can actually be found in most grocery stores.  The best part about pomegranates… they are a super food full of antioxidants. I encourage you to give this delicious fruit a try… you will not be disappointed!

pomegranate

Health Benefits of a Pomegranate (taken from HERE):

  • It is rich source of soluble and insoluble dietary fibers, providing about 4 g per 100 g (about 12% of RDA), which aid in smooth digestive and bowel movements. The fruit is suggested in the diet for weight reduction and cholesterol controlling programs. Regular inclusion of fruits in the diet helps protect from colon cancers.
  • Punicalagin is a polyphenolic anti-oxidant compound found abundantly in the pomegranate juice. Studies suggest that punicalagin and tannins are effective in reducing heart disease risk factors by scavenging harmful free radicals from the body.

  • It is also good source of antioxidant vitamin-C, provides about 17% per 100 g of daily requirement. Consumption of fruits rich in vitamin C helps body develop resistance against infectious agents by boosting immunity.

  • Regular consumption of pomegranate has also been found to be effective against prostate cancer, benign prostatic hyperplasia (BPH), diabetes, and lymphoma.

  • It is also good source of many vital B-complex group of vitamins such as pantothenic acid (vitamin B-5), folates, pyridoxine and vitamin K, and minerals like calcium, copper, potassium, and manganese.

Preparation Steps:

The only thing that I do not love about pomegranates is that they take a little bit of time to prepare.  However, they are so delicious that I look forward to preparing them and it can actually be quite therapeutic!  Also, this should ideally be done on a cutting board, while wearing an apron, so that the juices don’t stain everything they touch.

  1. Cut off the crown of the pomegranate.  (Fun fact – the bible says that Solomon’s crown was modeled after the pomegranate!)155
  2. I use serrated knife to cut skin deep in various patterns along the pomegranate; this process is called “scoring.”156
  3. Soak the pomegranate in cold water for 10 minutes.  This will help you break the pomegranate apart and will keep the juices from squirting and staining your clothes.
  4. Break the pomegranate apart and pick out the seeds.  The white flesh should float to the top, and the seeds should sink to the bottom.157
  5. Skim the top of the bowl to remove the white, fleshy parts and then drain the seeds in a colander.159

Timing: I cannot find any guidelines on introduction to children.  My recommendation would be to wait until after your LO has molars and can grind the seeds.  So this would probably be categorized as a toddler food.

Difficulty: 3 out of 5!  It pains me to give it this rating because it is so worth the time, but it can be pretty time consuming.  It is not difficult, it just takes some time.  I try to do 3 or 4 at a time.

Storage: The seeds can be stored in the refrigerator for up to 3 days… if they last that long!

Epicutie Rating: Yummy in the Tummy! ----See left side of the page for descriptions

Little Frances loves, loves, loves “grapes” as she calls them!  She asks for them all. the. time.  Don’t let this picture fool you!  This is the face that I have been getting when I prompt her for a smile…goof ball.  She loves them!

006

WARNING:  Little Frances has also figured out that these fit very nicely into her nose… so some supervision when eating them may be required!!!!

photo (18)

Wednesday, October 19, 2011

Banana Bread with Cinnamon Streusel Topping


This another one from Deceptively Delicious!  I promise this blog is not just for Deceptively Delicious recipes, but I was looking through my cookbooks last night and I had all the ingredients on hand for this one so I couldn’t resist.  I have a history of my banana bread not turning out, and once upon a time, I tried every banana and banana nut bread recipe that I could get my hands on and I was never happy with how they turned out.  After making this, I still feel like I am searching for that perfect recipe, but in the mean time this healthy, easy version will definitely scratch the itch!

Cinnamon Streusel Topping (Optional)

Ingredients:

  • 2/3 cup old-fashioned oats
  • 1/4 cup firmly packed brown sugar
  • 1 teaspoon cinnamon
  • 2 tablespoons melted butter or margarine

Steps:

  1. Stir together dry ingredients in a bowl. Stir in the butter or margarine. Set aside.
014 (640x425)

Banana Bread

Ingredients:

  • Nonstick cooking spray
  • 3/4 cup whole wheat flour
  • 1/2 cup all-purpose flour
  • 1/2 teaspoon baking soda
  • 1/4 teaspoon baking powder
  • 1/2 teaspoon salt
  • 1/2 teaspoon cinnamon (optional)
  • 1/2 cup firmly packed brown sugar
  • 1/4 cup canola or vegetable oil
  • 2 large egg whites
  • 1 1/2 cups banana puree
  • 1/2 cup cauliflower puree
  • 1 teaspoon pure vanilla extract

***I used 4 thawed frozen bananas to make 1 1/2 cups and I did not puree them beforehand.

016 (640x425)

Steps:

  1. Preheat the oven to 350 degrees F.  Coat a 9x5 inch loaf pan or 2 mini pans with cooking spray.
  2. In a bowl or a zip lock bag, mix the flours with the baking soda, baking powder, salt, and cinnamon, if using. Set aside.
  3. In a large mixing bowl, mix the sugar and oil with a wooden spoon until well combined. Mix in the egg whites, banana and cauliflower purees, and vanilla. Add the flour mixture and mix just until combined.018 (640x425)
  4. Pour the batter into a loaf pan.  Cover evenly with the streusel topping if using.
  5. Bake until a toothpick inserted into the center comes out clean, 55 to 60 minutes for the large loaf, 25 to 30 minutes for the mini loaves. Let cool on a rack for 5 minutes, then turn the bread out of the pan to cool before serving.

023 (640x425)

Timing: This could be given as early as 9 months, but be aware of the egg whites if your little one has an egg allergy.  Usually it does not affect children if it is cooked in something. I personally would not give

Difficulty: This was pretty simple, but I am giving it a 3 out of 5 because I had to get so many pans and bowls dirty!  Very few dirty dishes is a requirement for me to give something a low rating Smile.

Miscellaneous:

  • I used 3 mini loaf pans instead of 2.  I have a history of not evenly cooking my banana bread so I wanted to be cautious and not put too much batter into the pans.
  • When I put the cinnamon streusel topping on the batter, I gently mixed it with the top layer of the batter so that it would stay on the bread once baked.  It turned out very well.
  • To make cauliflower puree, simply steam raw cauliflower florets for 10 to 12 minutes and then puree.

Epicutie Rating: Yummy in the Tummy!!! ---See right side of the page for descriptions.

029 (640x425)

Thursday, September 15, 2011

Milk Shakes!

Little Frances is crazy over milkshakes, although for obvious reasons, she does not get them that often.  I developed or found three alternate healthy, banana-based recipes that your little one will love.  I like to serve it in a parfait glass with a straw so she feels like she is getting the real thing!

This is also a great way to get Little Ones to drink milk, who would not drink it otherwise.  You can also replace the whole milk with skim milk to make a healthy, delicious breakfast smoothie for the bigger kids in the family Smile.

Allergy Warning: Two of three of the recipes contain extreme allergens.  We have no history of food allergies in our families and even so I waited until Little Frances was 15 months old before I gave her peanut butter, and even then, only in small amounts.  Once I was certain that she was not allergic, she was allowed nut based products in larger quantities.  As always, if you are concerned, consult your Doctor!

Recipe 1: Blue-Banana Milk Shake

  • 1/2 frozen, chopped banana
  • 1/2 cup frozen blueberries
  • 1 cup whole milk

Recipe 2: Peanut Butter Milk Shake*

  • 1 frozen, chopped banana
  • 2 teaspoons peanut butter
  • 1 teaspoon milled flax seed
  • 1 cup whole milk

Recipe 3: Nut-N-Honey Milk Shake

  • 1 frozen, chopped banana
  • 1/4 cup almonds
  • 1/2 teaspoon honey
  • 1 cup whole milk

Directions:

  • Mix in a blender until well blended!

Yield and Storage: This depends on how hungry your Epicutie is.  Sometimes I save half of the milkshake in the freezer for Little Frances to eat the next day.  This would yield one adult sized milkshake or half of a milkshake for your toddler… it all depends on appetite.  This stores well in the fridge overnight.

Timing: Due to the possible milk, nut and honey allergies, give NO EARLIER than 12 months.

Difficulty: 1 out of 5! Easy and delicious.

Miscellaneous: I always buy a bunch of banana, slice them, and freeze them in individual baggies so that I have them on hand for smoothies.  Freezing them before hand means that you don’t need to use ice cubes, which can make your smoothie too watery… this way they stay nice and creamy!  This is also a great use for older bananas that you wouldn’t want to eat on their own.

Epicutie Rating: Yummy in the Tummy! --See right side of page for descriptions

Little Frances loves to crawl into her Daddy’s lap in the morning and have a taste of his morning milkshake!  I love her little milkshake goatee.

Goatee

Smiley Girl

*This recipe was taken from Jillian Michael’s weight loss website.

Monday, September 12, 2011

Easy At-Hand Blueberry Muffins

A few weeks ago we were coming off of a week long family illness and I had not been to the grocery store in ages… our cupboards were bare!  I had no idea what I was going to make my family for breakfast since I was down to one egg, had no yogurt, and very little milk.  Thankfully I remembered this easy recipe from my Wild About Texas cookbook (one of my favorites!), and I was able to prepare something for the whole family.  The great thing about this recipes is that you probably already have every single ingredient on hand.  I always make certain to have frozen blueberries in my freezer for this and other recipes. 

This recipe is not what I would classify as “healthy”, but it is a healthier alternative to most blueberry muffin recipes and certainly less fatty than what you would buy in the store.  I like to make this occasionally when I am in the mood for something really sweet, like chocolate chip cookies.  This still satisfies my sweet tooth and is much better for me than what I would have normally eaten!

Ingredients:

  • 1/4 cup butter or margarine
  • 1/2 cup sugar
  • 1 egg
  • 1/2 cup milk
  • 1 1/2 cups flour
  • 2 teaspoons baking powder
  • 1/4 teaspoon salt
  • 3/4 cup blueberries (I always like to add a few extra.  I love blueberries!)

Steps:

  1. Preheat oven to 350 degrees.
  2. Cream butter and sugar until light and fluffy.
  3. Beat in egg and milk.
  4. Stir in flour, baking powder, and salt until moistened.
  5. Fold in blueberries.
  6. Spoon batter in to 10 well-greased muffin cups, filling each about 2/3 full. (I just add the frozen berries.  I do not bother to thaw them and it works fine.)
  7. Bake for 20-25 minutes.

Yield: 10 muffins

Timing: I would use your best judgment, although I think that these could be given as early as 9 months considering the eggs and milk are mixed and cooked. 

Storage: Refrigerator for 1 week, freezer for up to 2 months.

Difficulty: 1 out of 5!  These are so, so easy.

Epicutie Rating: Yummy in the Tummy! --See right side of page for descriptions

I know you are thinking… of course Little Frances loved them! Who doesn’t love blueberry muffins?  Actually she has been such a picky eater since her molars have been slowly, slowly, slowly coming in.  She has even been turning down sweets, so I was delighted with how quickly she gobbled this up, and kept asking for more.  I didn’t think she would ever get full! Her happy face says it all.

Happy Blueberry Girl

Sunday, July 31, 2011

Maple Spice Muffins

My co-author (Little Frances' Mommy) has been raving about the cookbook "Deceptively Delicious" by Jessica Seinfeld for months now. I FINALLY remembered to look for it in my local bookstore, however I was only able to find her second cookbook "Double Delicious". Since I was anxious to test some of her recipes, I purchased it.

Only 2 days after buying, I was ready to try some recipes; today's recipe comes from "Double Delicious! Good, Simple Food for Busy, Complicated Lives" by Jessica Seinfeld.

Ingredients:
  • Non stick cooking spray or paper baking cups
  • 1/4 cup trans-fat-free soft tub margarine spread (other butters could be substituted)
  • 1/2 pure maple syrup
  • 1-6 oz container of low fat lemon yogurt (I used fat free greek yogurt for extra protein; fat free was the only lemon greek yogurt I could find)
  • 1/2 cup non fat sour cream
  • 1 large egg
  • 1 large carrot, washed and grated
  • 1 small apple, grated
  • 1/2 cup raisins (I accidentally ommitted this, but I am glad I did raisins are a major choking hazard and I would have needed to remove them or chop them super small for Little Joy)
  • 1 cup all purpose flour
  • 1 cup whole wheat pastry flour (I have no idea what pastry flour is, mine is just 100% whole wheat flour)
  • 1 teaspoon baking soda
  • 1 teaspoon baking powder
  • 1 1/2 teaspoon cinnamon
  • 1 teaspoon allspice
  • 1/2 teaspoon ground clove
  • 1/4 teaspoon slat
Steps:
  1. Preheat oven to 350 degrees.
  2. Coat a 12-cup muffin tin with cooking spray or line with paper baking cups.
  3. In a large bowl, stir together margarine, maple syrup, yogurt, sour cream, egg, carrot, apple and raisins, breaking up the margarine with a spoon.
  4. In a separate smaller bowl (about 4 cup size) combine all remaining ingredients (this should be all the dry ingredients).
  5. Sprinkle the dry ingredient mixture over the margarine mixture.
  6. Stir JUST until combine; do not over mix. The mixture will be quite lumpy.
  7. Divide batter among 12 muffin cups (it will look like the muffins cups are very full, but that's ok).
  8. Bake until the tops are brown and a toothpick comes out clean when inserted into the middle (about 20-25 minutes). I did allow mine to get too brown because I was worried they would dry out knowing this was a "healthy" recipe; the peaks of my muffins were slightly browned when a toothpick came out clean.
  9. Serve warm.
Yield: 12 muffins

Timing: I would wait until 12 months and be sure your little one knows how to chew drier ingredients. Again, since my little one had molars by about 12-13 months I could give her more advanced foods early. These muffins are the texture of moist bread, so a 12 month old should be able to eat it fine, just break it up small. If your child is older, they can probably handle larger pieces.

Storage: The author recommends storing muffins in an air tight container at room temperature for up to 2 days or wrapping individually and freezing for a month.

Tip: If you are making this for breakfast, combine your dry ingredients the night/day before and place in a sealed container to save time in the morning. Also, shred carrots the night/day before and place in a ziplock bag in the refrigerator. I would not recommend shredding the apple the night before as it will brown and get too juicy. It only took me about 10-15 minutes this morning to get the muffins in the oven since I did a little prep work. I can use all the extra sleep I can get right now (28 weeks pregnant right now).

Miscellaneous: Only down side to these is some of these ingredients might not be in your pantry already. Also, fun side note if you make this according to the recipe without my alterations there are only 195 calories per muffin.

Difficulty: 2 out of 3; it is actually quick and easy especially if you follow the tip above.

Epicutie Rating: YUMMY IN THE TUMMY--see right side of page for descriptions
Little Joy ate an entire muffin and was all smiles the entire time! My hubby and I loved them too. They are no fatty blueberry muffin, but still super delicious. Makes you feel good to know that you ate something healthy and nutritious!

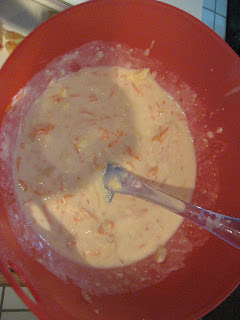
Step 3: All "wet" ingredients combined. I shredded my carrots vs grated and it was fine.

Step 4: All dry ingredients; it smelled SO good!

Step 7: Ready to bake

Done!

She saw the muffins and started licked her hand in excitement!

First bite!
CHEW, CHEW, CHEWING it!!!

All gone and happy she has a full tummy; do you think she loved them??

I am a warrior!


Little Tummy Yummies

About the Authors

This blog was started by two Babywise pen pals to document our adventures in high chair manners, making our own baby food and doing our bests to raise happy, healthy, thriving little ones!

Epicutie #1

Epicutie #1

Little Joy at 2 years, Sept 2012

Epicutie #2

Epicutie #2
Little Frances

Epicutie #3

Epicutie #3
Little Asher at 11 months, Sept 2012

Epicutie #4

Epicutie #4
Little Elizabeth, July 2013

  • Yummy in the Tummy: Epicutie thoroughly enjoyed each bite
  • Somewhat yummy: Epicutie seemed to somewhat enjoy the food at first, but seemed to like it less with subsequent bites
  • Not so sure I like it...yet: Epicutie somewhat rejected the first bites, but seemed intrigued. The next exposure may be better!
  • Confused: Epicutie rejected the first bites, perhaps due to texture or strong flavor.
  • Sour Puss: Epicutie gave a sour face indicating she did not like the food. However--if at first you do not succeed, try, try again!


  • Munchkin Land Designs Elements by Crisdam Designs

    Click Here for Other Awesome Giveaways!

    Labels

     
    Designed by Munchkin Land Designs • Copyright 2011 • All Rights Reserved