HomeAbout the BlogMeet the ChefsMeet the EpicutiesMeal IndexContact Us
Showing posts with label Dairy. Show all posts

Wednesday, January 6, 2016

Chicken Tostadas

We call this quick family friendly meal Mexican pizza!  This was adapted from 100 days of real food. If you want an easy, non processed, healthy meal this is it!

Ingredients:
* 3 cups shredded or diced cooked chicken (slow cook, roast or boil it)
* 1½ cups freshly grated Monterey Jack cheese
* 2 tablespoons water
* 1 teaspoon cumin
* ½ teaspoon salt
* ¼ teaspoon chili powder
* 1½ limes (1-2 tablespoons)
* 1 cup cooked black beans (organic canned or dried and then soaked and cooked in the crockpot)
* 8 whole-grain 5" to 6" corn tortillas,
* Recommended toppings: Tomatoes, avocado and cilantro

Steps:
1. Preheat the oven to 450 degrees F.
2. In a large bowl thoroughly combine the chicken, cheese, water, spices, and juice of 1 lime (or eye ball more if you want). Stir well then add black beans and toss gently so you don't smash the beans up!
3. On a large baking sheet lay the tortillas out in one even layer. You will probably need more than one baking sheet. 
4. Evenly distribute the chicken mixture on top of the 8 tortillas (the top layer should be about ½" tall) and bake until cheese begins to brown, about 12 to 13 minutes.
5. Squeeze the remaining lime juice, to taste, on top of the cooked tostadas and serve warm with diced tomatoes and avocado, and cilantro leaves.

**tips: cut into pizza triangles; 
serve with some cilantro lime rice; 
WORKING/BUSY MOMS: Make the chicken/cheese/spice/bean mixture the night before then simply top it on the tortillas 15-20 minutes before mealtime for a SUPER quick and healthy meal

Serves: 4 people (so we double)

Difficult: 1 out of 5; for a dinner, it doesn't get much easier than this. The make ahead option makes this meal super appealing too!

Timing: 15 months of its chopped up well!

Epicutie Rating
Little Joy: yummy in the yummy--always easy to please at meals she gobbled up two toastadas!
Little Asher: somewhat yummy--despite being the tough critique he still ate half a tostada with no complaints. He wasn't chomping at the bit for more, but was not gagging either. Gagging is common when he has beans!
Little Juliette:  yummy in the tummy; while we had to cut hers quite a bit she ended up eating an entire tostada. I think she would have eaten more but she got a sharp piece of tortilla and then seemed discouraged. 


Tuesday, February 4, 2014

Butternut Squash Mac and Cheese

This recipe was inspired by a Parents Magazine recipe.  The original one had chunks of butternut squash whereas mine has puree; it saves me time just having purees already made vs having to cook the chunks of squash when I make this.  That is how this recipe was born....

Ingredients

  • 1 1/2 cups butternut squash puree (less if you want the squash taste less pronounced)
  • 1/2 lb elbow noodles of your choice
  • 2 tablespoons butter (we used butter alternative to decrease the dairy amount in here for dairy intolerant Little Asher)
  • 2 tablespoon flour or tapioca flour
  • 1 1/2 cups almond milk (or reduced fat milk or other milk alternative)
  • 1/4 teaspoon nutmeg
  • dash of salt
  • dash of white pepper
  • 1 3/4 cups cheese (I used a mixture of part skim mozzarella and reduced fat cheddar--the high fat content is what bothers lactose intolerant folks; If I could do what I wanted I would use WHITE CHEDDAR)
Steps:
  1. Preheat oven to 375 degrees.
  2. Grease a medium casserole dish.
  3. Cook the elbow noodles 2 minutes less than the box says.  Drain and place in a large bowl.
  4. Meanwhile, melt butter over low heat.
  5. Whisk in flour and cook for 2 minutes.
  6. Slowly whisk in milk.  Bring mixture to a boil, add nutmeg, salt and pepper, then simmer.  Cook for 3 minutes; stirring occasionally making sure the lumps mix out.
  7. Add cheese and squash and stir until cheese is melted.
  8. Stir cheese sauce into pasta and transfer to greased casserole dish.
  9. Bake for 10-15 minutes.
NOTE:  You can top this with turkey bacon crumbles or buttered crumbled wheat crackers or more cheese.  Get creative.  This time I tried buttered crumbed wheat crackers and it added a nice texture/

Difficulty:  2 out of 5; with the puree already made this was easy peasy!  I made it about an hour before I wanted to bake it, covered it in the oven and when it was almost time to eat I took the lid off and baked.  You could also make this during nap time or in the morning and refrigerate until ready to bake.  Increase the bake time if you refrigerate.

Timing:  I would give this to mine as early as 9 months depending on their chewing abilities.  Mine love finger foods so 9 months is good for mine---otherwise around 12 months is perfect!

Epicutie Rating (see left side of page for rating descriptions):
  • Little Joy:  Yummy in the tummy!  She loved the crunch--she's my one with a bit of a mature pallete.  She likes lots of flavors like her mommy.
  • Little Asher: Yummy in the tummy!  He does not have mac and cheese much because it is too much dairy but since there is not as much dairy to pasta with the squash in there, it is quite a treat!  He gobbled up two hardy helpings.

Step 6: Whisk in milk, nutmeg, salt and pepper with butter and flour

My Squash Puree

Noodles awaiting sauce

Shredded cheeses

Step 7:  Add cheese and squash to milk mixture


Before adding a topping

Topping added

YUMMMM

And its done!

Served with ham and steamed peas

Little Asher going in...

Hows it taste?

"MMMMM"

"Watch me mommy" says Little Joy

And all she says is CHEESE after it


Thursday, September 19, 2013

Little Elizabeth’s First Food

So I know that I am way behind on my Green “Milkshake” post, but in the meantime, let me share with you Epicutie Elizabeth’s first food…

photo (12)

WATERMELON!!!

This was not pureed and she was two weeks shy of 6 months! I would have never been so unscientific with little Frances or given her solids before 6 months or something that she had to chew herself, but something about surviving parenthood the first time makes you more confident the second time around and sometimes you throw caution to the wind!

Also, here is how we celebrated her 6 month birthday…

photo (13)

FROZEN YOGURT!!!

That one was her daddy’s idea.

And yes, both foods got a “Yummy in the Tummy” rating Smile.

Wednesday, September 11, 2013

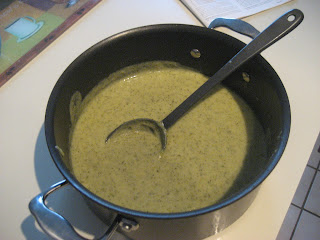
Cheesy Broccoli Potato Soup


*Updated reviews 9/10/13, 
Original post on 3/5/12*
I LOVE my Parent's Magazine supplemental recipe book; I got one last year and just got another one in the March issue! Since I received it I have been anxious to post and review recipes. So far I have already cooked two things from it.

There is something nostalgic and soothing about nice big bowl of soup. I vividly remember cooking Campbell's chicken noodle soup with my mom even before I was in kindergarten; it was the first thing she let me cook "on my own". So when I saw this recipe for cheesy broccoli potato soup I couldn't wait to test it out.

You will be surprised how smooth and easy this soup goes down and it has only a light broccoli taste!!

Ingredients:
  • 2 tsp olive oil
  • 1/2 sweet onion, coarsely chopped
  • 1 medium potato peeled and diced into 1/4 inch chunks
  • 3 cups fresh broccoli chopped (I think frozen would work fine too)
  • 3 cups low sodium vegetable stock
  • 1 cup reduced fat mozzarella cheese (plus a little more for garnish)
  • Salt and Pepper to taste (optional)
 

1) Chop onion coarsely
For those of you who have seen the movie "Help" they said if you held a match between your teeth when you cut onions you wouldnt cry---MYTH BUSTED, it does not work!

2)  Heat oil in large stock pot

3)  When oil is hot, add onion and sautee for 5-7 minutes

4)  Meanwhile coarsely chop the broccoli and potato (peel and wash first of course).

5)  Add stock, broccoli and potatoes to pot; bring to a boil.

 6)  Reduce heat, cover and simmer for 20 minutes or until broccoli and potatoes are soft.

7)  Remove from heat and allow to cool slightly.

8)  Pour soup into food processor or blender, add cheese and puree until desired consistency.

9)  Add salt and pepper to taste, stir.

9)  Serve warm with a little shredded cheese on top for garnish.


Epicutie Little Joy digging in
(I should give background, she had a food strike at lunch and striked for an hour and half carrying on in her high chair wanting to eat everything BUT what was prepared for her.  After an hour and a half of listening to her scream and cry it was nap time so she went to bed with no lunch. She is a hearty eater so she was most definitely starving by dinner, which we had early since we knew she would be hungry.  SO she might have loved it because of that)

Remnants of her second bowl

Yield:  4 adult servings; its only 170 calories per bowl so we had a little more than one bowl.

Serve:  Warm topped with a little shredded cheese along side a salad (for adults) or chicken nuggets or sandwich.  We had grilled cheese with it.

Timing:  12 months since there is not much to this recipe ingredient wise and its also smooooth :) which means it does not require much, if any, chewing

Difficulty:  2 out of 5; super easy and quick.  This is something you could make while your kids take their afternoon nap and then reheat at dinner time.  That is what we did.

Epicutie Rating: 
Little Joy:  Yummy in the Tummy -- see left side of page for descriptions
Little Joy loved, loved this!!  We will be making this more next fall/winter!  Be warned breastfeeding mommies who eat this, broccoli can give your nursing babies gas; It sure did Little Asher!!!
Little Frances:  Yummy in the Tummy
Little Asher:  Yummy in the Tummy  Little Asher had FOUR BOWLS of this along with some pork loin, hungry boy!!!

Tuesday, July 30, 2013

Chicken Avocado Quesadilla


 Since avocados have been on sale, this has become a regular at my house lately--and no one is complaining! We eat this for lunch or dinner!

Ingredients
  • 1 Cooked chicken breast (I throw a chicken breast in my steamer)
  • 1 avocado, sliced thinly
  • Shredded cheese (montery jack, monzerlla, Go Veggie! lactose free cheese--to make it dairy free)
  • Butter (Earth Balance Lactose Free butter alternative to make it dairy free)
  • Whole wheat tortillas
  • Lime
  • Salt
  • Pepper
Steps

  1. Preheat a griddle to 225-250 degrees.
  2. Shred chicken.
  3. Toss shredded chicken with a couple squeezes of lime, dash of pepper and dash of salt (optional).
  4. On one half of the tortilla, place a few thinly sliced avocado pieces (I actually mash it up and spread it on the tortilla for Little Asher who is texture sensitive), some shredded chicken and a little shredded cheese. Fold the tortilla in half.
  5. Put a thin layer of butter on the outside of both outside sides of the tortilla (I omit this on my quesadilla).
  6. Cook on griddle until both sides are browned.
  7. Allow to cool slightly and slice into triangles.

Miscellaneous: We usually eat this with crock pot vegetarian black beans (this recipe is next in the line up and I will link to it when available).

Tip:  Make the chicken ahead and put it in the fridge so that when it is time for dinner all you have to do is assemble and grill--easy!

Yield: Depends on how much chicken you use, but when we do one large chicken breast it feeds my family of four...which is about 6 quesadilla

Timing:  9-12 Months depending on your little ones ability to chew and grind and the number of teeth.  Little Asher was able to handle this cut up very small around 10 months and I would imagine Little Joy would have been around the same age had I tried it back then.

Difficulty: 2 out of 5; this is easy and can be partly made ahead.  Very few things get a 1 on difficulty from me; I reserve that for things I can do in my sleep!

Epicutie Rating (See left side of page for rating descriptions):
Little Joy:  Yummy in the Tummy; there is never a bit left of first helpings of this dish.  When she sees the griddle come out her exact words are "Is it pancakes or quesadilla??!  They are my favorite in the whole wide world!" LOL!
Little Asher:  Yummy in the Tummy; he usually finishes his before my husband and I finish ours!


Thursday, May 9, 2013

Broccoli Orzo


My friend made this for Little Joy and I one day because her Epicutie, Little Kate, LOVES it. We agree and even my texture picky Little Asher loves it two, with some lower dairy alterations of course. I love it too; I always enjoy a serving at lunch when we make it.


Try this. Try this. Try this.


Ingredients:
  • 1 cup uncooked orzo
  • 1 to 2 large bunches of fresh broccoli; alter amount to your taste
  • 1/3 to 1/2 cup Parmesan cheese (Parmesan cheese doesn't bother little Asher like most cheeses)
  • 1/4 cup sharp cheese, shredded (I substituted one slice of sharp veggie slices so Little Asher could try it) more or less to your taste
  • splash to one tablespoon milk (we used almond milk)
  • dash pepper
Steps:
  1. Prepare orzo according to package instructions
  2. Steam broccoli and finely chop
  3. Mix all ingredients together
  4. Serve warm


Timing: 9 months as long as the ingredients have been introduced alone first to determine allergies.


Storage: 3 to 5 days in the fridge. I don't recommend freezing this.


Tip: You can boil the broccoli with the orzo to make this even easier and less clean up. I opt to steam because a) I have a steamer and b) steaming retains more nutrients than boiling. But we are mommys and sometimes we just have to focus on saving time.


Difficulty: 1 out of 5. Other than a purée this might be the easiest recipe I have posted!


Epicutie Rating:

-Little Joy: Yummy in The Tummy; Every time my friend or I has made this for Little Joy she eats it up fast!
Little Asher: Yummy in the Tummy; I was surprised little Asher loved this because he does not like the texture of broccoli; thats why I chop it up real fine. And he loves it. It tastes like broccoli so it's texture not taste. The first time I made this he ate so much I had to cut him off!!

I love to eat this too so it's on put short list now!!! Thanks to Little Kate's mom for letting us post and review the recipe!


Wednesday, April 10, 2013

Veggie Frittatas


 Easy, delicious and good for you!!!!

Ingredients:

  • Cooking spray or preferably silicone cupcakes liners
  • 4 eggs
  • 3-4 tablespoons milk (eye ball it)
  • 1/4 tsp salt
  • 1/3 cup your favorite cheese, shredded or cheese blend (I have done part skim mozzarella  cheddar, cheddar/Parmesan combo, colby, etc)
  • 4 whole sun dried tomatoes, packed in oil and chopped
  • 1/3 cup green pepper, chopped
Steps:
  1. Preheat oven to 375 degrees
  2. Spray muffin tin with spray or line with silicon liners
  3. In a bowl whisk together eggs, milk and salt.
  4. Optional:  Place bell peppers in a small bowl with water, cover and microwave for one minute to soften the peppers.  My Little Asher does not prefer the pepper crunch and I do not min accommodating.
  5. Add peppers, tomatoes and cheese to egg mixture--stir to combine.
  6. Distribute mixture evenly among 12 muffin cups.
  7. Bake at 375 for 14 minutes.
ALLERGY ALERT:  EGGS

Timing:  One year due to eggs.

Storage:  In the fridge for 2 days.  Microwave well to reheat.

Difficulty: 1 out of 5; Honestly the hardest part is chopping and the chopping is minimal here.  This is fast breakfast or even a breakfast for dinner option! 

Nutrition:  (using part skim mozzarella, per frittata) 36 calories; 3 g protein; 2 g fat

Tip:  The silicone liners are a HUGE time savor.  They make clean up fast and serving them even easier.  If you do not have any, its a great kitchen "gadget" for not much money.

Epicutie Rating (see left side of page for rating descriptions):
  • Little Joy:  Yummy in the Tummy;  She liked these even better the second time I made them--she ate three along with a pancake!
  • Little Asher:  Yummy in the Tummy;  The first time we served this we only had the  frittatas and fruit and he ate like four of them.  The second time we served them we had pancakes with it since it was breakfast with dinner and he put up a fight because he wanted pancakes.  He is the strong willed one. He still loved it though, just wanted to let us know he wanted pancakes MORE--who doesnt?
Mixture

Before baking

Done!

Done!

YUMM!

WHAT IS THIS??

Friday, March 22, 2013

Pumpkin Ravioli


Pasta is always easy and fun for toddlers, so it's always on my short list. This recipe comes from Double Delicious by Jessica Seinfeld. Since the cheese is cooked and part skim we decided to try it on Little Asher, no horrible reactions just some lower stomach issues.

Ingredients:

  • 1 (15 oz) can white kidney beans; drained and rinsed
  • 1/2 cup canned pumpkin
  • 1/2 cup part skim ricotta
  • 1/4 cup grated Parmesan
  • 3/4 garlic powder
  • dash of salt
  • 1 egg
  • 72 wonton papers
  • cornstarch
  • Your favorite marinara sauce microwaved until warm

Steps:

  1. Fill a large pot with water and bring to a boil.
  2. Place beans, pumpkin, ricotta, Parmesan and garlic in a food processor and purée until smooth.
  3. In a small bowl beat the egg with a tablespoon of water.
  4. Sprinkle a baking sheet with cornstarch.
  5. Set wonton papers on a cutting board. Place one tablespoon of the pumpkin mixture into the center of the wrapper. Brush the edges with the egg wash. Top off with another wonton paper. Press firmly together.
  6. Place the ravioli on the baking sheet. When all the ravioli is ready, carefully place them in the lightly boiling water using a slotted spoon.
  7. As soon as the rise to the top of the pot, about five minutes, they are done. Divide among 6 bowls and top with marinara sauce. Serve immediately.


Tip: Next time I make these I will use ONE wonton paper and half the filling to make the ravioli smaller and easier for toddlers to pick up. I will fold the wonton paper in half vs using two papers per ravioli.

Storage: After cooking, 3-5 days in the fridge. I recommend refrigerating IN the sauce. I froze some uncooked ravioli a for quick meal in the future.

Timing: 10 months; super easy to chew!

Difficulty: 4 out of 5; It's only high on the difficulty scale because filling the ravioli is time consuming and once out start making this recipe you can't really stop for long.

Epicutie Rating: (see left side of page for descriptions)

  • Little Asher: Yummy In The Tummy; holy gobble fest!!!!! After I cut I the ravioli he devoured three!
  • Little Joy: Yummy In The Tummy; Little Joy quickly ate two ravioli without prompting. She even loved it left over. Little Asher wasn't as big a fan of the left over version :)
  • Kelly: love it!!!!!!

Ready to serve

Cutting her first bit; this was a messy food---bib required this time!

Trying it!

"HMMM Mommy!"

I didnt get his first reaction but as soon as I took Little Joys picture---look how much he had eaten!

MORE!!!

Friday, November 2, 2012

Banana Cinnamon Waffles


I buy bananas a lot because my whole family loves them, but sometimes I buy a batch that seem to brown really fast.  That's when I want to have plenty of banana recipes in my arsenal. Furthermore, I am constantly looking for breakfast foods that will freeze well so that I can break up the week's breakfasts which are usually filled with cereals and oatmeals.  This recipe was inspired by one I found on a Cooking Light site.

Ingredients:

  • 1 1/4 cup all-purpose flour (you could replace 1/4 of this flour for 1/4 cup buckwheat flour for a nutty flavor)
  • 1/2 cup whole wheat flour
  • 1/4 cup ground flaxseed
  • 2 tablespoons sugar
  • 1 1/2 teaspoons baking powder
  • 1/2 teaspoon ground cinnamon
  • 1/4 teaspoon salt
  • 1 1/2 cups rice milk
  • 3 tablespoons butter, melted (I used Earth Balance dairy free, soy free butter alternative)
  • 2 large eggs, lightly beaten
  • 1 1/2 teaspoons vanilla
  • 1 1/2 large ripe banana, mashed
  • Cooking spray

Steps:

  1. Preheat waffle iron.
  2. Combine Dry ingredients in a medium bowl (flours, flaxseed, sugar, baking powder, cinnamon and salt) stirring with a whisk to combine.
  3. In a separate bowl combine milk, butter, eggs and vanilla.
  4. Add wet ingredients to dry stirring with a whisk; mix until combined but not too much!
  5. Fold in mashed banana.
  6. Coat iron with cooking spray
  7. Spoon batter onto hot iron spreading the batter to edges.
  8. Cook 3 to 4 minutes or until steaming stops; repeat procedure with remaining batter.
  9. Serve warm.

*Allergy Alert:  Contains Egg*

Timing:  One year due to the eggs however I would have given this as early as 9 months to my Epicuties because its soft and easy to chew; even my texture sensitive Little Asher thought they were soft and yummy.  Most pediatricians recommend avoiding whole eggs until one year.

Storage:  Fridge for 4 days and freezer for a month.  Wrap each waffle individually in plastic wrap and then place in a freezer bag.  Thaw in microwave or toaster oven.  Quick and healthy on hand breakfast!

Yield:  14 waffles (see photo below)

Difficulty: 2 out of 5; the only recipes I give a 1 to are those that require NO cooking.  This was quick to whip up; I even made it after I had both kids up and dressed and no one starved while waiting :)

Epicutie Rating:

  • Little Joy:  Yummy in the Tummy; She proclaimed "Oh mommy, this is good" after this first bite.  She did not consume as much as she usually does of foods she loves but we are learning with a toddler---some days they cannot eat enough to be satisfied while others they require very little food.  
  • Little Asher:  Yummy in the Tummy; after a liquid feeding and puree prunes he still ate an entire waffle.  He tends to be particular about textures, but this was soft enough for him to find YUMMY!
It made 14 of the smaller square so 7 of the big double squares


Signing MORE

Let me try one more to see if I like it

Signing MORE MORE


YUMMY IN THE TUMMY

I said "Give me your I like it smile if you like it" LOL!


I am a warrior!


Little Tummy Yummies

About the Authors

This blog was started by two Babywise pen pals to document our adventures in high chair manners, making our own baby food and doing our bests to raise happy, healthy, thriving little ones!

Epicutie #1

Epicutie #1

Little Joy at 2 years, Sept 2012

Epicutie #2

Epicutie #2
Little Frances

Epicutie #3

Epicutie #3
Little Asher at 11 months, Sept 2012

Epicutie #4

Epicutie #4
Little Elizabeth, July 2013

  • Yummy in the Tummy: Epicutie thoroughly enjoyed each bite
  • Somewhat yummy: Epicutie seemed to somewhat enjoy the food at first, but seemed to like it less with subsequent bites
  • Not so sure I like it...yet: Epicutie somewhat rejected the first bites, but seemed intrigued. The next exposure may be better!
  • Confused: Epicutie rejected the first bites, perhaps due to texture or strong flavor.
  • Sour Puss: Epicutie gave a sour face indicating she did not like the food. However--if at first you do not succeed, try, try again!


  • Munchkin Land Designs Elements by Crisdam Designs

    Click Here for Other Awesome Giveaways!

    Labels

     
    Designed by Munchkin Land Designs • Copyright 2011 • All Rights Reserved