HomeAbout the BlogMeet the ChefsMeet the EpicutiesMeal IndexContact Us
Showing posts with label Double Delicious. Show all posts

Friday, March 22, 2013

Pumpkin Ravioli


Pasta is always easy and fun for toddlers, so it's always on my short list. This recipe comes from Double Delicious by Jessica Seinfeld. Since the cheese is cooked and part skim we decided to try it on Little Asher, no horrible reactions just some lower stomach issues.

Ingredients:

  • 1 (15 oz) can white kidney beans; drained and rinsed
  • 1/2 cup canned pumpkin
  • 1/2 cup part skim ricotta
  • 1/4 cup grated Parmesan
  • 3/4 garlic powder
  • dash of salt
  • 1 egg
  • 72 wonton papers
  • cornstarch
  • Your favorite marinara sauce microwaved until warm

Steps:

  1. Fill a large pot with water and bring to a boil.
  2. Place beans, pumpkin, ricotta, Parmesan and garlic in a food processor and purée until smooth.
  3. In a small bowl beat the egg with a tablespoon of water.
  4. Sprinkle a baking sheet with cornstarch.
  5. Set wonton papers on a cutting board. Place one tablespoon of the pumpkin mixture into the center of the wrapper. Brush the edges with the egg wash. Top off with another wonton paper. Press firmly together.
  6. Place the ravioli on the baking sheet. When all the ravioli is ready, carefully place them in the lightly boiling water using a slotted spoon.
  7. As soon as the rise to the top of the pot, about five minutes, they are done. Divide among 6 bowls and top with marinara sauce. Serve immediately.


Tip: Next time I make these I will use ONE wonton paper and half the filling to make the ravioli smaller and easier for toddlers to pick up. I will fold the wonton paper in half vs using two papers per ravioli.

Storage: After cooking, 3-5 days in the fridge. I recommend refrigerating IN the sauce. I froze some uncooked ravioli a for quick meal in the future.

Timing: 10 months; super easy to chew!

Difficulty: 4 out of 5; It's only high on the difficulty scale because filling the ravioli is time consuming and once out start making this recipe you can't really stop for long.

Epicutie Rating: (see left side of page for descriptions)

  • Little Asher: Yummy In The Tummy; holy gobble fest!!!!! After I cut I the ravioli he devoured three!
  • Little Joy: Yummy In The Tummy; Little Joy quickly ate two ravioli without prompting. She even loved it left over. Little Asher wasn't as big a fan of the left over version :)
  • Kelly: love it!!!!!!

Ready to serve

Cutting her first bit; this was a messy food---bib required this time!

Trying it!

"HMMM Mommy!"

I didnt get his first reaction but as soon as I took Little Joys picture---look how much he had eaten!

MORE!!!

Saturday, March 10, 2012

Cinnamon-Maple Quinoa

In an effort to try to incorporate more easy, healthy grains and side dishes into my normally “one pot dinner” mix, I have had been making a few quinoa dishes.  I have to say, we are not loving quinoa, even though it has a fairly mild taste.  I thought that I would try a breakfast recipe with quinoa and change things up a bit.  We love breakfast and love making things sweeter... however, it was still not a big hit!  However, we try to share our failures here on LTY as well as our successes, and you might have better luck with your epicutie!  This recipe comes from Double Delicious by Jessica Seinfeld.

Ingredients:

  • 1 1/4 cup water
  • 1 cup quinoa
  • 1 tablespoon butter or margarine
  • 1/2 cup sweet potato puree (We do not have sweet potatoes where I live so I used pureed butternut squash and I think a carrot puree would also work.  If you do not have any of the above, try a 1/2 cup of applesauce.)
  • 1 tablespoon pure maple syrup
  • 1/3 cup light vanilla soy milk or milk
  • 1/4 teaspoon cinnamon
  • 6 teaspoons pure maple syrup divided, for garnish
  • 6 teaspoons chopped or ground walnuts or almonds, divided for garnish

Steps:

  1. In a small saucepan, bring water to a boil.
  2. Meanwhile, rinse the quinoa in cold water and strain in a fine colander or cheesecloth.
  3. Add the quinoa to the boiling water and reduce heat to a simmer.
  4. Cook for 12 minutes, uncovered and remove from heat.  Let sit covered for 5 minutes.
  5. In a separate pan, melt the butter.
  6. Stir in sweet potato puree, 1 tablespoon of the maple syrup, milk, cinnamon and salt. 
  7. When the quinoa has finished cooking, stir in the sweet potato mixture.
  8. Divide into bowls and top with a teaspoon each of maple syrup and nuts.

001

Yield: 6

Timing: If you leave out the nut topping, this recipe can be given as early as 9 months, with the nut topping, 12 months as long as the nuts are finely ground and your epicutie has no nut allergies.

Miscellaneous:

  • Rinsing the quinoa is very important!  I left this step out when I first made this recipe because I was not sure how I would strain it, but I had to throw away my entire first batch because it did not turn out.  The second time, I used a sturdy paper towel in my wire colander and that worked well.
  • I ground the nuts since I still do not feel comfortable giving Little Frances nuts that require a lot of chewing.

Difficulty: 2 out of 5.  Its pretty easy, but you have to dirty two pots.  I hate dirtying two pots and it takes a while.  Also, this is not a quick breakfast recipe and is more work than I like to do early in the morning.

Epicutie Rating: Somewhat Yummy! ----See left side of the page for descriptions.

Epicutie Frances was willing to try many, many bites of this at first, so by our LTY standards this one is Somewhat Yummy.  I think she ate so much because I told her it was like oatmeal, and she loves oatmeal! However, she seemed to really hate it the more she ate it.  She even gave it to her dad and said “Here Daddy, throw away” when she saw that her dad was emptying his bowl.  It would also like to add that this recipe got a big ole’ sourpuss from her mom and dad!

011012013014

Tuesday, January 17, 2012

Banana Cocolate Chip Waffles

We tried this "Double Delicious!" recipe on Christmas morning for the first time and were absolutely in love with it!!! I of course had to deviate from the official recipe since I didn't have the exact ingredients. This will be one of these things I only make on a special occasion.


Ingredients:

  • 1 cup whole wheat flour
  • 1 teaspoon baking soda
  • 1/4 teaspoon baking powder
  • 1/4 teaspoon salt
  • 3 tablespoons olive oil
  • 2 egg whites
  • 1/2 cup low fat buttermilk
  • 1/2 cup carrot purée (or 5 ice cube tray method sized cubes)
  • 1 large ripe banana, mashed
  • 3 tablespoons semi sweet chocolate chips (dark would also be good; I recommend regular sized chips not mini because the smaller chips burn more easily in he waffle iron)
  • Cooking spray


Steps:

  • Preheat waffle iron
  • In a medium bowl, combine flour, baking soda, baking powder and salt.
  • In a large bowl combine oil, egg whites, buttermilk, puree and banana; using a whisk whisk for 1-2 minutes.
  • Add dry ingredients to wet ingredients and stir with a wooden spoon just until combined; do NOT over stir.
  • Stir in chocolate chips.
  • Coat waffle iron with spray.
  • Ladle batter into hot iron (about 1/4 cup) and cook until waffle is lightly browned.
Serve:  Serve warm with pure maple syrup and fresh fruit.

Yield:  4 servings

Storage:  In refrigerator for 2-3 days.  To reheat, place in toaster oven.

Timing:  1 year; be sure your little one can chew breads well before offering this.

Difficulty:  2 out of 5; fairly quick and easy.

Epicutie Rating:  Yummy in the Tummy--see right side of page for rating descriptions
Epicutie Joy LOVED these waffles.  Every time the bite had a chocolate chip in it she would say "mmmm" and smil really big.  These were a hit and were especially fun for Christmas morning!

Monday, October 10, 2011

Chicken and Biscuits

Thus I continue on my adventures in cooking through the "Double Delicious" cookbook by Jessica Seinfeld. I have made a dozen or so recipes from this cookbook and have posted hardly any of them! I am determined to catch up before Baby #2 arrives (due in 10 days)! Also, most of my posts here on out will be geared for family meals.

Ingredients for Chicken:
  • 1 tablespoon olive oil
  • 2 boneless, skinless chicken breasts cubed OR about 10 boneless skinless chicken tenderloins which is what I use (about 1 lb; add more or less depending on how much you need)
  • 1/8 teaspoon fresh ground pepper
  • 1 can reduced fat cream of chicken soup
  • 1/2 cup low fat milk
  • 1/2 cup carrot puree (can also use pumpkin or sweet potato puree)
Ingredients for Biscuit Topping:
  • 1 1/2 cups whole wheat flour
  • 2 teaspoons baking powder
  • 1/4 teaspoon salt
  • 1/2 cup trans-fat-free, soft tub margarine (you can substitute any butter, if using regular butter it should be softened)
  • 1 large egg beaten
  • 1/4 cup honey
  • 1/2 teaspoon cream of tarter
  • 3/4 cup low fat buttermilk
Steps:
  1. Heat oil in an dutch oven or flame proof casserole dish.
  2. Sprinkle chicken with pepper.
  3. Add chicken to the casserole dish until it begins to brown.
  4. Stir in soup, milk and puree until all ingredients are well combine.
  5. Remove from heat.
  6. Preheat oven to 375 degrees.
  7. Prepare the biscuits by combining flour, baking powder, and salt in a large bowl.
  8. Rub the margarine into the flour with your finger tips until the mixture resembles coarse crumbs.
  9. Add egg, honey, cream of tarter and buttermilk all at once.
  10. Mix just until soft dough forms.
  11. Dot the dough over the chicken mixture.
  12. Bake 20-25 minutes, uncovered, until the biscuits are cooked through and golden on top.
Yield: 6 servings

Storage: 3 days in the refrigerator. I do not recommend freezing.

Timing: I would wait until your little one has teeth to grind and chew through the bread and chicken. For us this was 12 months. We gave it to Little Joy at 17 months.

Serve: Serve immediately. This is a great family food and goes great along side sauteed green beans or steamed broccoli. OR a green salad for the adults, YUM!!!

Difficulty: 3 out of 5; easy and fast but does require a little prep time so I gave it a three vs. a two.

Epicutie Rating: Yummy in the Tummy--see right side of page for descriptions
Little Joy seems to like everything the first 2-3 times she has something, then if we have it several days in a row as leftovers, she is waving us off saying "All done" in sign language and verbally saying "All done chicken. No Thank You". HA!

Step 3: Cooking chicken in oil

Step 5: Remove from heat; all chicken ingredients combined.

Step 10: All dough ingredients combine

Ready to serve

Served to Mommy and Daddy with salad :)

Sunday, September 4, 2011

Creamy Whole-Grain Risotto

Up next in my review of recipes from Jennifer Seinfeld's "Double Delicious" is her Creamy Whole Grain Risotto. This is another of her recipes that boasts its quick, which always catches my eye! I encourage all of you buy her book(s); they are great, healthy and live up to their DELICIOUSNESS!!!! Here is the recipe with a few of my minor alterations.

Ingredients:
  • 2 cups short grain brown rice (this took me a week to find and it is not cheap; check your health/organic food aisle)
  • 2 tablespoons olive oil
  • 3/4 large onion pureed or very finely chopped
  • 4 garlic cloves pureed or very finely chopped
  • 2 cups low fat, reduced sodium chicken broth
  • 1 cup cauliflower puree (if you are using the ice cube tray method, the conversion is approximately 1.5 cubes=1/4 cup)
  • 1 cup carrot puree
  • 1 spring fresh basil (big sprig, especially if it is from your backyard like mine)
  • 1/2 teaspoon salt (optional)
  • 1/4 teaspoon fresh ground pepper
  • 2 tablespoon trans fat free tub butter (can substitute with regular butter if you want)
  • 1/2 cup grated Parmesan
Steps:
  1. In medium saucepan, add brown rice and 4 cups water; bring to a boil, immediately cover and reduce heat to a low simmer.
  2. Cook for 45-50 minutes (this is longer than the recipe said, but I wanted to be sure it was soft for Little Joy) or until tender.
  3. Remove from heat and allow the rice to steam with the lid on for 5 minutes.
  4. Drain, if needed (I did not need to).
  5. Puree onion and garlic together, set aside.
  6. Heat oil in a large pot/skillet over medium-high heat.
  7. When oil is hot, add purred onion and garlic (step 5).
  8. Cook until onions soften (10 minutes) but not brown.
  9. Add rice (prepared in steps 1-4), broth, both purees, basil, salt and pepper.
  10. Simmer on low heat until 1/4 of liquid evaporates (about 5-10 minutes).
  11. Remove from heat, stir in butter and remove basil.
  12. Serve immediately.
  13. Sprinkle with Parmesan after you plate the item (to make sure each serving has Parmesan since this is a key ingredient if you ask me).
Yield: The book says 6 servings, but it was more like 7-8 for us.

Storage: Refrigerator for 2-3 days; freezer for a month. I have not tried heating from the freezer yet though!!

Timing: Based on your child's ability to chew, this can be given as early as around 10 months I would say.

Difficulty: 2 out of 3; if you do not count the separate steps of making the purees, this pulls together quickly and easily.

TIPS:
  1. Make the rice ahead of time and set aside (steps 1-4).
  2. I puree the onion and garlic vs. chop since I know my fine chopping skills are lacking and Little Joy like onion and garlic but not a BIG OLE chunk of it.
  3. If you are using frozen purees, thaw them in the fridge the night before and ensure they are completely thawed before adding. This saves on the time the risotto has to cook in step 10.
  4. Although this dish can stand alone, you may decide to serve with chicken on the side or mixed in if you want some variety. I would recommend making the chicken from the Pasta with Pea Pesto and Chicken Post; it went along nicely with it. Guys like the meat with this dish.
Epicutie Rating: Yummy in The Tummy--See right side of page for descriptions
Little Joy thought this was a funny finger food. She gobbled up over half what we served her right away and then slowed down. I beginning to learn Little Joy loves EVERYTHING the first 2-4 times she has something, then the newness wears off :)

I am not sure what I did with the pictures; I will add once I find them!!!

Saturday, August 13, 2011

Pasta with Pea Pesto and Chicken

I am loving Jennifer Seinfield's "Doubly Delicious" cookbook; it has some very interesting recipes! I will be the first to tell you peas are one of my least favorite vegetables, but I eat them when I need to (only after drinking a lot to get them down!). This recipe for Pasta with Pea Pesto and Chicken caught my attention because I always welcome a way to get peas into my diet AND it somewhat similar to our "Buttered" Noodles post which I love. Also, traditional pesto is my favorite thing ever and this is exactly how you make traditional pesto except for peas substituting the basil. Below you will find the recipe with some of my minor alterations.

Ingredients (pesto):
  • 2 cups frozen peas (be sure to read the label to ensure there is no added salt)
  • 1/2 cup grated 100% Parmesan
  • 1/2 pine nuts (these can be expensive but are essential for a good pesto)
  • 2 medium to large garlic cloves, pressed
  • 1/2 cup extra virgin olive oil
  • 2 tablespoons water
  • 1/4 teaspoon salt
Ingredients (chicken):
  • 10-12 boneless skinless chicken tenderloins (I use this vs chicken breasts because I freeze mine and these thaw much faster and cook faster)
  • 1/2 teaspoon garlic powder
  • 1/4 teaspoon salt
  • 1/4 teaspoon fresh ground pepper
  • 1 teaspoon olive oil
Ingredients (pasta)
  • 8-10 oz whole wheat spiral pasta (fun and easy for little ones to pick up)
Steps:
  1. Pesto: Blanch peas (boil water, add frozen peas, cook for one minute, shock in cold water bath). Combine peas, Parmesan, pine nuts, pressed garlic, olive oil, water and salt in a food processor or a chopper. Blend until well combined and a you have a sauce that is the consistency of toothpaste. If you use a chopper, do it in two batches.
  2. Chicken: Combine garlic powder, salt and pepper in a small bowl. Sprinkle thawed chicken with spices on both sides. Heat oil in skillet, add seasoned chicken. Cook until browned, flip and cook until other side browns. Be sure the chicken is cooked through. Chop chicken to the size appropriate for your little one.
  3. Pasta: Cook according to package directions. I always cook extra noodles in cause I have too much sauce.
  4. Assembly: Toss pasta, pesto and chicken together and serve warm/immediately.
Yield: 6-8 servings depending on serving sizes. Looks like it is serving closer to 8 for us.

Serve: Serve warm. Cut chicken into sizes appropriate for your little one. We served with a side salad and bread (Little Joy did not have salad, hehe).

Storage: Refrigerator for several days. I froze some left over pesto for future use and I plan to keep it frozen for up to 1-2 months.

Timing: Since this has nuts in it, I would wait until 12 months. If you family has a history of ANY nut allergies, please consult with your doctor before serving this dish. The chicken is very tender, so even if your little one does not have molars, they should be able to eat the chicken--just use your judgement on the size of the pieces.

Tips: You can make the pesto a few hours before the rest of the meal if needed; that is what I did. If so, refrigerate the pesto in the meantime. Making it ahead is great when you have a kids running around because you can make the pesto during naptime and the rest of the recipe is very quick. Even though my pesto was refrigerated, the pasta was so warm, when tossed the dish was just the right temperature! Also, I cooked about 8 oz of pasta and I felt like there was too much pesto, so just use your judgement on the amount of pasta to cook.

Difficulty: 2 out of 5; this is an easy and surprising yummy recipe. It only took about 20 minutes to make the entire thing from start to finish.

Epicutie Rating: Yummy in the Tummy--see right side of page for descriptions.
At first I thought Little Joy was not liking this dish, but she eventually dug in. I also try to test the food on her as a leftover the next couple of days and she seemed to like it more and more. She is going through a funny stage where she does not want to independently feed herself so it was hard to tell if she just did not like it or she was being funny about self-feeding vs. me helping her.

Parental Rating: We liked it as well. I loved it, my husband just liked it. This is a health food thing so we did not expect something fatty and dripping with buttery goodness. We wont have it once a week, but it is on the short list for sure.

Pesto Only.

Ready to serve!

First Bite.

"These are not the noodles I am used to having...hmmm"


She's in the middle of trying to give me a kiss so I will stop asking her to smile for the camera.

CHEEEESE and YUMMY!

Sunday, July 31, 2011

Maple Spice Muffins

My co-author (Little Frances' Mommy) has been raving about the cookbook "Deceptively Delicious" by Jessica Seinfeld for months now. I FINALLY remembered to look for it in my local bookstore, however I was only able to find her second cookbook "Double Delicious". Since I was anxious to test some of her recipes, I purchased it.

Only 2 days after buying, I was ready to try some recipes; today's recipe comes from "Double Delicious! Good, Simple Food for Busy, Complicated Lives" by Jessica Seinfeld.

Ingredients:
  • Non stick cooking spray or paper baking cups
  • 1/4 cup trans-fat-free soft tub margarine spread (other butters could be substituted)
  • 1/2 pure maple syrup
  • 1-6 oz container of low fat lemon yogurt (I used fat free greek yogurt for extra protein; fat free was the only lemon greek yogurt I could find)
  • 1/2 cup non fat sour cream
  • 1 large egg
  • 1 large carrot, washed and grated
  • 1 small apple, grated
  • 1/2 cup raisins (I accidentally ommitted this, but I am glad I did raisins are a major choking hazard and I would have needed to remove them or chop them super small for Little Joy)
  • 1 cup all purpose flour
  • 1 cup whole wheat pastry flour (I have no idea what pastry flour is, mine is just 100% whole wheat flour)
  • 1 teaspoon baking soda
  • 1 teaspoon baking powder
  • 1 1/2 teaspoon cinnamon
  • 1 teaspoon allspice
  • 1/2 teaspoon ground clove
  • 1/4 teaspoon slat
Steps:
  1. Preheat oven to 350 degrees.
  2. Coat a 12-cup muffin tin with cooking spray or line with paper baking cups.
  3. In a large bowl, stir together margarine, maple syrup, yogurt, sour cream, egg, carrot, apple and raisins, breaking up the margarine with a spoon.
  4. In a separate smaller bowl (about 4 cup size) combine all remaining ingredients (this should be all the dry ingredients).
  5. Sprinkle the dry ingredient mixture over the margarine mixture.
  6. Stir JUST until combine; do not over mix. The mixture will be quite lumpy.
  7. Divide batter among 12 muffin cups (it will look like the muffins cups are very full, but that's ok).
  8. Bake until the tops are brown and a toothpick comes out clean when inserted into the middle (about 20-25 minutes). I did allow mine to get too brown because I was worried they would dry out knowing this was a "healthy" recipe; the peaks of my muffins were slightly browned when a toothpick came out clean.
  9. Serve warm.
Yield: 12 muffins

Timing: I would wait until 12 months and be sure your little one knows how to chew drier ingredients. Again, since my little one had molars by about 12-13 months I could give her more advanced foods early. These muffins are the texture of moist bread, so a 12 month old should be able to eat it fine, just break it up small. If your child is older, they can probably handle larger pieces.

Storage: The author recommends storing muffins in an air tight container at room temperature for up to 2 days or wrapping individually and freezing for a month.

Tip: If you are making this for breakfast, combine your dry ingredients the night/day before and place in a sealed container to save time in the morning. Also, shred carrots the night/day before and place in a ziplock bag in the refrigerator. I would not recommend shredding the apple the night before as it will brown and get too juicy. It only took me about 10-15 minutes this morning to get the muffins in the oven since I did a little prep work. I can use all the extra sleep I can get right now (28 weeks pregnant right now).

Miscellaneous: Only down side to these is some of these ingredients might not be in your pantry already. Also, fun side note if you make this according to the recipe without my alterations there are only 195 calories per muffin.

Difficulty: 2 out of 3; it is actually quick and easy especially if you follow the tip above.

Epicutie Rating: YUMMY IN THE TUMMY--see right side of page for descriptions
Little Joy ate an entire muffin and was all smiles the entire time! My hubby and I loved them too. They are no fatty blueberry muffin, but still super delicious. Makes you feel good to know that you ate something healthy and nutritious!

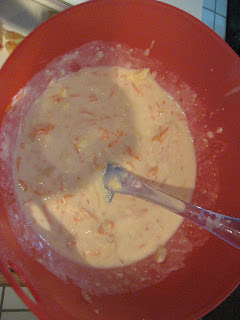
Step 3: All "wet" ingredients combined. I shredded my carrots vs grated and it was fine.

Step 4: All dry ingredients; it smelled SO good!

Step 7: Ready to bake

Done!

She saw the muffins and started licked her hand in excitement!

First bite!
CHEW, CHEW, CHEWING it!!!

All gone and happy she has a full tummy; do you think she loved them??

I am a warrior!


Little Tummy Yummies

About the Authors

This blog was started by two Babywise pen pals to document our adventures in high chair manners, making our own baby food and doing our bests to raise happy, healthy, thriving little ones!

Epicutie #1

Epicutie #1

Little Joy at 2 years, Sept 2012

Epicutie #2

Epicutie #2
Little Frances

Epicutie #3

Epicutie #3
Little Asher at 11 months, Sept 2012

Epicutie #4

Epicutie #4
Little Elizabeth, July 2013

  • Yummy in the Tummy: Epicutie thoroughly enjoyed each bite
  • Somewhat yummy: Epicutie seemed to somewhat enjoy the food at first, but seemed to like it less with subsequent bites
  • Not so sure I like it...yet: Epicutie somewhat rejected the first bites, but seemed intrigued. The next exposure may be better!
  • Confused: Epicutie rejected the first bites, perhaps due to texture or strong flavor.
  • Sour Puss: Epicutie gave a sour face indicating she did not like the food. However--if at first you do not succeed, try, try again!


  • Munchkin Land Designs Elements by Crisdam Designs

    Click Here for Other Awesome Giveaways!

    Labels

     
    Designed by Munchkin Land Designs • Copyright 2011 • All Rights Reserved