HomeAbout the BlogMeet the ChefsMeet the EpicutiesMeal IndexContact Us
Showing posts with label Egg. Show all posts

Thursday, January 23, 2014

Vegetable Fried Rice

This recipe is inspired by a skinnytaste.com recipe!  If your toddler or preschooler has not tried their hand at chop sitcks, grab some for the family to enjoy this meal.  My epicuties gobble this up and I think its partly because of the fun utencils!

Ingredients

  • 3 cups leftover cooked brown rice (or any other rice or quinoa)
  • 2 eggs, scrambled (or 2 egg whites, and 1 whole egg scrambled )
  • 1 tbsp oil of your choice (coconut, olive, etc)
  • 2 tsp splashes sesame oil (optional)
  • 1/2 onion, chopped
  • 1 yellow bell pepper, finely chopped
  • 2 cloves garlic, diced 
  • 5 scallions, chopped, whites and greens separated
  • 1/2 cup shredded carrots
  • cooking spray
  • 1 cup ready-to-eat shelled edamame
  • 3 tbsp low sodium soy sauce, tamari for gluten free (or more to taste)
  • salt and fresh pepper to taste

Steps

  1. Make your rice (I made mine in the rice cooker the morning we wanted to eat this and refrigerated it until I was ready to use it)
  2. Whisk eggs season with salt and pepper. In a hot wok/large pan, spray a little oil and cook the eggs. When cooked, remove from pan and set aside.
  3. On medium high heat. Add oils and cook onions, bell pepper, scallion whites, and garlic.  I cooked until soft to be more palatable for my little ones, but if you want extra crunch then cook 60 seconds on high heat
  4. Add carrots and cook for an additional 2-4 minutes (again less if you want it extra crunchy).
  5. Add brown rice/grain and stir well a few minutes to heat through.
  6. Add cooked egg along with soy sauce, scallion greens and edamame, mixing well for about 3-4 minutes.  Add more soy sauce if you want
  7. ENJOY!
Yield:  Approximately 6 one cup servings....we ate most of it.  It went down easy!

Difficulty:  2 out of 5; most of this could be prepped to cook when you littles are napping or occupied and then when it is time to eat it would be a breeze!\

Timing:  1 year; it would be a mess, but if I had made this when mine were younger I would have given it as young as one.  I would avoid the edamame or cut them in half for younger toddlers.  Babe three that is baking will have it sooner than my older two.

Allergies:  This has soy AND egg so be sure you watch this food if its one of the first time your littles has eaten these ingredients.

Epicutie Ratings:
  • Little Joy:  Yummy in the Tummy-She scafed this down a long with a side of turkey sausage.  She looooves to use the chopsticks
  • Little Asher:  Somewhat Yummy-He ate his whole bowl but you could tell he liked it but not LOVED it.  He was not as into the edamame this time as he was last time.
Overall, this was a hit...we will be making it more often!

With turkey sausage

Little Joy


He actually got good at it but we were in a hurry to finish dinner and head to Awanas so I could not keep stopping to record!

Wednesday, April 10, 2013

Veggie Frittatas


 Easy, delicious and good for you!!!!

Ingredients:

  • Cooking spray or preferably silicone cupcakes liners
  • 4 eggs
  • 3-4 tablespoons milk (eye ball it)
  • 1/4 tsp salt
  • 1/3 cup your favorite cheese, shredded or cheese blend (I have done part skim mozzarella  cheddar, cheddar/Parmesan combo, colby, etc)
  • 4 whole sun dried tomatoes, packed in oil and chopped
  • 1/3 cup green pepper, chopped
Steps:
  1. Preheat oven to 375 degrees
  2. Spray muffin tin with spray or line with silicon liners
  3. In a bowl whisk together eggs, milk and salt.
  4. Optional:  Place bell peppers in a small bowl with water, cover and microwave for one minute to soften the peppers.  My Little Asher does not prefer the pepper crunch and I do not min accommodating.
  5. Add peppers, tomatoes and cheese to egg mixture--stir to combine.
  6. Distribute mixture evenly among 12 muffin cups.
  7. Bake at 375 for 14 minutes.
ALLERGY ALERT:  EGGS

Timing:  One year due to eggs.

Storage:  In the fridge for 2 days.  Microwave well to reheat.

Difficulty: 1 out of 5; Honestly the hardest part is chopping and the chopping is minimal here.  This is fast breakfast or even a breakfast for dinner option! 

Nutrition:  (using part skim mozzarella, per frittata) 36 calories; 3 g protein; 2 g fat

Tip:  The silicone liners are a HUGE time savor.  They make clean up fast and serving them even easier.  If you do not have any, its a great kitchen "gadget" for not much money.

Epicutie Rating (see left side of page for rating descriptions):
  • Little Joy:  Yummy in the Tummy;  She liked these even better the second time I made them--she ate three along with a pancake!
  • Little Asher:  Yummy in the Tummy;  The first time we served this we only had the  frittatas and fruit and he ate like four of them.  The second time we served them we had pancakes with it since it was breakfast with dinner and he put up a fight because he wanted pancakes.  He is the strong willed one. He still loved it though, just wanted to let us know he wanted pancakes MORE--who doesnt?
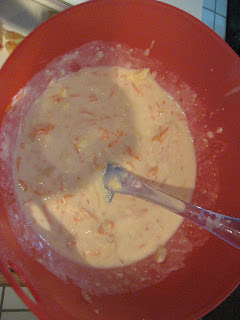
Mixture

Before baking

Done!

Done!

YUMM!

WHAT IS THIS??

Saturday, February 4, 2012

Taco Skillet

This isn't THE healthiest recipe that I have blogged about but what I Iove about it is it is quick, easy and it makes a complete meal. And at this point in our lives with two under two, we Need all the quick, easy meals possible! It's not totally unhealthy but not my top healthiest either. This recipe is adapted from one I found in a Parents magazine cookbook.
Ingredients

  • 1 pound ground beef

  • 1 can (19oz) black beans with liquid

  • 1 can (14.5 oz) petite cut no salt added tomatoes

  • 1 can no salt added corn

  • 1 package taco seasoning mix

  • 1 box jiffy cornbread mix (I have also homemade my corn bread on top and it works fine that way too, but using the mix is faster which is the theme of this recipe)

  • 2 large eggs

  • 1/2 cup milk

  • 1.5 tablespoons vegetable oil

  • 1/2 cup shredded cheddar cheese

Steps

  1. Preheat oven to 425 degrees.

  2. In a large cast iron skillet, cook beef over medium heat until brown. Drain fat if necessary.

  3. Stir in black beans, tomatoes, corn and taco seasoning.

  4. Bring mixture to a boil over high heat and cook for one minute.

  5. Prepare cornbread according to package directions using the egg, milk, and oil in the quantities shown in the ingredients list.

  6. Spoon cornbread mixture over hot taco mixture.

  7. Bake for 15 minutes.

  8. Sprinkle with cheese and continue baking for 5 minutes or until the cornbread is golden brown.

  9. Allow to cool for 5 minutes before serving.

Serve: I usual serve ours with a tad bit of sour cream and some diced up avocados. Or as Little Joy says "cream-memem"
Yield: 6 adult servings
Storage: 3 days in the refrigerator; makes a great left over meal the next day or two!
Timing: 18 months, I only say this old because it is very chunky and refers chewing. Decide the best age for your little one based on how many teeth they have for grinding and how well they chew. Little Joy tried this around 15 months.
Difficulty: 1 out of 5. As I said this is sure easy and fast, I usually make this a while before my husband gets home from work and let it sit in the turned off but still warm oven so that as soon as he walks in, he can eat!
Epicutie Rating: YUMMY IN THE TUMMY (see right side of page for rating descriptions). Little Joy devours this every single time we make it! We have this at least once a month! We love love love it!!!
Sorry no pictures!!! I am desperately just trying to get posts up even without pictures!!!

Saturday, December 10, 2011

Green Eggs

Little Joy LOVES Dr. Seuss's "Green Eggs and Ham" so when I noticed Jessica Seinfeld had a recipe for green eggs I knew we must try it.  The recipe that follows is inspired by the recipe and book!


Ingredients:
  • Olive oil
  • 3 eggs
  • 3 oz spinach puree
  • 1/8-1/4 cup milk
  • Grated Parmesan 
  • Salt and pepper
Steps:
  1. Heat olive oil in small skillet on medium-low
  2. Meanwhile, beat eggs, spinach, milk and salt and pepper (to taste) in a small bowl.  Use as much milk as you need to make the eggs as fluffy (or not) as you want; this is a matter of preference.
  3. Pour egg mixture in hot skillet.
  4. Scramble eggs until cooked through
  5. Remove from heat and sprinkle with desired amount of Parmesan cheese
  6. Serve warm with toast
Yield:  This made enough for myself and Little Joy

Storage:  I do not recommend keeping this as a leftover.

Difficulty: 1 out of 5; super easy if the spinach puree is made ahead.  This is about a 5-10 minute breakfast!

Miscellaneous:  Fun activity idea---read Green Eggs and Ham while you enjoy your very own GREEN EGGS!

Epicutie Rating:  Yummy In the Tummy---see right side of page for descriptions
Little Joy LOVED this the first time she had it, but the second go round it was just "ok".  She tends to have a love/hate relationship with eggs.  She eats them, but really just wants the toast that always comes with it.


Also, don’t forget about our fundraiser for Kai!  For a donation of ANY AMOUNT (even $1), you can be entered to win a 13 cup Kitchen Aid Processor!  For details, click here:

Wednesday, October 19, 2011

Banana Bread with Cinnamon Streusel Topping


This another one from Deceptively Delicious!  I promise this blog is not just for Deceptively Delicious recipes, but I was looking through my cookbooks last night and I had all the ingredients on hand for this one so I couldn’t resist.  I have a history of my banana bread not turning out, and once upon a time, I tried every banana and banana nut bread recipe that I could get my hands on and I was never happy with how they turned out.  After making this, I still feel like I am searching for that perfect recipe, but in the mean time this healthy, easy version will definitely scratch the itch!

Cinnamon Streusel Topping (Optional)

Ingredients:

  • 2/3 cup old-fashioned oats
  • 1/4 cup firmly packed brown sugar
  • 1 teaspoon cinnamon
  • 2 tablespoons melted butter or margarine

Steps:

  1. Stir together dry ingredients in a bowl. Stir in the butter or margarine. Set aside.
014 (640x425)

Banana Bread

Ingredients:

  • Nonstick cooking spray
  • 3/4 cup whole wheat flour
  • 1/2 cup all-purpose flour
  • 1/2 teaspoon baking soda
  • 1/4 teaspoon baking powder
  • 1/2 teaspoon salt
  • 1/2 teaspoon cinnamon (optional)
  • 1/2 cup firmly packed brown sugar
  • 1/4 cup canola or vegetable oil
  • 2 large egg whites
  • 1 1/2 cups banana puree
  • 1/2 cup cauliflower puree
  • 1 teaspoon pure vanilla extract

***I used 4 thawed frozen bananas to make 1 1/2 cups and I did not puree them beforehand.

016 (640x425)

Steps:

  1. Preheat the oven to 350 degrees F.  Coat a 9x5 inch loaf pan or 2 mini pans with cooking spray.
  2. In a bowl or a zip lock bag, mix the flours with the baking soda, baking powder, salt, and cinnamon, if using. Set aside.
  3. In a large mixing bowl, mix the sugar and oil with a wooden spoon until well combined. Mix in the egg whites, banana and cauliflower purees, and vanilla. Add the flour mixture and mix just until combined.018 (640x425)
  4. Pour the batter into a loaf pan.  Cover evenly with the streusel topping if using.
  5. Bake until a toothpick inserted into the center comes out clean, 55 to 60 minutes for the large loaf, 25 to 30 minutes for the mini loaves. Let cool on a rack for 5 minutes, then turn the bread out of the pan to cool before serving.

023 (640x425)

Timing: This could be given as early as 9 months, but be aware of the egg whites if your little one has an egg allergy.  Usually it does not affect children if it is cooked in something. I personally would not give

Difficulty: This was pretty simple, but I am giving it a 3 out of 5 because I had to get so many pans and bowls dirty!  Very few dirty dishes is a requirement for me to give something a low rating Smile.

Miscellaneous:

  • I used 3 mini loaf pans instead of 2.  I have a history of not evenly cooking my banana bread so I wanted to be cautious and not put too much batter into the pans.
  • When I put the cinnamon streusel topping on the batter, I gently mixed it with the top layer of the batter so that it would stay on the bread once baked.  It turned out very well.
  • To make cauliflower puree, simply steam raw cauliflower florets for 10 to 12 minutes and then puree.

Epicutie Rating: Yummy in the Tummy!!! ---See right side of the page for descriptions.

029 (640x425)

Monday, September 12, 2011

Easy At-Hand Blueberry Muffins

A few weeks ago we were coming off of a week long family illness and I had not been to the grocery store in ages… our cupboards were bare!  I had no idea what I was going to make my family for breakfast since I was down to one egg, had no yogurt, and very little milk.  Thankfully I remembered this easy recipe from my Wild About Texas cookbook (one of my favorites!), and I was able to prepare something for the whole family.  The great thing about this recipes is that you probably already have every single ingredient on hand.  I always make certain to have frozen blueberries in my freezer for this and other recipes. 

This recipe is not what I would classify as “healthy”, but it is a healthier alternative to most blueberry muffin recipes and certainly less fatty than what you would buy in the store.  I like to make this occasionally when I am in the mood for something really sweet, like chocolate chip cookies.  This still satisfies my sweet tooth and is much better for me than what I would have normally eaten!

Ingredients:

  • 1/4 cup butter or margarine
  • 1/2 cup sugar
  • 1 egg
  • 1/2 cup milk
  • 1 1/2 cups flour
  • 2 teaspoons baking powder
  • 1/4 teaspoon salt
  • 3/4 cup blueberries (I always like to add a few extra.  I love blueberries!)

Steps:

  1. Preheat oven to 350 degrees.
  2. Cream butter and sugar until light and fluffy.
  3. Beat in egg and milk.
  4. Stir in flour, baking powder, and salt until moistened.
  5. Fold in blueberries.
  6. Spoon batter in to 10 well-greased muffin cups, filling each about 2/3 full. (I just add the frozen berries.  I do not bother to thaw them and it works fine.)
  7. Bake for 20-25 minutes.

Yield: 10 muffins

Timing: I would use your best judgment, although I think that these could be given as early as 9 months considering the eggs and milk are mixed and cooked. 

Storage: Refrigerator for 1 week, freezer for up to 2 months.

Difficulty: 1 out of 5!  These are so, so easy.

Epicutie Rating: Yummy in the Tummy! --See right side of page for descriptions

I know you are thinking… of course Little Frances loved them! Who doesn’t love blueberry muffins?  Actually she has been such a picky eater since her molars have been slowly, slowly, slowly coming in.  She has even been turning down sweets, so I was delighted with how quickly she gobbled this up, and kept asking for more.  I didn’t think she would ever get full! Her happy face says it all.

Happy Blueberry Girl

Saturday, August 13, 2011

Pumpkin Waffles

This recipe was submitted by Jen and her little cutie Claire (as a side note, Little Claire has THE prettiest hair color EVER). Jen is wonderful about cooking creatively, deceptively and organically for her Little One; so I had to feature this easy breakfast recipe she has been raving about. The cinnamon in these makes them so unquiely different than the pumpkin pancake recipe I reviewed last week.

Ingredients:
  • 2 cups all-purpose flour (Jen substitutes amaranth flour, but use whatever you like; I think half all purpose white and wheat would be good)
  • ¼ cup sugar (Jen substitutes honey* here)
  • 1 tbsp baking powder
  • 1 tsp cinnamon
  • ½ tsp salt
  • 2 eggs
  • 1-1/2 cups milk (Jen substitutes soy/rice milk due to an allergy)
  • 4 tbsp butter, melted
  • ½ cup canned organic pumpkin (PS this may be hard to find/more expensive right now since it is off season, check your health food aisle)
*If you use honey instead of sugar, waffles will be a bit softer.

Steps:
  1. Preheat waffle iron.
  2. In medium sized bowl, stir together dry ingredients.
  3. In separate bowl, beat eggs then add rest of wet ingredients, except butter.
  4. Pour wet ingredients over flour mixture and stir just until combined.
  5. Add butter to combined mixture and stir.
  6. Coat waffle iron with cooking spray.
  7. Pour appropriate amount of batter into center of waffle iron.
  8. Cook for 4-5 minutes (or to recommended time of your waffle iron) or until crispy and light brown.
  9. Serve immediately.
Yield: 8-10 square waffles (see my pictures to see what size mine were)

Serve: Serve warm topped with maple syrup or if you are like me and do not like the mess, serve plain. We also sometimes put fresh fruit puree on top. Serve followed by fresh fruit.

Storage: 2-3 days in the fridge.

Timing: Due to the eggs, 12 months. Cut into bit sized pieces appropriate for your little one's ability to chew.

Difficulty: 2 out of 5; quick and easy. The hardest part is waiting for the waffle iron to finish!!!

Epicutie Rating: YUMMY IN THE TUMMY---see right side of page for descriptions
YUMMY IN THE YUMMY rating for our submitter's daughter Little Claire.
Little Joy LOVED these!! She ate almost 1.5 waffles plus TONS of cantelope. When she likes something at a meal, she eats SO much. I still wonder where it all goes on my long and lean lil thing!

This gives you an idea of the size waffles I am talking about.
.

Listen very carefully, she can say WAFFLE!!!

Tuesday, August 9, 2011

Tilapia Cakes with Avacado Tomatillo Sauce

Today's recipe was submitted by Jennifer and her daughter Sara. This is a super yummy twist to fish. It is especially good to make when having company so your little one can partake in the same thing as the group. Although I do not recommend the sauce for your little one, my husband and I LOVED the sauce, especially with a little brown rice too. Have fun with this one and thank you to Jennifer for submitting your recipe.

*If you would like to submit a recipe please email us at littletummyyummies@gmail.com and you might see your recipe featured here!*

Ingredients (Sauce) I do not recommend the sauce for your little one, it is a bit spicy:
  • 4 garlic cloves, peeled
  • 1 tomatillo husked and quartered (about 3 oz) -- (I used tomatillo sauce since I already had it on hand)
  • 1/2 medium vidalia or other sweet onion, quartered
  • 1/2 jalapeno pepper, seeded (I left this out)
  • Cooking Spray
  • 9 T chopped ripe peeled avocado (about one small avocado)
  • 1/4 C fresh cilantro leaves
  • 1 T fresh lime juice
  • 1/2 tsp salt
Ingredients (Cakes):
  • 2 cups bread crumbs divided
  • 1/2 C finely chopped vidalia or other sweet onion
  • 1/2 C finely chopped red bell pepper
  • 1/2 C finely chopped and sauteed zucchini or yellow squash
  • 2 T fresh cilantro
  • 2 T capers, drained
  • 2 T fat free mayonnaise
  • 1/2 tsp salt
  • 1/2 tsp ground coriander
  • 1/4 tsp freshly ground black pepper
  • 14 oz chopped skinless tilapia
  • 2 large egg whites
  • 1 tsp butter
Steps:
  1. Preheat broiler
  2. Sauce: Combine first 4 ingredients on jelly-roll pan coated w/ cooking spray. Broil 12 minutes or until blackened, stirring once. Cool slightly. Place tomatillo mixture in blender, add remaining sauce ingredients and blend until smooth. Cover and chill. (alternatively, I used tomatillo sauce and omitted the jalapeno, so I sauteed the onion, garlic and tomatillo sauce until browned and then followed the rest of the steps)
  3. Preheat oven to 400 degrees
  4. Cakes: Combine 1 C bread crumbs, with onion and next 9 ingredients (through egg white) - stir until well blended. Divide tiliapia mixture into 12 patties, dredge in 1 C remaining bread crumbs.
  5. Melt butter in non stick skillet, cook cakes 2 min each side, then bake at 400 degrees for 8 minutes or until done.
  6. Serve warm over brown rice---I do NOT advice the sauce for your little ones, that is for mom and dad to enjoy :) I gave Little Joy plain avocado to go with her cakes
Yield: 12 cakes (approximately 216 calories per cake)

Storage: Refrigerator for 3 days; fish does not normal refrigerate well, but this seemed to do fine when reheated. Just be sure to reheat on a low power level.

Timing: 12 months; be sure to watch them closely if they do not have many teeth.

Changes for next time: If I make this again, I will nearly puree the fish. Although I tried to chop it small, the chunks were too big and made the cakes fall apart.

Difficulty: 5 out of 5; this is relatively time consuming especially since your sauce needs to chill. Its a fun change of pace though and a great meal if you are having company!!!

Epicutie Rating: Somewhat Yummy--see right side of page for descriptions
Yummy in the Tummy for Little Sara (whose mommy submitted this recipe)
Little Joy gobbled up several bites and then wanted nothing to do with the cakes after that, even the next day. We have been struggling with her exerting her will at the table, so I am not surprised. She has been trying to reject favorite foods too. We do not allow her to do that, but it means sometimes she only has a bite or two of some foods. All in all I believe she liked it somewhat.


Cakes before dishing up.

This is how we served the cakes for us. Little Joy just had a cake, a bit of rice, some veggies and avocado.

First bite.

Second bite. Still looks a bit skeptical :)


Saturday, August 6, 2011

Pumpkin Pancakes


I have been dying to try this recipe since it appeared in a May 2011 issue of "Parents" Magazine, but apparently canned pumpkin is quite the novelty in the off season! A friend on mine happen to find a store that carries it all the time, so we were finally able to sample this simple yet delicious recipe.


Ingredients:
  • 1 cup all purpose flour
  • 1 tablespoon sugar
  • 1 teaspoon baking powder
  • 1 teaspoon baking soda
  • 2 tablespoons unsalted butter, divided
  • 1 egg slightly beaten
  • 1 cup buttermilk (alternatively, mix 1 tablespoon lemon juice with one cup of milk; let stand about 5 minutes)
  • 1/3 cup canned organic pumpkin
  • Maple syrup (Little Joy did NOT have syrup, too much mess)
  • Fresh berries
Steps:
  1. Preheat griddle to 225 degrees (alternatively, use a non stick skillet on medium-high heat with 1 tablespoon melted butter in pan).
  2. In a medium bowl mix together flour, sugar, baking powder and baking soda.
  3. Melt 1 tablespoon butter
  4. In a separate small bowl whisk together butter, egg, buttermilk and pumpkin; whisk just until combined.
  5. Add wet ingredients to dry and whisk until combined, not too much! Mixture maybe slightly lumpy.
  6. Spoon 1/8 cup of batter onto a griddle. Cook for 2-3 minutes or until pancakes have bubbles on top and are slightly dry around the edges, flip. Cook for an additional 2-3 minutes or until golden brown. Repeat with remaining batter.
  7. Serve warm with fresh berries.
Yield: 12 3 inch pancakes; about 228 calories per THREE pancakes---not bad.

TIP: Love this recipe has a 5 minute version......Whisk together 1 cup buttermilk pancake mix, 2/3 cup lowfat milk, and 1/3 cup canned pumpkin. Cook as directed above and it yields about 8 3 inch pancakes!!!

Storage: Refrigerator for 3 days.

Difficulty: 2 out of 3; love this! I can whip it up in about 15 minutes!

Epicutie Rating: Yummy in the Tummy--see right side of page for descriptions
Although I was skeptical because I COULD taste a lil pumpkin, Little Joy gobbled up two pancakes along with several strawberries in no time!! We will make these again.

Next up in the pumpkin world---Pumpkin WAFFLES submitted by a reader and friend of mine!


Ingredients

Cooking on the griddle.

Ready to eat!

First bite

CHEEEEEESE...it's YUMMY!!!

Sunday, July 31, 2011

Maple Spice Muffins

My co-author (Little Frances' Mommy) has been raving about the cookbook "Deceptively Delicious" by Jessica Seinfeld for months now. I FINALLY remembered to look for it in my local bookstore, however I was only able to find her second cookbook "Double Delicious". Since I was anxious to test some of her recipes, I purchased it.

Only 2 days after buying, I was ready to try some recipes; today's recipe comes from "Double Delicious! Good, Simple Food for Busy, Complicated Lives" by Jessica Seinfeld.

Ingredients:
  • Non stick cooking spray or paper baking cups
  • 1/4 cup trans-fat-free soft tub margarine spread (other butters could be substituted)
  • 1/2 pure maple syrup
  • 1-6 oz container of low fat lemon yogurt (I used fat free greek yogurt for extra protein; fat free was the only lemon greek yogurt I could find)
  • 1/2 cup non fat sour cream
  • 1 large egg
  • 1 large carrot, washed and grated
  • 1 small apple, grated
  • 1/2 cup raisins (I accidentally ommitted this, but I am glad I did raisins are a major choking hazard and I would have needed to remove them or chop them super small for Little Joy)
  • 1 cup all purpose flour
  • 1 cup whole wheat pastry flour (I have no idea what pastry flour is, mine is just 100% whole wheat flour)
  • 1 teaspoon baking soda
  • 1 teaspoon baking powder
  • 1 1/2 teaspoon cinnamon
  • 1 teaspoon allspice
  • 1/2 teaspoon ground clove
  • 1/4 teaspoon slat
Steps:
  1. Preheat oven to 350 degrees.
  2. Coat a 12-cup muffin tin with cooking spray or line with paper baking cups.
  3. In a large bowl, stir together margarine, maple syrup, yogurt, sour cream, egg, carrot, apple and raisins, breaking up the margarine with a spoon.
  4. In a separate smaller bowl (about 4 cup size) combine all remaining ingredients (this should be all the dry ingredients).
  5. Sprinkle the dry ingredient mixture over the margarine mixture.
  6. Stir JUST until combine; do not over mix. The mixture will be quite lumpy.
  7. Divide batter among 12 muffin cups (it will look like the muffins cups are very full, but that's ok).
  8. Bake until the tops are brown and a toothpick comes out clean when inserted into the middle (about 20-25 minutes). I did allow mine to get too brown because I was worried they would dry out knowing this was a "healthy" recipe; the peaks of my muffins were slightly browned when a toothpick came out clean.
  9. Serve warm.
Yield: 12 muffins

Timing: I would wait until 12 months and be sure your little one knows how to chew drier ingredients. Again, since my little one had molars by about 12-13 months I could give her more advanced foods early. These muffins are the texture of moist bread, so a 12 month old should be able to eat it fine, just break it up small. If your child is older, they can probably handle larger pieces.

Storage: The author recommends storing muffins in an air tight container at room temperature for up to 2 days or wrapping individually and freezing for a month.

Tip: If you are making this for breakfast, combine your dry ingredients the night/day before and place in a sealed container to save time in the morning. Also, shred carrots the night/day before and place in a ziplock bag in the refrigerator. I would not recommend shredding the apple the night before as it will brown and get too juicy. It only took me about 10-15 minutes this morning to get the muffins in the oven since I did a little prep work. I can use all the extra sleep I can get right now (28 weeks pregnant right now).

Miscellaneous: Only down side to these is some of these ingredients might not be in your pantry already. Also, fun side note if you make this according to the recipe without my alterations there are only 195 calories per muffin.

Difficulty: 2 out of 3; it is actually quick and easy especially if you follow the tip above.

Epicutie Rating: YUMMY IN THE TUMMY--see right side of page for descriptions
Little Joy ate an entire muffin and was all smiles the entire time! My hubby and I loved them too. They are no fatty blueberry muffin, but still super delicious. Makes you feel good to know that you ate something healthy and nutritious!

Step 3: All "wet" ingredients combined. I shredded my carrots vs grated and it was fine.

Step 4: All dry ingredients; it smelled SO good!

Step 7: Ready to bake

Done!

She saw the muffins and started licked her hand in excitement!

First bite!
CHEW, CHEW, CHEWING it!!!

All gone and happy she has a full tummy; do you think she loved them??

Monday, July 4, 2011

Blueberry Zucchini Bread

Many readers have told me they are looking for recipes with "hidden" veggies so when I saw this recipe in my "Parent's" magazine, I knew I had to try it. I was so excited to test this recipe on our whole family because anything with cinnamon and blueberries is right up our alley and the best part----zucchini is hidden inside.

For those of you who do NOT like zucchini please do not be discouraged by this recipe. The zucchini flavor is completely hidden and all you taste is the blueberry cinnamon goodness! Try it and I think you will love it!

Ingredients:
  • 1 cup all purpose flour
  • 1 cup whole-wheat pastry flour (I used regular whole wheat flour and it worked fine)
  • 1/4 cup packed light brown sugar
  • 1/4 cup granulated sugar
  • 1 tsp baking soda
  • 1 tsp cinnamon
  • 1/2 tsp coarse sea salt
  • 1/2 tsp baking powder
  • 3 eggs
  • 3/4 cup oil (olive oil can be used but it make change the flavor, I used vegetable oil even though I generally try to stay away from it, but on occasion its perfectly fine)
  • 1 tsp vanilla
  • 2 cups shredded zucchini
  • 1 cup blueberries
Steps:
  1. Preheat oven to 350 degrees.
  2. Lightly coat the bottom of a mini loaf pan or one regular loaf pan with cooking spray and set aside.
  3. In a large bowl, combine first 8 ingredients; set aside.
  4. In a separate smaller bowl combine eggs, oil and vanilla; add to flour mixture and stir until combined.
  5. Gently stir in zucchini and then blueberries.
  6. Spoon batter in to prepared pan(s).
  7. Bake at 350 degrees for 30-45 minutes for mini loaf pans, about an hour for a 9 inch loaf pan OR until golden brown and a toothpick inserted in the center comes out clean.
  8. Allow to cool for 10 minutes before removing from pan (tip: loosen the bread by inserting a table knife around the edges).
  9. Serve warm or cool completely and re-heat to serve.
Yeild: One loaf pan or eight mini loaves.

Timing: Provided you have introduced all these ingredients seperately AND know eggs are not an allergen, I would recommend this as early as 12 months (maybe as soon as 10 months if you have a good chewer).

Storage: Fresh for a few days or up to 3 months in the freezer.

Miscellaneous: I think the bread would have been a bit more moist if I had used the pastry wheat flour, but it still turned out great.

Difficulty: 2 our of 5; pretty easy stuff for the deliciousness that it produces!

Epicutie Rating: Yummy in the Tummy--see right side of page for descriptions.
I was totally not surprised that Little Joy was prepared to devour as much Blueberry Zucchini Bread as I would give her. The light sweetness and hint of cinnamon seemed to tickle her fancy---this was a big hit!


Ingredients

Recipe from my "Parents" magazine

Step 3: Combine first 8 ingredients (dry ingredients)

Step 5: All ingredients combined.

Step 6: Spoon batter into pan.


Cooling

Cooling

See that grin behind the bite?

MORE!

AND MORE!

Sunday, June 12, 2011

Fast Family Frittata

I love eggs served up anyway and Little Joy so far has too, so when I saw a recipe for a Frittata in my Parent's magazine, I knew we had to try it!

You need an oven proof pan (I used a cast iron skillet) for this recipe.

ALLERGEN WARNING: This recipe has eggs and salsa in it. Eggs are a known allergen and most doctors recommend waiting until 1 year. Salsa can be spicy but it was not spicy at all in my opinion, so I was not worried about it bothering Little Joy. Just use your discretion; perhaps try it yourself first then decide (I do that A LOT).

Ingredients:
  • 1 Tbls olive oil
  • 1/2 of a 20 oz package (or 2.5 cups) of frozen or refrigerated hash brown potatoes (check the nutrition facts to make sure there is little sodium added, also I used more than the recipe called for since my oven proof skillet is rather larger)
  • Salt and pepper (optional)
  • 4 oz smoked turkey sausage (or any pre-cooked meat of your choice really)
  • 1 carton (15 oz) Egg Beaters Southwestern Flavor (if you cannot find this, use regular Egg Beaters and add 1/2 cup salsa to it; OR use real eggs--I just wanted to try something different)
  • 1 oz Parmesan cheese finely shredded (eye ball it)

Steps:
  1. Heat oil on medium in a large oven proof non stick skillet (I only had cast iron so it stuck a little but not too bad).
  2. Add potatoes and sprinkle lightly with salt and pepper (optional).
  3. Cook for 5-10 minutes (depends on if your potatoes where still frozen) or until the potatoes are lightly browned, stirring occasionally.
  4. Press potatoes into uniform layer (this is when I realized I needed more potatoes to fit my large pan--they did not nearly cover the bottom of the pan so I just added more!)
  5. Top potatoes evenly with turkey sausage/other cooked meat.
  6. Cook uncovered, for 5 minutes, occasionally tilting skillet and lifting the frittata around the edges with a spatula to allow uncooked mixture to flow underneath.
  7. Turn on broiler.
  8. Broil 4-5 inches from the heat for 4-6 minutes or until the top is set.
  9. Sprinkle with cheese.
  10. Allow to stand 5 minutes before cutting (it should continue to cook while it cools).
Yield: 4-5 adult servings.

Serve: Serve warm and chopped coarsely or diced in sized appropriate for your baby's age/chewing abilities.

Timing: 12 months due to eggs. Ensure your baby can chew fairly well due to the meat in the dish; I might even recommend waiting until your little one has some molars at least part way in.

Storage: Refrigerator for several days. Do not recommend freezing.

Difficulty: 3 out of 5; I say this because it does require your full attention throughout the cooking process. It is easy and quick, but does require you to be very attentive.

Epicutie Rating: Yummy in the Tummy--see right side of page for descriptions
Little Joy could not fill herself up with this enough!!!! She said "MMMM" after most every bite! We will be making this again!!

I forgot to take photos of this frittata :( Be looking for another frittata posting soon too!

Wednesday, January 12, 2011

Baby Omelet

This is my FAVORITE food for Little Joy yet!!!! I HIGHLY recommend it!!

Let me begin this post by giving a firm warning to our readers; eggs tend to be an allergen! Please be very careful when introducing eggs. Egg WHITES are generally the allergy culprit. Doctors will advice you against introducing the WHOLE egg before one year but instead try the egg YOLK. If you, your spouse or anyone in your immediate family is allergic to eggs, I would not introduce even the egg yolk.

This was so much fun to make, feed her and watch her attempt to self feed! I cannot wait to try it again! Remember, if your baby has more than one ingredient listed below, I would recommend introducing them one at a time to eliminate any potential allergies.

Ingredients:
  • 2 Egg YOLK (if under one year; and yes TWO egg yolks because just one is not enough to cook well)
  • Formula or breastmilk (we used breastmilk; also Little Joy has had whole milk already, so if your baby has had that; its fine too)
  • Chunky or pureed veggie of your choice (we used steamed baby carrot chunks)
  • Cheese of your choice (we used Monterey Jack Cheese; see this article about cheeses to decide what cheeses are good to start with)
Steps:
  1. Prepare and heat up a small frying pan with olive oil or a small pat of butter (this is where I made a mistake because I was so excited about making this; make sure the pan is nice and hot when you put the eggs on it so they wont crumble. If you splash water on the pan the water should "dance around" and sizzle.)
  2. Whisk milk and egg yolks together
  3. Pour egg mixture into heated and prepared pan
  4. Grate the cheese of your choice
  5. Scramble eggs
  6. Just before they are finished, add the veggie or your choice (chunky steamed baby carrots for us) and scramble until no longer runny
  7. Remove from pan and add cheese on top
  8. Allow to cool, serve warm but not hot
  9. If you are brave----let your little one try this as a finger food!
Miscellaneous: Serve with fruit pieces or pureed fruit for a balanced breakfast! The only thing I will do differently is cook it on a higher heat so that maybe the egg wont be in such small pieces; it was hard for her to self feed. The cheese helped keep it together some. However, maybe thats just how the egg does when it is egg yolk vs the whole egg.

Timing: 9-10 months

Storage: I do not recommend saving any leftovers

Epicutie Rating: Yummy in the Tummy-see right side of page for descriptions
I was shocked by how much Little Joy loved her very first omlete; I was so convinced she wouldn't like it that I had a back up breakfast ready. It was a big omelet but she ate the majority of it. Although I will stick with cereal and fruit as her "go to breakfast" this is a great meal to mix things up once a week!

Step 2: Egg yolk and milk mixture

Step 4: Grated Monterey Jack cheese (we didn't use that much I just made extra to have on hand as a finger food)

Step 6: Adding carrot chunks; I made the chunks a bit smaller than the size I use for her carrot finger food

Step 7: Finished!!

Step 8: Allowing to cool!

Little Joy sampling it as a Finger Food. She must investigate it first of course!

I am a warrior!


Little Tummy Yummies

About the Authors

This blog was started by two Babywise pen pals to document our adventures in high chair manners, making our own baby food and doing our bests to raise happy, healthy, thriving little ones!

Epicutie #1

Epicutie #1

Little Joy at 2 years, Sept 2012

Epicutie #2

Epicutie #2
Little Frances

Epicutie #3

Epicutie #3
Little Asher at 11 months, Sept 2012

Epicutie #4

Epicutie #4
Little Elizabeth, July 2013

  • Yummy in the Tummy: Epicutie thoroughly enjoyed each bite
  • Somewhat yummy: Epicutie seemed to somewhat enjoy the food at first, but seemed to like it less with subsequent bites
  • Not so sure I like it...yet: Epicutie somewhat rejected the first bites, but seemed intrigued. The next exposure may be better!
  • Confused: Epicutie rejected the first bites, perhaps due to texture or strong flavor.
  • Sour Puss: Epicutie gave a sour face indicating she did not like the food. However--if at first you do not succeed, try, try again!


  • Munchkin Land Designs Elements by Crisdam Designs

    Click Here for Other Awesome Giveaways!

    Labels

     
    Designed by Munchkin Land Designs • Copyright 2011 • All Rights Reserved