HomeAbout the BlogMeet the ChefsMeet the EpicutiesMeal IndexContact Us
Showing posts with label Grain. Show all posts

Thursday, January 23, 2014

Vegetable Fried Rice

This recipe is inspired by a skinnytaste.com recipe!  If your toddler or preschooler has not tried their hand at chop sitcks, grab some for the family to enjoy this meal.  My epicuties gobble this up and I think its partly because of the fun utencils!

Ingredients

  • 3 cups leftover cooked brown rice (or any other rice or quinoa)
  • 2 eggs, scrambled (or 2 egg whites, and 1 whole egg scrambled )
  • 1 tbsp oil of your choice (coconut, olive, etc)
  • 2 tsp splashes sesame oil (optional)
  • 1/2 onion, chopped
  • 1 yellow bell pepper, finely chopped
  • 2 cloves garlic, diced 
  • 5 scallions, chopped, whites and greens separated
  • 1/2 cup shredded carrots
  • cooking spray
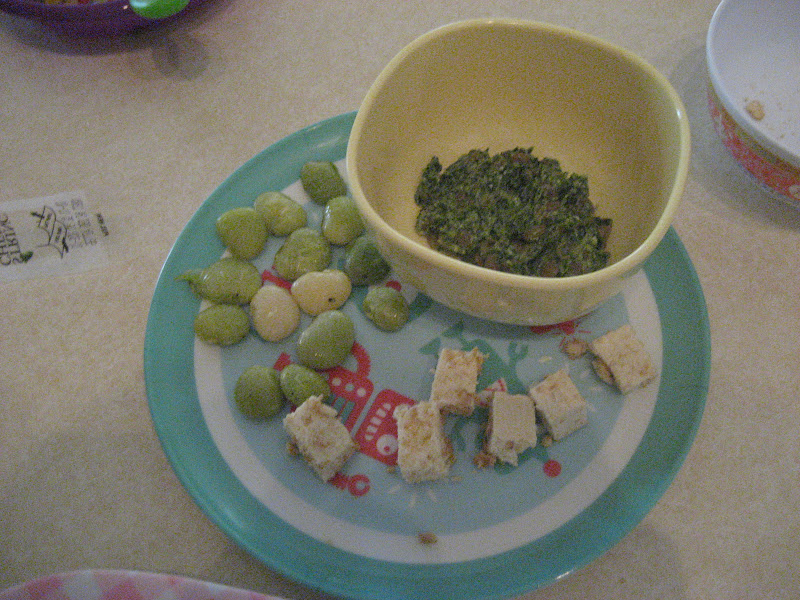
  • 1 cup ready-to-eat shelled edamame
  • 3 tbsp low sodium soy sauce, tamari for gluten free (or more to taste)
  • salt and fresh pepper to taste

Steps

  1. Make your rice (I made mine in the rice cooker the morning we wanted to eat this and refrigerated it until I was ready to use it)
  2. Whisk eggs season with salt and pepper. In a hot wok/large pan, spray a little oil and cook the eggs. When cooked, remove from pan and set aside.
  3. On medium high heat. Add oils and cook onions, bell pepper, scallion whites, and garlic.  I cooked until soft to be more palatable for my little ones, but if you want extra crunch then cook 60 seconds on high heat
  4. Add carrots and cook for an additional 2-4 minutes (again less if you want it extra crunchy).
  5. Add brown rice/grain and stir well a few minutes to heat through.
  6. Add cooked egg along with soy sauce, scallion greens and edamame, mixing well for about 3-4 minutes.  Add more soy sauce if you want
  7. ENJOY!
Yield:  Approximately 6 one cup servings....we ate most of it.  It went down easy!

Difficulty:  2 out of 5; most of this could be prepped to cook when you littles are napping or occupied and then when it is time to eat it would be a breeze!\

Timing:  1 year; it would be a mess, but if I had made this when mine were younger I would have given it as young as one.  I would avoid the edamame or cut them in half for younger toddlers.  Babe three that is baking will have it sooner than my older two.

Allergies:  This has soy AND egg so be sure you watch this food if its one of the first time your littles has eaten these ingredients.

Epicutie Ratings:
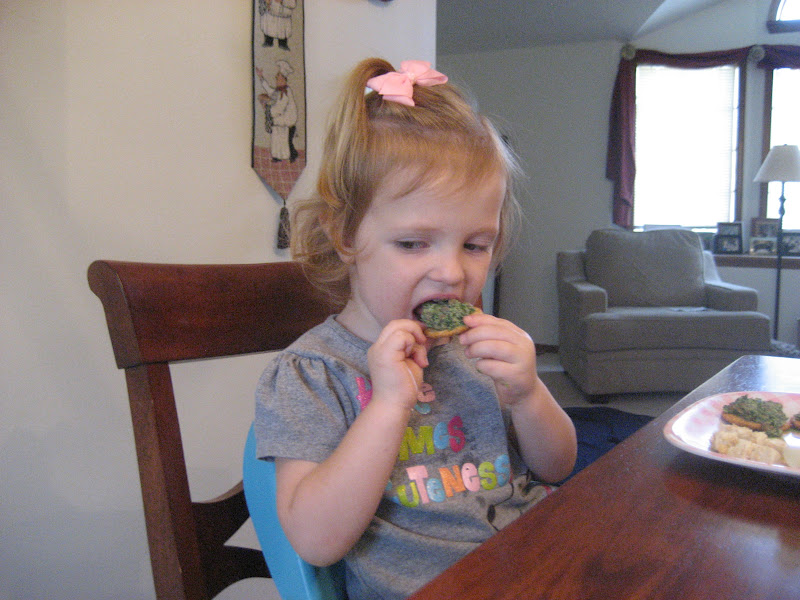
  • Little Joy:  Yummy in the Tummy-She scafed this down a long with a side of turkey sausage.  She looooves to use the chopsticks
  • Little Asher:  Somewhat Yummy-He ate his whole bowl but you could tell he liked it but not LOVED it.  He was not as into the edamame this time as he was last time.
Overall, this was a hit...we will be making it more often!

With turkey sausage

Little Joy


He actually got good at it but we were in a hurry to finish dinner and head to Awanas so I could not keep stopping to record!

Monday, September 23, 2013

Whole Wheat Banana Pancakes


Bananas.  Oh bananas.  These are always plentiful in my house but sometimes, they get too ripe too fast for us, so I use them in other ways and this recipe is one way!  This recipe is from 100 days of real food, with some alterations for dairy free!

Ingredients:

  • 2 cups whole-wheat flour (I use King Arthur’s organic white whole-wheat flour)
  • 2 teaspoons baking powder
  • 1 ½ teaspoons baking soda
  • ½ teaspoon salt
  • 1 tablespoon honey
  • 2 large eggs, lightly beaten
  • 1 ¾ cups almond milk (or any other milk alternative, for those not avoiding dairy use regular milk!)
  • 2 tablespoons unsalted butter (we use Earth's Best Soy Free lactose free butter), melted
  • 2 ripe bananas, mashed
  • 100% pure maple syrup for serving

Steps:

  1. In a large bowl, whisk together the flour, baking powder, baking soda, and salt.
  2. In a separate bowl, mix together honey, eggs, milk, and 2 tablespoons of melted butter.
  3. Make a well (hole) in the center of the flour mixture and pour the liquid mixture into the center; mix to combine but do not over mix!
  4. Gently fold the mashed bananas into the batter with a spatula.
  5. Heat a griddle or sauté pan over medium-high heat (if you are using a pan swirl some butter in there, if using a griddle this isn't needed).  Add pancake batter using a 1/4 or 1/3 measuring cup.
  6. When the pancakes have begun brown on the bottom and start to bubble on the top, flip them over to cook the other side.
  7. Serve with maple syrup!
Difficulty:  2 out of 5; for pancakes, this is pretty easy!

Tip:  Freeze leftover for a quick breakfast another day!

Timing:  I serve pancakes as early as about 10 months since my babes show good chewing ability, but by 12 months I think these would be great for any toddler as long as they are cut up small!

Epicutie Rating:  (see left side for rating descriptions)
  • Little Joy:  Yummy in the Tummy!  My kids LOVE pancakes so I knew this would be a hit!
  • Little Asher:  Yummy in the Tummy!  He ate SIX PANCAKES!!!!!!!  I had to cut him off!
The batter

THE GOODS!!!!

"Helping"


He couldn't wait for me to get the camera out!

YUM!

Going back for more!

Thursday, August 30, 2012

Cream of Spinach (revised for Dairy Free)


I love the Cream Spinach with Lentils Over Brown Rice that we posted in April 2011; I have made it countless times for Little Joy and still do!  Little Asher cannot have dairy at all until he is 15-18 months so this limits me on what I can cook for him and I prefer not to cook separate meals for my two epicuties (even though I know it is inevitable as this stage).

I decided to really test my cooking abilities and wing making this recipe dairy free, below is what I came up with and it was quite tasty, surprisingly.  If you look at our previous post, you will see it is very similar.  

Oh and for the record, this tasted great to me too!

Ingredients:
  • One bag baby spinach
  • 1 tablespoon grated sweet onion (about 1/3-1/2 of a large onion)
  • 1 small clove garlic, minced or through a garlic press
  • 1 tablespoons olive oil
  • 1/4 cup imitation cream cheese (see photo below)
  • 1/4 cup firm tofu
  • salt and freshly ground black pepper, to taste
  • 1 tsp dried fresh basil
  • Cooked red lentils (cooked according to package)

Steps:
  1. Cook red lentils according to package instructions or if there are not any, check out this website about cooking lentils
  2. Wash and trim  spinach (if needed), place in food processor along with minced/pressed garlic and grated onion.
  3. Pulse it in food processor several times until the spinach reaches your desired consistency.  Be careful not to over process it, the goal is the finely and evenly chop it (in the previous post I said to chop it with a knife, but I found the spinach gets to a better size for a younger baby when the food processor is used--not to mention its MUCH quicker).
  4. Combine cream cheese and tofu in small chopper and puree until smooth (you might be able to use 1/2 tofu and omit the imitation cream cheese but I wanted the consistency to be smooth since the original recipe called for yogurt).
  5. Place spinach mixture in large sauce pan (spinach cooks down a lot so if your pan looks full...do not worry).
  6. Cook over medium heat covered for approximately 5-8 minutes. Be sure to shake the pan often to ensure the veggies do not get burned.
  7. Drain veggies well (if needed).
  8. Stir in Olive Oil and continue to cook for 3-5 minutes, continue to stir constantly (I am not good at doing anything constantly when the epicuties are awake, so just do your best)
  9. Remove from heat and stir in tofu mixture, salt, pepper and basil.
  10. While warm, mix in about a 1/3 lentil to 2/3 spinach mixture.
Yield: 3-4 servings

Serve:  Warm; can be served over cooked brown rice.  I spoon fed this to my 10 month old (Little Asher) and my toddler fed herself with the cream of spinach on a cracker.

Variation for a Toddler:  Little Joy enjoyed the dairy version of this on top of crackers (in the original post it was served over brown rice, but tried something new to liven things up).  So it was kinda like a dip!

Timing: 10 months or later; there are some strong flavors in here and lentils are best to wait to introduce until 10 months. This food does not require much chewing/grinding so if your Little One does not have many teeth, do not despair!

Storage: I would say 3-5 days in the fridge; freezer for about a month.  I froze the dairy version of this and it tasted fine frozen and reheated.
Difficulty: 2 out of 5 using the food process made this quick and easy

Epicutie Rating:  (see left side of page for rating descriptions)

  • Little Joy:  Yummy in the Tummy: She loved eating this as a dip.  We also tried it in a quesadilla and she was not as keen on it.
  • Little Asher:  Yummy in the Tummy:  He kept opening his mouth for more!!!  He even loved it on the second day.
Step 3:  Pulse spinach, onion and garlic in food processor

Step 9: After adding tofu mixture


Step 10:  Add lentils and stir

Little Asher's Meal; served with lima beans and tofu cubes dusted with graham crackers (post for that coming soon)

Little Joy's meal; cream spinach served over crackers with tofu cubes, cheese and lima beans


Little Joy trying it

She's saying "Its gonna be yummmmy"

"I like it Mommy" she said

Little Asher getting ready for the first bite

Seeing if Big Sister liked it

After several bites, he got into it and he liked it!!


Saturday, March 10, 2012

Cinnamon-Maple Quinoa

In an effort to try to incorporate more easy, healthy grains and side dishes into my normally “one pot dinner” mix, I have had been making a few quinoa dishes.  I have to say, we are not loving quinoa, even though it has a fairly mild taste.  I thought that I would try a breakfast recipe with quinoa and change things up a bit.  We love breakfast and love making things sweeter... however, it was still not a big hit!  However, we try to share our failures here on LTY as well as our successes, and you might have better luck with your epicutie!  This recipe comes from Double Delicious by Jessica Seinfeld.

Ingredients:

  • 1 1/4 cup water
  • 1 cup quinoa
  • 1 tablespoon butter or margarine
  • 1/2 cup sweet potato puree (We do not have sweet potatoes where I live so I used pureed butternut squash and I think a carrot puree would also work.  If you do not have any of the above, try a 1/2 cup of applesauce.)
  • 1 tablespoon pure maple syrup
  • 1/3 cup light vanilla soy milk or milk
  • 1/4 teaspoon cinnamon
  • 6 teaspoons pure maple syrup divided, for garnish
  • 6 teaspoons chopped or ground walnuts or almonds, divided for garnish

Steps:

  1. In a small saucepan, bring water to a boil.
  2. Meanwhile, rinse the quinoa in cold water and strain in a fine colander or cheesecloth.
  3. Add the quinoa to the boiling water and reduce heat to a simmer.
  4. Cook for 12 minutes, uncovered and remove from heat.  Let sit covered for 5 minutes.
  5. In a separate pan, melt the butter.
  6. Stir in sweet potato puree, 1 tablespoon of the maple syrup, milk, cinnamon and salt. 
  7. When the quinoa has finished cooking, stir in the sweet potato mixture.
  8. Divide into bowls and top with a teaspoon each of maple syrup and nuts.

001

Yield: 6

Timing: If you leave out the nut topping, this recipe can be given as early as 9 months, with the nut topping, 12 months as long as the nuts are finely ground and your epicutie has no nut allergies.

Miscellaneous:

  • Rinsing the quinoa is very important!  I left this step out when I first made this recipe because I was not sure how I would strain it, but I had to throw away my entire first batch because it did not turn out.  The second time, I used a sturdy paper towel in my wire colander and that worked well.
  • I ground the nuts since I still do not feel comfortable giving Little Frances nuts that require a lot of chewing.

Difficulty: 2 out of 5.  Its pretty easy, but you have to dirty two pots.  I hate dirtying two pots and it takes a while.  Also, this is not a quick breakfast recipe and is more work than I like to do early in the morning.

Epicutie Rating: Somewhat Yummy! ----See left side of the page for descriptions.

Epicutie Frances was willing to try many, many bites of this at first, so by our LTY standards this one is Somewhat Yummy.  I think she ate so much because I told her it was like oatmeal, and she loves oatmeal! However, she seemed to really hate it the more she ate it.  She even gave it to her dad and said “Here Daddy, throw away” when she saw that her dad was emptying his bowl.  It would also like to add that this recipe got a big ole’ sourpuss from her mom and dad!

011012013014

Thursday, November 24, 2011

Lisa’s Pizza (Dough)

Most pizzas are all about the toppings!  This recipe, however is all about the dough.  This is a fun, unusual recipe that you will love.  I don’t know where it came from other than my mama.  She used to make it for me when I was a kid, and yesterday I pulled it out again… I don’t know how I forgot about it for so long because I think this will become a new old favorite!

Ingredients:

  • 3 cups of flour                        
  • 1 tsp sugar
  • 1/2 tsp salt                          
  • 1 1/2 tsp active dry yeast
  • 1 1/2 tsp dried basil                 
  • 1 cup tomato juice (warm)
  • 3/4 tsp cayenne pepper                
  • 1/4 cup olive oil
  • Tomato/marinara/pizza sauce of choice
  • Cheese of choice, I use mozzarella
  • Toppings of choice

Steps:

  1. Stir sugar and yeast into warmed tomato juice and place in warm, draft free place for
    5 minutes.
  2. Combine flour, salt, basil and pepper in a bowl. 
  3. Combine olive oil with tomato juice mixture and stir into flour mixture.
  4. Turn out onto lightly floured board and knead until smooth and elastic (5-10 minutes).
  5. Cover with towel and let rise in a warm place to double its size (about 1
    hour).
  6. Punch down and pat into a greased 12 inch deep dish pizza pan.
  7. Let rise for about 30 more minutes covered with a towel in a warm place. 
  8. Preheat oven to 475 F.
  9. Brush pizza lightly with olive oil. 018 (640x425)
  10. Top as desired. 020 (640x425)
  11. Place pizza on bottom rack of oven and bake for 5 minutes.
  12. Lower the temp of your over to 400 F and bake for 25-30 minutes or until crust is golden.025 (640x425)

Timing: Because of the cayenne pepper crust, I would wait until 1 year to introduce.

Difficulty: 3 out of 5, its not that hard, but I am always nervous about how much the dough “rises”.

Miscellaneous:

  • You can also make this with whole wheat flour without sacrificing flavor, but you must make it with a little less flour.  I recommend first making it with white flour so that you have an idea of the dough’s consistency.
  • It is very important that you put the dough in a WARM place.  I put mine on the radiator.
  • I make this on a baking stone, not a deep dish pizza pan, and it works fine.
  • I also find that it does not need to cook quite as long as the instructions say, but I know that each oven is different.

Epicutie Rating: Yummy in the Tummy! ----See right side of the page for descriptions

She gobbled it right up that day and the next! Hooray.

028 (640x425)031 (640x425)032 (640x425)

Also, don’t forget about our fundraiser for Kai!  For a donation of ANY AMOUNT (even $1), you can be entered to win a 13 cup Kitchen Aid Processor!  For details, click here:

Saturday, October 22, 2011

7 Grain Bread

Yet another recipe submitted by my friend Heather.  I give the bread SHE made a 5 of 5 stars, but mine was not nearly as good!  I do not have a bread maker so it takes several attempts at making the bread from scratch to get it right so I am posting this recipe exactly how she sent it to me (using the bread machine).  My family and friends still enjoyed the bread, but it was really dense and did not rise well; the flavor was still there though!

Ingredients:

  • 1 1/3 c water
  • 1/2 c Grape Nuts or other 7 grain cereal, like Kashi
  • 1/2 c rolled oats, blended finely in a mini-food processor (or oat flour)
  • 1 1/2 tsp salt
  • 3 T molasses
  • 3 T olive oil
  • 3 1/2 c bread flour
  • 1 pack active dry yeast


I mix all these together in a bread maker first on the dough setting, but if you don't have one, you can start by hand: Heat water to 130 degrees, add to cereal in large bowl, let stand 10 mins. Add yeast, oat flour, salts, molasses, and oil. Beat well. Cover, let stand 15 mins. Slowly add bread flour, and beat until smooth. Turn dough out onto lightly floured board and knead until smooth and springy about 5mins, adding flour if necessary. Grease another bowl, place dough in bowl and roll until greased on all sides. Cover and let rise in warm place until doubled, about 1 hour.

Here, either take dough out of bread maker or bowl and do the following (or you can just bake whole thing start to finish in bread maker and skip dough cycle): Grease 9 x 5 inch loaf pan or 8 or 9 inch round cake pan. Turn dough onto lightly floured board. Punch dough down and shape it into loaf. Place with smooth side up into pan. Cover and let rise again in a warm place until almost doubled, about 45 minutes. Preheat oven to 375 degrees. Bake 25 to 30 mins, until loaf is golden. Remove from pan immediately and cool on rack.

Yield:  One loaf

Timing:  This is just bread so as soon as your little one has eaten grains with no issues and can gum foods, this is perfect.  I would say about 9 months

Difficulty:  5 out of 5; not using a bread machine makes this very time consuming, but I still think its worth it it's YUMMO!

Epicutie Rating:  YUMMY IN THE TUMMY--see right side of page for descriptions.
I had to make Little Joy stop eating this stuff.  She has taste buds like her Daddy.....BREAD :)  She used to hate bread now it is her best friend---go figure!

Wednesday, October 19, 2011

Banana Bread with Cinnamon Streusel Topping


This another one from Deceptively Delicious!  I promise this blog is not just for Deceptively Delicious recipes, but I was looking through my cookbooks last night and I had all the ingredients on hand for this one so I couldn’t resist.  I have a history of my banana bread not turning out, and once upon a time, I tried every banana and banana nut bread recipe that I could get my hands on and I was never happy with how they turned out.  After making this, I still feel like I am searching for that perfect recipe, but in the mean time this healthy, easy version will definitely scratch the itch!

Cinnamon Streusel Topping (Optional)

Ingredients:

  • 2/3 cup old-fashioned oats
  • 1/4 cup firmly packed brown sugar
  • 1 teaspoon cinnamon
  • 2 tablespoons melted butter or margarine

Steps:

  1. Stir together dry ingredients in a bowl. Stir in the butter or margarine. Set aside.
014 (640x425)

Banana Bread

Ingredients:

  • Nonstick cooking spray
  • 3/4 cup whole wheat flour
  • 1/2 cup all-purpose flour
  • 1/2 teaspoon baking soda
  • 1/4 teaspoon baking powder
  • 1/2 teaspoon salt
  • 1/2 teaspoon cinnamon (optional)
  • 1/2 cup firmly packed brown sugar
  • 1/4 cup canola or vegetable oil
  • 2 large egg whites
  • 1 1/2 cups banana puree
  • 1/2 cup cauliflower puree
  • 1 teaspoon pure vanilla extract

***I used 4 thawed frozen bananas to make 1 1/2 cups and I did not puree them beforehand.

016 (640x425)

Steps:

  1. Preheat the oven to 350 degrees F.  Coat a 9x5 inch loaf pan or 2 mini pans with cooking spray.
  2. In a bowl or a zip lock bag, mix the flours with the baking soda, baking powder, salt, and cinnamon, if using. Set aside.
  3. In a large mixing bowl, mix the sugar and oil with a wooden spoon until well combined. Mix in the egg whites, banana and cauliflower purees, and vanilla. Add the flour mixture and mix just until combined.018 (640x425)
  4. Pour the batter into a loaf pan.  Cover evenly with the streusel topping if using.
  5. Bake until a toothpick inserted into the center comes out clean, 55 to 60 minutes for the large loaf, 25 to 30 minutes for the mini loaves. Let cool on a rack for 5 minutes, then turn the bread out of the pan to cool before serving.

023 (640x425)

Timing: This could be given as early as 9 months, but be aware of the egg whites if your little one has an egg allergy.  Usually it does not affect children if it is cooked in something. I personally would not give

Difficulty: This was pretty simple, but I am giving it a 3 out of 5 because I had to get so many pans and bowls dirty!  Very few dirty dishes is a requirement for me to give something a low rating Smile.

Miscellaneous:

  • I used 3 mini loaf pans instead of 2.  I have a history of not evenly cooking my banana bread so I wanted to be cautious and not put too much batter into the pans.
  • When I put the cinnamon streusel topping on the batter, I gently mixed it with the top layer of the batter so that it would stay on the bread once baked.  It turned out very well.
  • To make cauliflower puree, simply steam raw cauliflower florets for 10 to 12 minutes and then puree.

Epicutie Rating: Yummy in the Tummy!!! ---See right side of the page for descriptions.

029 (640x425)

Friday, October 14, 2011

Chicken Enchiladas with Spinach

This is another recipe from Double Delicious, my second favorite cookbook!  This is such an easy, super healthy recipe, and I love that it gets Little Frances (and her Daddy) to eat such a large amount of spinach.  Plus, its delicious too.  This is one of my favorite things to cook (and eat)!
Ingredients:
  • Nonstick cooking spray
  • 1 T olive oil
  • 2 boneless, skinless chicken breasts, cubed (about ¾ lb)
  • ½ t garlic powder
  • ¼ t pepper
  • ½ c sweet potato puree or carrot puree
  • ¼ c sour cream
  • 1 c shredded cheddar cheese
  • 6 (9 inch) whole wheat tortillas
  • ½ c spinach puree
  • ½ c mild tomato salsa
Steps:
  1. Preheat the oven to 350 degrees F.
  2. Coat a 9 x 12 inch baking dish with cooking spray.
  3. Warm the oil in a large skillet over medium-high heat.
  4. Sprinkle the chicken with garlic powder and pepper.
  5. Cook the chicken 4 to 5 minutes, stirring occasionally, until it is cooked through and no longer pink in the center.
  6. Off the heat, mix the sweet potato or carrot puree, sour cream, and half the cheese into the skillet.
  7. Fill each tortilla with the chicken mixture and roll up. Place seam-side down in the prepared baking dish.
  8. Dot the tops of the enchiladas with spinach puree. Spoon the salsa over the enchiladas and sprinkle with the remaining cheese. DSC_0008
  9. Cover the dish with aluminum foil and bake until the cheese melts and filling is hot, 35 to 40 minutes.
Tips:
  • When I am in a hurry, I just buy rotisserie chicken at the grocery store and use the meat to skip steps 3-5.  Then I warm a skillet to melt the cheese mixture.
  • To make a 1/2 cup spinach puree I steam 1 large back of baby spinach for 2 minutes and then puree.  This purees easier with an immersion blender (which I don’t have).
Yield: 6 enchiladas
Timing: Because this is a difficult food to chew, I recommend no earlier than 15 months or until your baby has at least 8 teeth. I would NOT think that this would puree well for smaller children.  This is definitely a toddler food.
Difficulty: 2 of 5… super easy, super delicious!
Epicutie Rating: Yummy in the Tummy! --See right side of page for descriptions
Little Frances LOVES these!  It is her favorite food next to hamburgers.
Little Joy gave this a YUMMY IN THE TUMMY as well!  She gobbled it up and asked for more!  We served this along side some Mexican rice.


But before she will eat it, we must first feed baby!
DSC_0011
Ok, now Little Frances will eat them. Smile Yum yum.
DSC_0012

Monday, October 10, 2011

Chicken and Biscuits

Thus I continue on my adventures in cooking through the "Double Delicious" cookbook by Jessica Seinfeld. I have made a dozen or so recipes from this cookbook and have posted hardly any of them! I am determined to catch up before Baby #2 arrives (due in 10 days)! Also, most of my posts here on out will be geared for family meals.

Ingredients for Chicken:
  • 1 tablespoon olive oil
  • 2 boneless, skinless chicken breasts cubed OR about 10 boneless skinless chicken tenderloins which is what I use (about 1 lb; add more or less depending on how much you need)
  • 1/8 teaspoon fresh ground pepper
  • 1 can reduced fat cream of chicken soup
  • 1/2 cup low fat milk
  • 1/2 cup carrot puree (can also use pumpkin or sweet potato puree)
Ingredients for Biscuit Topping:
  • 1 1/2 cups whole wheat flour
  • 2 teaspoons baking powder
  • 1/4 teaspoon salt
  • 1/2 cup trans-fat-free, soft tub margarine (you can substitute any butter, if using regular butter it should be softened)
  • 1 large egg beaten
  • 1/4 cup honey
  • 1/2 teaspoon cream of tarter
  • 3/4 cup low fat buttermilk
Steps:
  1. Heat oil in an dutch oven or flame proof casserole dish.
  2. Sprinkle chicken with pepper.
  3. Add chicken to the casserole dish until it begins to brown.
  4. Stir in soup, milk and puree until all ingredients are well combine.
  5. Remove from heat.
  6. Preheat oven to 375 degrees.
  7. Prepare the biscuits by combining flour, baking powder, and salt in a large bowl.
  8. Rub the margarine into the flour with your finger tips until the mixture resembles coarse crumbs.
  9. Add egg, honey, cream of tarter and buttermilk all at once.
  10. Mix just until soft dough forms.
  11. Dot the dough over the chicken mixture.
  12. Bake 20-25 minutes, uncovered, until the biscuits are cooked through and golden on top.
Yield: 6 servings

Storage: 3 days in the refrigerator. I do not recommend freezing.

Timing: I would wait until your little one has teeth to grind and chew through the bread and chicken. For us this was 12 months. We gave it to Little Joy at 17 months.

Serve: Serve immediately. This is a great family food and goes great along side sauteed green beans or steamed broccoli. OR a green salad for the adults, YUM!!!

Difficulty: 3 out of 5; easy and fast but does require a little prep time so I gave it a three vs. a two.

Epicutie Rating: Yummy in the Tummy--see right side of page for descriptions
Little Joy seems to like everything the first 2-3 times she has something, then if we have it several days in a row as leftovers, she is waving us off saying "All done" in sign language and verbally saying "All done chicken. No Thank You". HA!

Step 3: Cooking chicken in oil

Step 5: Remove from heat; all chicken ingredients combined.

Step 10: All dough ingredients combine

Ready to serve

Served to Mommy and Daddy with salad :)

Sunday, September 4, 2011

Creamy Whole-Grain Risotto

Up next in my review of recipes from Jennifer Seinfeld's "Double Delicious" is her Creamy Whole Grain Risotto. This is another of her recipes that boasts its quick, which always catches my eye! I encourage all of you buy her book(s); they are great, healthy and live up to their DELICIOUSNESS!!!! Here is the recipe with a few of my minor alterations.

Ingredients:
  • 2 cups short grain brown rice (this took me a week to find and it is not cheap; check your health/organic food aisle)
  • 2 tablespoons olive oil
  • 3/4 large onion pureed or very finely chopped
  • 4 garlic cloves pureed or very finely chopped
  • 2 cups low fat, reduced sodium chicken broth
  • 1 cup cauliflower puree (if you are using the ice cube tray method, the conversion is approximately 1.5 cubes=1/4 cup)
  • 1 cup carrot puree
  • 1 spring fresh basil (big sprig, especially if it is from your backyard like mine)
  • 1/2 teaspoon salt (optional)
  • 1/4 teaspoon fresh ground pepper
  • 2 tablespoon trans fat free tub butter (can substitute with regular butter if you want)
  • 1/2 cup grated Parmesan
Steps:
  1. In medium saucepan, add brown rice and 4 cups water; bring to a boil, immediately cover and reduce heat to a low simmer.
  2. Cook for 45-50 minutes (this is longer than the recipe said, but I wanted to be sure it was soft for Little Joy) or until tender.
  3. Remove from heat and allow the rice to steam with the lid on for 5 minutes.
  4. Drain, if needed (I did not need to).
  5. Puree onion and garlic together, set aside.
  6. Heat oil in a large pot/skillet over medium-high heat.
  7. When oil is hot, add purred onion and garlic (step 5).
  8. Cook until onions soften (10 minutes) but not brown.
  9. Add rice (prepared in steps 1-4), broth, both purees, basil, salt and pepper.
  10. Simmer on low heat until 1/4 of liquid evaporates (about 5-10 minutes).
  11. Remove from heat, stir in butter and remove basil.
  12. Serve immediately.
  13. Sprinkle with Parmesan after you plate the item (to make sure each serving has Parmesan since this is a key ingredient if you ask me).
Yield: The book says 6 servings, but it was more like 7-8 for us.

Storage: Refrigerator for 2-3 days; freezer for a month. I have not tried heating from the freezer yet though!!

Timing: Based on your child's ability to chew, this can be given as early as around 10 months I would say.

Difficulty: 2 out of 3; if you do not count the separate steps of making the purees, this pulls together quickly and easily.

TIPS:
  1. Make the rice ahead of time and set aside (steps 1-4).
  2. I puree the onion and garlic vs. chop since I know my fine chopping skills are lacking and Little Joy like onion and garlic but not a BIG OLE chunk of it.
  3. If you are using frozen purees, thaw them in the fridge the night before and ensure they are completely thawed before adding. This saves on the time the risotto has to cook in step 10.
  4. Although this dish can stand alone, you may decide to serve with chicken on the side or mixed in if you want some variety. I would recommend making the chicken from the Pasta with Pea Pesto and Chicken Post; it went along nicely with it. Guys like the meat with this dish.
Epicutie Rating: Yummy in The Tummy--See right side of page for descriptions
Little Joy thought this was a funny finger food. She gobbled up over half what we served her right away and then slowed down. I beginning to learn Little Joy loves EVERYTHING the first 2-4 times she has something, then the newness wears off :)

I am not sure what I did with the pictures; I will add once I find them!!!

Friday, August 26, 2011

Chicken and Apple Balls


I found this recipe in The Healthy Baby Meal Planner and it looked like fun!  These healthy and delicious balls would work well for a variety of ages.  They make a great meal for your baby, and healthy snack for any older children.

Ingredients:

  • 2 teaspoons light olive oil, and extra for frying 
  • 1 onion, finely chopped
  • 1 large Granny Smith apple, peeled and grated
  • 2 chicken breast fillets, cut into chunks
  • 1/2 tbsp fresh parsley
  • 1 tbsp fresh thyme or sage
  • 1 chicken bouillon cube, crumbled (from 1 year)
  • 1 cup fresh white breadcrumbs, may substitute 1 cup of oatmeal
  • salt and freshly ground pepper (from 1 year)
  • all purpose flour for coating

Steps:

  1. Cook chicken chunks in skillet on medium high heat until cooked all the way through.
  2. Heat 2 tsp of olive oil in a pan and sauté half of the onions
  3. Peel and grate the apple, squeeze out excess juice with your handDSC_0097
  4. Combine all ingredients into a food processor, and pulse until well mixedDSC_0098DSC_0099
  5. The mixture should be nice and pasty and stick together fairly well.  Roll into golf sized balls.DSC_0103
  6. Fill pan with light layer of olive oil and bring to medium-high heat.
  7. Lightly coat balls in flour, and pan fry for approximately 5 minutes.DSC_0104
  8. Finished product!DSC_0106

Yield: Between 20 and 25 balls.

Timing: If omitting the above mentioned spices, this could be given as early as 9 months.  12 months if using all the spices.  The apple and chicken balls are very soft, and can be easily mashed in your babies teeth.

Misc: Whenever making any type of meatball or loaf that calls for breadcrumbs, I usually substitute it for oatmeal.  It tastes just as good, and it’s a little healthier!

Storage: I have saved half of the apple and chicken balls for the freezer (before coating with flour), where I will keep them up to one month in air tight Tupperware.  The balls that I have already cooked up will stay in the fridge for one week.

Difficulty: I give this a 2 out of 5!  There were a lot of little side steps before you get to the final mixture, but they were easy… even for me.

Epicutie Rating: Not so sure I like it… yet! Little Frances is coming off getting her first set of molars which has made for much pickier eating that usual.  However, I was encouraged by the several bites that she took, and I will try this again tomorrow.

DSC_0111

I am a warrior!


Little Tummy Yummies

About the Authors

This blog was started by two Babywise pen pals to document our adventures in high chair manners, making our own baby food and doing our bests to raise happy, healthy, thriving little ones!

Epicutie #1

Epicutie #1

Little Joy at 2 years, Sept 2012

Epicutie #2

Epicutie #2
Little Frances

Epicutie #3

Epicutie #3
Little Asher at 11 months, Sept 2012

Epicutie #4

Epicutie #4
Little Elizabeth, July 2013

  • Yummy in the Tummy: Epicutie thoroughly enjoyed each bite
  • Somewhat yummy: Epicutie seemed to somewhat enjoy the food at first, but seemed to like it less with subsequent bites
  • Not so sure I like it...yet: Epicutie somewhat rejected the first bites, but seemed intrigued. The next exposure may be better!
  • Confused: Epicutie rejected the first bites, perhaps due to texture or strong flavor.
  • Sour Puss: Epicutie gave a sour face indicating she did not like the food. However--if at first you do not succeed, try, try again!


  • Munchkin Land Designs Elements by Crisdam Designs

    Click Here for Other Awesome Giveaways!

    Labels

     
    Designed by Munchkin Land Designs • Copyright 2011 • All Rights Reserved