Welcome little blessing! You are well loved already!
Monday, September 15, 2014
Welcome to the World Epicutie Patricia
The sixth epicutie, Little Patricia, joined Little Frances and Little Elizabeth on September 12, 2014 at 3:24 pm weighing 7 lbs 4 oz and 19.5 inches long.
Tuesday, February 4, 2014
Butternut Squash Mac and Cheese
This recipe was inspired by a Parents Magazine recipe. The original one had chunks of butternut squash whereas mine has puree; it saves me time just having purees already made vs having to cook the chunks of squash when I make this. That is how this recipe was born....Ingredients
- 1 1/2 cups butternut squash puree (less if you want the squash taste less pronounced)
- 1/2 lb elbow noodles of your choice
- 2 tablespoons butter (we used butter alternative to decrease the dairy amount in here for dairy intolerant Little Asher)
- 2 tablespoon flour or tapioca flour
- 1 1/2 cups almond milk (or reduced fat milk or other milk alternative)
- 1/4 teaspoon nutmeg
- dash of salt
- dash of white pepper
- 1 3/4 cups cheese (I used a mixture of part skim mozzarella and reduced fat cheddar--the high fat content is what bothers lactose intolerant folks; If I could do what I wanted I would use WHITE CHEDDAR)
Steps:
- Preheat oven to 375 degrees.
- Grease a medium casserole dish.
- Cook the elbow noodles 2 minutes less than the box says. Drain and place in a large bowl.
- Meanwhile, melt butter over low heat.
- Whisk in flour and cook for 2 minutes.
- Slowly whisk in milk. Bring mixture to a boil, add nutmeg, salt and pepper, then simmer. Cook for 3 minutes; stirring occasionally making sure the lumps mix out.
- Add cheese and squash and stir until cheese is melted.
- Stir cheese sauce into pasta and transfer to greased casserole dish.
- Bake for 10-15 minutes.
NOTE: You can top this with turkey bacon crumbles or buttered crumbled wheat crackers or more cheese. Get creative. This time I tried buttered crumbed wheat crackers and it added a nice texture/
Difficulty: 2 out of 5; with the puree already made this was easy peasy! I made it about an hour before I wanted to bake it, covered it in the oven and when it was almost time to eat I took the lid off and baked. You could also make this during nap time or in the morning and refrigerate until ready to bake. Increase the bake time if you refrigerate.
Timing: I would give this to mine as early as 9 months depending on their chewing abilities. Mine love finger foods so 9 months is good for mine---otherwise around 12 months is perfect!
Epicutie Rating (see left side of page for rating descriptions):
- Little Joy: Yummy in the tummy! She loved the crunch--she's my one with a bit of a mature pallete. She likes lots of flavors like her mommy.
- Little Asher: Yummy in the tummy! He does not have mac and cheese much because it is too much dairy but since there is not as much dairy to pasta with the squash in there, it is quite a treat! He gobbled up two hardy helpings.
Step 6: Whisk in milk, nutmeg, salt and pepper with butter and flour
My Squash Puree
Noodles awaiting sauce
Shredded cheeses
Step 7: Add cheese and squash to milk mixture
Before adding a topping
Topping added
YUMMMM
And its done!
Served with ham and steamed peas
Little Asher going in...
Hows it taste?
"MMMMM"
"Watch me mommy" says Little Joy
And all she says is CHEESE after it
Labels:
12 months,
Bake/Roast,
Combo,
Dairy,
Family Foods,
Finger Food,
Kelly,
Pasta,
Toddler,
Veggie
Thursday, January 23, 2014
Vegetable Fried Rice
This recipe is inspired by a skinnytaste.com recipe! If your toddler or preschooler has not tried their hand at chop sitcks, grab some for the family to enjoy this meal. My epicuties gobble this up and I think its partly because of the fun utencils!Ingredients
- 3 cups leftover cooked brown rice (or any other rice or quinoa)
- 2 eggs, scrambled (or 2 egg whites, and 1 whole egg scrambled )
- 1 tbsp oil of your choice (coconut, olive, etc)
- 2 tsp splashes sesame oil (optional)
- 1/2 onion, chopped
- 1 yellow bell pepper, finely chopped
- 2 cloves garlic, diced
- 5 scallions, chopped, whites and greens separated
- 1/2 cup shredded carrots
- cooking spray
- 1 cup ready-to-eat shelled edamame
- 3 tbsp low sodium soy sauce, tamari for gluten free (or more to taste)
- salt and fresh pepper to taste
Steps
- Make your rice (I made mine in the rice cooker the morning we wanted to eat this and refrigerated it until I was ready to use it)
- Whisk eggs season with salt and pepper. In a hot wok/large pan, spray a little oil and cook the eggs. When cooked, remove from pan and set aside.
- On medium high heat. Add oils and cook onions, bell pepper, scallion whites, and garlic. I cooked until soft to be more palatable for my little ones, but if you want extra crunch then cook 60 seconds on high heat
- Add carrots and cook for an additional 2-4 minutes (again less if you want it extra crunchy).
- Add brown rice/grain and stir well a few minutes to heat through.
- Add cooked egg along with soy sauce, scallion greens and edamame, mixing well for about 3-4 minutes. Add more soy sauce if you want
- ENJOY!
Yield: Approximately 6 one cup servings....we ate most of it. It went down easy!
Timing: 1 year; it would be a mess, but if I had made this when mine were younger I would have given it as young as one. I would avoid the edamame or cut them in half for younger toddlers. Babe three that is baking will have it sooner than my older two.
Allergies: This has soy AND egg so be sure you watch this food if its one of the first time your littles has eaten these ingredients.
Epicutie Ratings:
- Little Joy: Yummy in the Tummy-She scafed this down a long with a side of turkey sausage. She looooves to use the chopsticks
- Little Asher: Somewhat Yummy-He ate his whole bowl but you could tell he liked it but not LOVED it. He was not as into the edamame this time as he was last time.
Overall, this was a hit...we will be making it more often!
With turkey sausage
Little Joy
He actually got good at it but we were in a hurry to finish dinner and head to Awanas so I could not keep stopping to record!
Labels:
12 months,
Combo,
Egg,
Family Foods,
Finger Food,
Grain,
Kelly,
Toddler,
Veggie
Tuesday, October 29, 2013
Raw Green Applesauce
I know that I have yet to post on Green Smoothies as I promised and as my penpal reminded me Anyway, I found this recipe and I had to try it! It was just what a raw recipe should be – easy, fun. I enlisted the help of Little Frances to help me make it! Its so fun to have extra hands in the kitchen as our epicuties get bigger!
Ingredients:
- 4 apples
- 1 banana
- 2 to 3 cups chopped romaine lettuce
- ½ teaspoon cinnamon
- up to 2 cups water
- Chop apples into pieces, removing the core.
- Place half the water and the rest of the ingredients together in a blender or a food processor.
- Blend/process!
- Add more water if needed until you reach desired thickness.
Storage: This can be kept in the freezer for up to 2 months. In the fridge, I would recommend no longer than 2 or 3 days since it is a raw recipe.
Difficulty: 1 out of 5. Easy, like most of the recipes I post on here.
Timing: 8 months. This is about the average age for introducing greens to small babies from what I can find. Some recommend earlier, some recommend later. If you have concerns, speak with your pediatrician.
Miscellaneous: Our applesauce turned out a little brown since I had bought a pre chopped and rinsed salad kit that contained both red and green romaine lettuce. I also made the mistake of adding all of the water at once so it came out a little more soupy than saucy! I recommend starting with a more conservative amount of water and adding as desired.
Epicutie Ratings (see left side of the page for ratings):
Little Frances: Somewhat Yummy! Little Frances’ enthusiasm may be due to the fact that she helped make it but she seemed to like it. It lost her interest after a while.
Little Elizabeth: Yummy in the Tummy! I failed to take a picture of Little Elizabeth, but she has loved it all three times she has eaten it!
Labels:
8 months,
Apple,
Combo,
Dairy Free,
Family Foods,
Fruit,
Gluten Free,
Great Greens,
No Cook,
nut free,
Puree,
Stori,
Toddler
Monday, September 23, 2013
Turkey Sloppy Joes

I got this recipe from "Once a Month Mom"'s dairy free gluten free menu---I LIVED on this site when I was on the elimination diet with Little Asher and a lot since then because he dairy intolerant....still. The original recipe makes 8 servings and its just too much so I halved it to see if it still worked well and it does--I had to alter the cooking times a bit too, so here is my version!
I also LOVE slow cooker meals because I can get it in there before the kids are up or when they are busy :)
Ingredients:
- 1 tablespoon olive oil
- 1 medium onion, minced
- 3 carrots, finely minced
- 1 pounds ground turkey
- 1/2 cup gluten free ketchup, fruit juice sweetened preferred
- 1 tablespoons brown sugar
- 2 teaspoons gluten free yellow mustard
- pinch of salt, optional
- pinch of ground pepper
Steps:
- Heat oil in skillet over medium to medium-high heat. Sauté onion and carrots until onion is translucent, then add ground turkey.
- Using a heat safe spatula, break up meat in skillet until turkey is completely cooked about 5 more minutes.
- Transfer to crock and add rest of the ingredients.
- Mix well, cover then cook on high for an hour and lower to low for about 4-6 hours until flavors are combined and vegetables are softened.
- Check about 1/2 hour before eating and see if the sloppy joes look too “juicy”. If they are, I remove the lid of the crock and cook on high, stirring periodically until the right consistency is reached. When the recipe is halved it is usually the right consistency when ready to eat.
Difficulty 3 out of 5; I only give it a 3 vs 2 because it is not a dump into the crock pot and go---you have to brown the meat and cook the veggies first.
Tip: This is a GREAT freezer meal. Do steps one and two, allow to cool, place in a freezer bag along with all other ingredients--FREEZE! When you are ready to use it, thaw over night, place in crock pot and cook on low for about 7 hours and ENJOY! I am thinking of all you working moms out there!
Timing: Unless this is pureed, I would recommend waiting until around 14 months or so. It can be strange to eat and difficult unless you have a palete used to these things or VERY good chewing skills.
Serve: We serve this over a piece of homemade bread (also easy to do before you leave for work) along with another veggie! Double veggies is always good in my book!
Epicutie Ratings: (see left side of page for rating descriptions)
Little Joy: Somewhat Yummy; when we first had this about a year ago she went crazy over it but now she eats it just without huge zesto--which is fine. Cant love EVERY food, but tolerate every food is the goal!
Little Asher: Yummy in the Tummy; it took him a little while to grow into liking this, but he is ON BOARD!
Meat and veggies sauteed
Everything mixed and ready to cook in the crock pot
4-6 hours later!
Served with potaoes and lima beans (we were in desperate need of a grocery store run!)
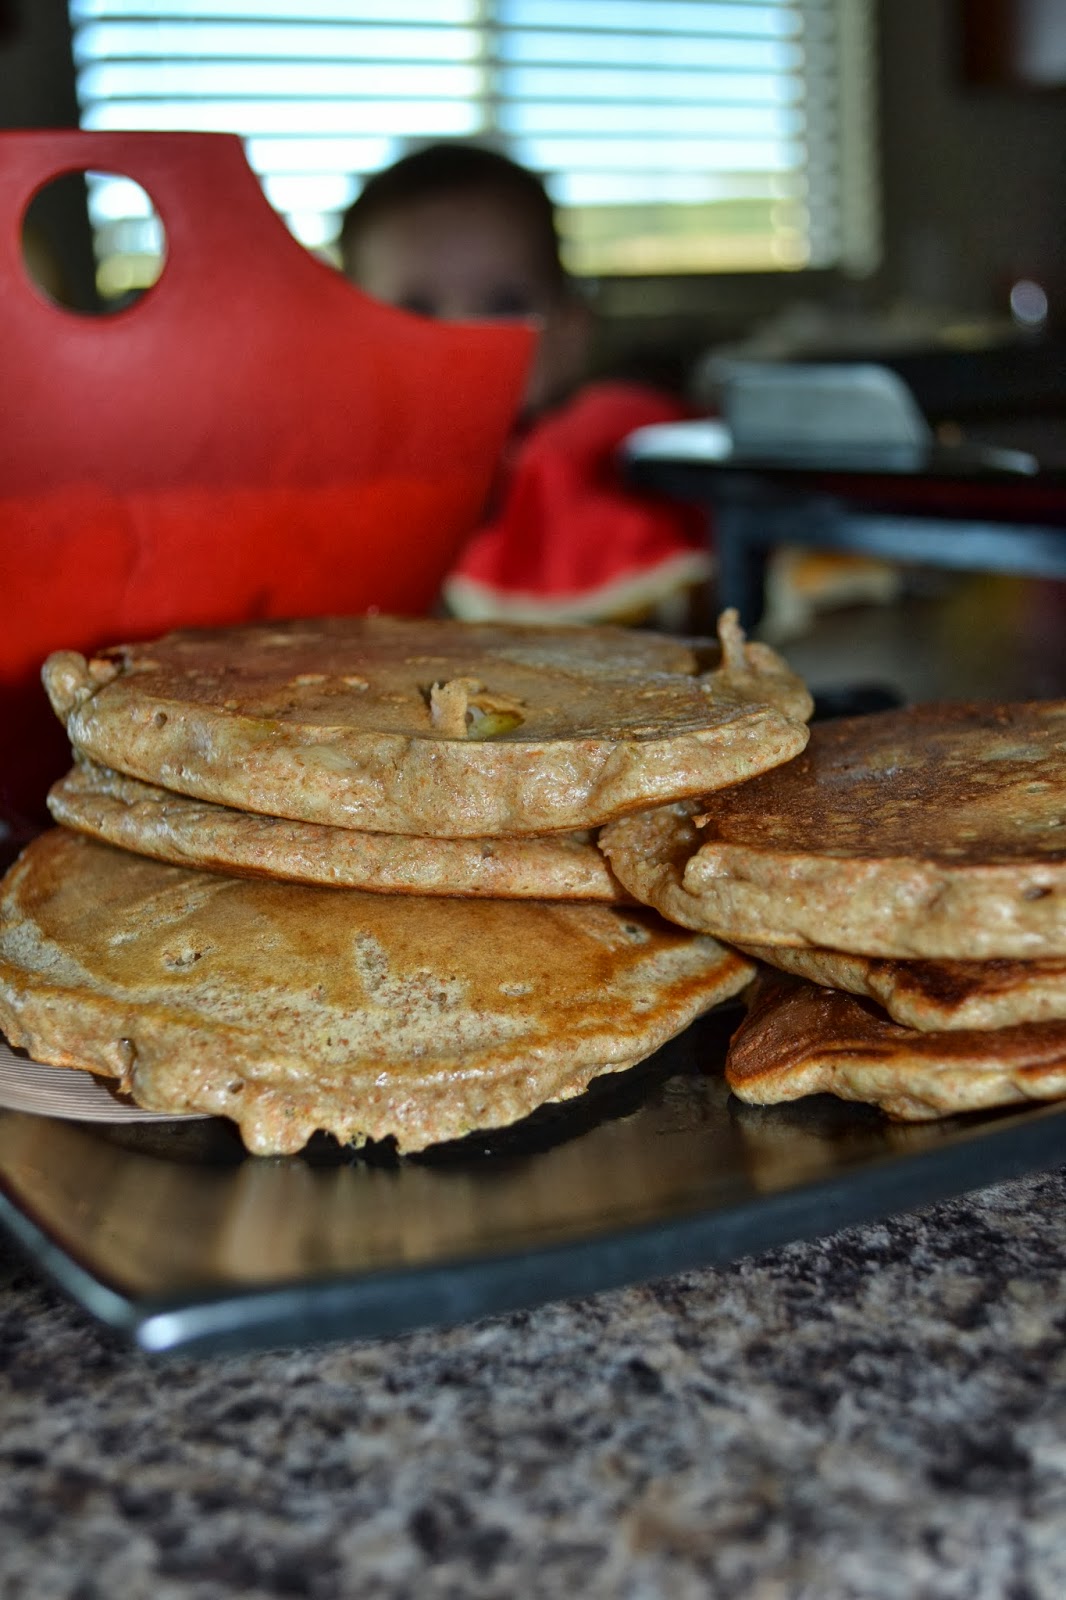
Whole Wheat Banana Pancakes

Bananas. Oh bananas. These are always plentiful in my house but sometimes, they get too ripe too fast for us, so I use them in other ways and this recipe is one way! This recipe is from 100 days of real food, with some alterations for dairy free!
Ingredients:
- 2 cups whole-wheat flour (I use King Arthur’s organic white whole-wheat flour)
- 2 teaspoons baking powder
- 1 ½ teaspoons baking soda
- ½ teaspoon salt
- 1 tablespoon honey
- 2 large eggs, lightly beaten
- 1 ¾ cups almond milk (or any other milk alternative, for those not avoiding dairy use regular milk!)
- 2 tablespoons unsalted butter (we use Earth's Best Soy Free lactose free butter), melted
- 2 ripe bananas, mashed
- 100% pure maple syrup for serving
Steps:
- In a large bowl, whisk together the flour, baking powder, baking soda, and salt.
- In a separate bowl, mix together honey, eggs, milk, and 2 tablespoons of melted butter.
- Make a well (hole) in the center of the flour mixture and pour the liquid mixture into the center; mix to combine but do not over mix!
- Gently fold the mashed bananas into the batter with a spatula.
- Heat a griddle or sauté pan over medium-high heat (if you are using a pan swirl some butter in there, if using a griddle this isn't needed). Add pancake batter using a 1/4 or 1/3 measuring cup.
- When the pancakes have begun brown on the bottom and start to bubble on the top, flip them over to cook the other side.
- Serve with maple syrup!
Difficulty: 2 out of 5; for pancakes, this is pretty easy!
Tip: Freeze leftover for a quick breakfast another day!
Timing: I serve pancakes as early as about 10 months since my babes show good chewing ability, but by 12 months I think these would be great for any toddler as long as they are cut up small!
Epicutie Rating: (see left side for rating descriptions)
Labels:
12 months,
Breakfast,
Combo,
Dairy Free,
Family Foods,
Fruit,
Grain,
Kelly,
Toddler
Thursday, September 19, 2013
Little Elizabeth’s First Food
So I know that I am way behind on my Green “Milkshake” post, but in the meantime, let me share with you Epicutie Elizabeth’s first food…
WATERMELON!!!
This was not pureed and she was two weeks shy of 6 months! I would have never been so unscientific with little Frances or given her solids before 6 months or something that she had to chew herself, but something about surviving parenthood the first time makes you more confident the second time around and sometimes you throw caution to the wind!
Also, here is how we celebrated her 6 month birthday…
FROZEN YOGURT!!!
That one was her daddy’s idea.
And yes, both foods got a “Yummy in the Tummy” rating .
Subscribe to:
Posts (Atom)