HomeAbout the BlogMeet the ChefsMeet the EpicutiesMeal IndexContact Us

Tuesday, October 29, 2013

Raw Green Applesauce

I know that I have yet to post on Green Smoothies as I promised and as my penpal reminded me Smile, but I sat down to do it and realized that it was going to be much more involved than I had originally thought… and I just have not had the time. I wanted to try a few new recipes before I do that big post, but while I was searching I found this recipe at RawFamily.com. I love raw recipes! Its not a movement that I see myself joining, but raw usually translates to “easy” and “healthy” and I need to start frequenting more raw recipe websites and cookbooks!
Anyway, I found this recipe and I had to try it! It was just what a raw recipe should be – easy, fun. I enlisted the help of Little Frances to help me make it! Its so fun to have extra hands in the kitchen as our epicuties get bigger!
Ingredients:
  • 4 apples
  • 1 banana
  • 2 to 3 cups chopped romaine lettuce
  • ½ teaspoon cinnamon
  • up to 2 cups water
Steps:
  1. Chop apples into pieces, removing the core.
  2. Place half the water and the rest of the ingredients together in a blender or a food processor.
  3. Blend/process!
  4. Add more water if needed until you reach desired thickness.photo (21)
Yield: 3 cups
Storage: This can be kept in the freezer for up to 2 months. In the fridge, I would recommend no longer than 2 or 3 days since it is a raw recipe.
Difficulty: 1 out of 5. Easy, like most of the recipes I post on here.
Timing: 8 months. This is about the average age for introducing greens to small babies from what I can find.  Some recommend earlier, some recommend later. If you have concerns, speak with your pediatrician.
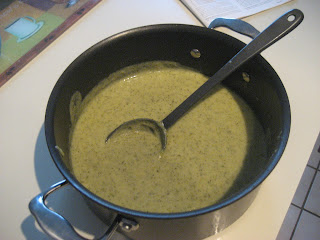
Miscellaneous: Our applesauce turned out a little brown since I had bought a pre chopped and rinsed salad kit that contained both red and green romaine lettuce. I also made the mistake of adding all of the water at once so it came out a little more soupy than saucy!  I recommend starting with a more conservative amount of water and adding as desired.
Epicutie Ratings (see left side of the page for ratings):
Little Frances: Somewhat Yummy! Little Frances’ enthusiasm may be due to the fact that she helped make it but she seemed to like it. It lost her interest after a while.
photo (22)
Little Elizabeth: Yummy in the Tummy! I failed to take a picture of Little Elizabeth, but she has loved it all three times she has eaten it!

Monday, September 23, 2013

Turkey Sloppy Joes


I got this recipe from "Once a Month Mom"'s dairy free gluten free menu---I LIVED on this site when I was on the elimination diet with Little Asher and a lot since then because he dairy intolerant....still.  The original recipe makes 8 servings and its just too much so I halved it to see if it still worked well and it does--I had to alter the cooking times a bit too, so here is my version!

I also LOVE slow cooker meals because I can get it in there before the kids are up or when they are busy :)

Ingredients:

  • 1 tablespoon olive oil
  • 1 medium onion, minced
  • 3 carrots, finely minced
  • 1 pounds ground turkey
  • 1/2 cup gluten free ketchup, fruit juice sweetened preferred
  • 1 tablespoons brown sugar
  • 2 teaspoons gluten free yellow mustard
  • pinch of salt, optional
  • pinch of ground pepper

Steps:

  1. Heat oil in skillet over medium to medium-high heat.  Sauté onion and carrots until onion is translucent, then add ground turkey.
  2. Using a heat safe spatula, break up meat in skillet until turkey is completely cooked about 5 more minutes.
  3. Transfer to crock and add rest of the ingredients.
  4. Mix well, cover then cook on high for an hour and lower to low for about 4-6 hours until flavors are combined and  vegetables are softened.  
  5. Check about 1/2 hour before eating and see if the sloppy joes look too “juicy”.  If they are, I remove the lid of the crock and cook on high, stirring periodically until the right consistency is reached.  When the recipe is halved it is usually the right consistency when ready to eat.
Difficulty 3 out of 5; I only give it a 3 vs 2 because it is not a dump into the crock pot and go---you have to brown the meat and cook the veggies first.

Tip:  This is a GREAT freezer meal.  Do steps one and two, allow to cool, place in a freezer bag along with all other ingredients--FREEZE!  When you are ready to use it, thaw over night, place in crock pot and cook on low for about 7 hours and ENJOY!  I am thinking of all you working moms out there!

Timing:  Unless this is pureed, I would recommend waiting until around 14 months or so.  It can be strange to eat and difficult unless you have a palete used to these things or VERY good chewing skills.

Serve:  We serve this over a piece of homemade bread (also easy to do before you leave for work) along with another veggie!  Double veggies is always good in my book!

Epicutie Ratings:  (see left side of page for rating descriptions)
Little Joy:  Somewhat Yummy; when we first had this about a year ago she went crazy over it but now she eats it just without huge zesto--which is fine.  Cant love EVERY food, but tolerate every food is the goal!
Little Asher:  Yummy in the Tummy; it took him a little while to grow into liking this, but he is ON BOARD!

Meat and veggies sauteed 

Everything mixed and ready to cook in the crock pot

4-6 hours later!

Served with potaoes and lima beans (we were in desperate need of a grocery store run!)

Whole Wheat Banana Pancakes


Bananas.  Oh bananas.  These are always plentiful in my house but sometimes, they get too ripe too fast for us, so I use them in other ways and this recipe is one way!  This recipe is from 100 days of real food, with some alterations for dairy free!

Ingredients:

  • 2 cups whole-wheat flour (I use King Arthur’s organic white whole-wheat flour)
  • 2 teaspoons baking powder
  • 1 ½ teaspoons baking soda
  • ½ teaspoon salt
  • 1 tablespoon honey
  • 2 large eggs, lightly beaten
  • 1 ¾ cups almond milk (or any other milk alternative, for those not avoiding dairy use regular milk!)
  • 2 tablespoons unsalted butter (we use Earth's Best Soy Free lactose free butter), melted
  • 2 ripe bananas, mashed
  • 100% pure maple syrup for serving

Steps:

  1. In a large bowl, whisk together the flour, baking powder, baking soda, and salt.
  2. In a separate bowl, mix together honey, eggs, milk, and 2 tablespoons of melted butter.
  3. Make a well (hole) in the center of the flour mixture and pour the liquid mixture into the center; mix to combine but do not over mix!
  4. Gently fold the mashed bananas into the batter with a spatula.
  5. Heat a griddle or sauté pan over medium-high heat (if you are using a pan swirl some butter in there, if using a griddle this isn't needed).  Add pancake batter using a 1/4 or 1/3 measuring cup.
  6. When the pancakes have begun brown on the bottom and start to bubble on the top, flip them over to cook the other side.
  7. Serve with maple syrup!
Difficulty:  2 out of 5; for pancakes, this is pretty easy!

Tip:  Freeze leftover for a quick breakfast another day!

Timing:  I serve pancakes as early as about 10 months since my babes show good chewing ability, but by 12 months I think these would be great for any toddler as long as they are cut up small!

Epicutie Rating:  (see left side for rating descriptions)
  • Little Joy:  Yummy in the Tummy!  My kids LOVE pancakes so I knew this would be a hit!
  • Little Asher:  Yummy in the Tummy!  He ate SIX PANCAKES!!!!!!!  I had to cut him off!
The batter

THE GOODS!!!!

"Helping"


He couldn't wait for me to get the camera out!

YUM!

Going back for more!

Thursday, September 19, 2013

Little Elizabeth’s First Food

So I know that I am way behind on my Green “Milkshake” post, but in the meantime, let me share with you Epicutie Elizabeth’s first food…

photo (12)

WATERMELON!!!

This was not pureed and she was two weeks shy of 6 months! I would have never been so unscientific with little Frances or given her solids before 6 months or something that she had to chew herself, but something about surviving parenthood the first time makes you more confident the second time around and sometimes you throw caution to the wind!

Also, here is how we celebrated her 6 month birthday…

photo (13)

FROZEN YOGURT!!!

That one was her daddy’s idea.

And yes, both foods got a “Yummy in the Tummy” rating Smile.

Wednesday, September 11, 2013

Cheesy Broccoli Potato Soup


*Updated reviews 9/10/13, 
Original post on 3/5/12*
I LOVE my Parent's Magazine supplemental recipe book; I got one last year and just got another one in the March issue! Since I received it I have been anxious to post and review recipes. So far I have already cooked two things from it.

There is something nostalgic and soothing about nice big bowl of soup. I vividly remember cooking Campbell's chicken noodle soup with my mom even before I was in kindergarten; it was the first thing she let me cook "on my own". So when I saw this recipe for cheesy broccoli potato soup I couldn't wait to test it out.

You will be surprised how smooth and easy this soup goes down and it has only a light broccoli taste!!

Ingredients:
  • 2 tsp olive oil
  • 1/2 sweet onion, coarsely chopped
  • 1 medium potato peeled and diced into 1/4 inch chunks
  • 3 cups fresh broccoli chopped (I think frozen would work fine too)
  • 3 cups low sodium vegetable stock
  • 1 cup reduced fat mozzarella cheese (plus a little more for garnish)
  • Salt and Pepper to taste (optional)
 

1) Chop onion coarsely
For those of you who have seen the movie "Help" they said if you held a match between your teeth when you cut onions you wouldnt cry---MYTH BUSTED, it does not work!

2)  Heat oil in large stock pot

3)  When oil is hot, add onion and sautee for 5-7 minutes

4)  Meanwhile coarsely chop the broccoli and potato (peel and wash first of course).

5)  Add stock, broccoli and potatoes to pot; bring to a boil.

 6)  Reduce heat, cover and simmer for 20 minutes or until broccoli and potatoes are soft.

7)  Remove from heat and allow to cool slightly.

8)  Pour soup into food processor or blender, add cheese and puree until desired consistency.

9)  Add salt and pepper to taste, stir.

9)  Serve warm with a little shredded cheese on top for garnish.


Epicutie Little Joy digging in
(I should give background, she had a food strike at lunch and striked for an hour and half carrying on in her high chair wanting to eat everything BUT what was prepared for her.  After an hour and a half of listening to her scream and cry it was nap time so she went to bed with no lunch. She is a hearty eater so she was most definitely starving by dinner, which we had early since we knew she would be hungry.  SO she might have loved it because of that)

Remnants of her second bowl

Yield:  4 adult servings; its only 170 calories per bowl so we had a little more than one bowl.

Serve:  Warm topped with a little shredded cheese along side a salad (for adults) or chicken nuggets or sandwich.  We had grilled cheese with it.

Timing:  12 months since there is not much to this recipe ingredient wise and its also smooooth :) which means it does not require much, if any, chewing

Difficulty:  2 out of 5; super easy and quick.  This is something you could make while your kids take their afternoon nap and then reheat at dinner time.  That is what we did.

Epicutie Rating: 
Little Joy:  Yummy in the Tummy -- see left side of page for descriptions
Little Joy loved, loved this!!  We will be making this more next fall/winter!  Be warned breastfeeding mommies who eat this, broccoli can give your nursing babies gas; It sure did Little Asher!!!
Little Frances:  Yummy in the Tummy
Little Asher:  Yummy in the Tummy  Little Asher had FOUR BOWLS of this along with some pork loin, hungry boy!!!

Monday, August 26, 2013

Banana Porridge


If you want easy---this is IT....Banana Porridge!   This is my go to breakfast for my kids and has been since they were both about 15 months old.

Ingredients:

  • Ripe Banana
  • 1/2 Cup Quick Oats 100% Oats Oatmeal
  • 1 Cup Water (or Milk)
  • Dash of Salt
Steps:
  1. Cut the banana into small pieces (I usually cut it lengthwise in an X and then slice horizontally making small triangle pieces.  Place in a large cereal bowl.
  2. Add oats, water and dash of salt into bowl.  Stir to combine.
  3. Microwave for two minutes.
  4. Remove from microwave and allow to stand for at least 5 minutes (so it can thicken).
  5. Serve...watch out its hot!
Yield:  I split this between my 21 month old and 3 year old and its JUST enough for them both so---two hearty toddler servings.

Note:  I have also used applesauce and cinnamon vs bananas and even strawberries too!

Timing:  As early as 9 months if they are good at chewing

Difficulty:  1 out of 5; easy as it gets!

Epicutie Rating:
Little Joy and Little Asher:  YUMMY IN THE TUMMY!  Sometimes Little Joy gets tired of having it day in and day out but she always gobbles it up and then sometimes says "so tomorrow we will have something new" :)

A Dinner with an Epicutie

A glimpse of a Little Tummy Yummies meal around our house!

Easy Peasy Baked Cod, Kale Chips, Wild Rice and Zucchini, Mushroom, Onion Sauté with Parmesan


To the right of the toothpicks are garlic kale chips


An epicuite's plate

Zucchini and Kale Chips
(She ate her mushrooms already)


She loved the Kale Chips
"I want a big pile of those Mommy"
She's our adventurous eater, always willing to try new things---and she usually likes them the first time!


Friday, August 16, 2013

Tomato, Carrot and Kale Spaghetti


So this recipe was created by my friend Meg for her little boy Calvin, and I asked her if I could feature it on LTY.  I made this recipe last month and I think that it is going to be my new go-to spaghetti sauce.  I doubled the recipe and froze the sauce and its so nice to have on hand in a pinch.  Please ignore Little Frances’ reaction – she may be the only child in history to not like marinara sauce! This recipe is delish.
Ingredients:
  • 1 tablespoon olive oil
  • 1/2 of a large onion chopped, about 1/2 cup
  • 2 cloves of garlic, or a teaspoon of jarred garlic
  • a handful of baby carrots chopped, about 1/2-2/3 cup
  • 2 16 ounces cans of whole tomatoes, no salt added.
  • 1/2 teaspoon basil
  • 1/2 teaspoon oregano
  • 1 teaspoon salt
  • 1/4 teaspoon black pepper
  • 2 shakes of red pepper flakes or 1/8 teaspoon – omitted
  • 2 handfuls of chopped kale, approximately 1 cup
  • Spaghetti or other type of pasta – we used spinach spaghetti to add just a little extra green to our meal!
Steps:
  1. Heat oil in a saucepan.
  2. Add onion, garlic and carrots and cook for 5-7 minutes.  Stir occassionally.
  3. Start water boiling for pasta.
  4. Drain juice off the tomatoes and add the tomatoes to the pan.IMG_1850
  5. Add basil, oregano, salt, red pepper flakes if using, and kale.IMG_1851
  6. When water boils, begin cooking pasta.
  7. Bring sauce to a boil, crushing the tomatoes.
  8. Reduce to simmer and cover and cook on low.  A minute or so before the pasta is done, blend the sauce using an immersion blender, or place it in a blender or food processor
  9. Serve the sauce over the pasta and sprinkle with parmesan cheese.photo (7)
Misc: Don’t you think Little Frances’ spaghetti looks a little bit like a heart? Serve it with salad or a side of steamed broccoli and you have a nice family meal.
Timing: The ingredients can technically be introduced at 1 year, although with noodles I would suggest waiting until 18 months or you feel like your little one can handle chewing the noodles.
Difficulty: 3 out of 5. It was pretty easy, but it did have a lot of steps and you can’t just throw everything in at once and let it cook.
Epicutie Rating (see left side of page for rating descriptions):
Confused. So Little Frances does not like spaghetti!  Until fairly recently she did not even like noodles, although now she loves them.  Usually even if she does not love something, she will eat it if I give it to her by hand and/or add a little cheese, but this she was not willing to eat this after a bit or two.  We are going to keep working on spaghetti sauce until she likes it!

Little Joy and Little Asher:  YUMMY IN THE TUMMY
photo (9)
Although Little Elizabeth is not yet old enough for solids, it seems she wanted a little taste of what we were eating and she reached down and helped herself to some of my salad! Smile  More on her first foods in the next few weeks.
photo (8)

Wednesday, August 7, 2013

Kale Chips


 This recipe is so fun! And its cheap, quick and easy.  I spent approximately 98 cents on this huge bunch of kale. These are a pretty tasty way to get some green into your kids, and are a great replacement for potato chips.
IMG_0020
Ingredients:
  • 1 bunch of kale
  • olive oil to taste (I used a generous 2 tablespoons)
  • 1/2 teaspoon of salt, a little bit goes a long way but add more to taste
Steps:
  1. Separate leaves from the thick kale stems and break into small pieces. I saved the stems for our compost pile (more on that later!).IMG_0023
  2. Pour tablespoon of olive oil over kale and toss to coat.  Add oil 1 teaspoon at a time until you feel that it is properly coated. Sprinkle with salt to taste. IMG_0025
  3. Spread leaves on a baking sheet.  You can line it with wax paper if you want to.IMG_0027
  4. Bake at 350oF for 10 minutes.  Remove baking sheet and flip kale.  Bake for an additional 10-12 minutes until leaves are crispy.IMG_0029
  5. Serve and eat right away!
Timing: 1 year, if crispy, 18 months if they are not 100% crispy.  It might require more teeth and more chewing!
Difficulty: 1 out of 5, super easy, super quick!
Epicutie Rating (see left side of page for rating descriptions):

  • Little Frances is not so sure she likes it… yet! Little Frances initially seemed very into these, especially when I told her they were chips, however I think that I over salted them.  Next time I am going to try them with less salt and maybe a few other seasonings. I think that they would be fun with a little bit of parmesan cheese too!  I thought that they were pretty tasty myself… I am going to work on a salt and vinegar version, yum yum.
  • Little Joy:  Yummy in the Tummy; she asked for a pile of them
  • Little Asher: Confused; he tried very hard to like it but after four bites, he was done.  If at first you do not succeed, try again!

IMG_0036
What flavors do you think would make for tasty kale chips?

Friday, August 2, 2013

Kid Friendly Kale

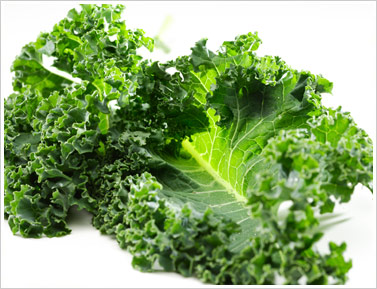
Last year I shared with LTY readers a little bit about our family’s journey with trying to adopt a more nutritarian lifestyle.  Although I don’t think we will ever be the type of family to be strict anything – why give yourself more reasons to stress in this world – we have been trying to be more conscious of the nutrient content of our food, not just the caloric content.  One key takeaway from our food journey was the importance of eating greens of all shapes and sizes.  Someone once told me that just eating iceberg lettuce was just like eating nothing and had no nutritional value simply because it had very little caloric value.  Now that we know about micronutrients, not just macronutrients (ABC+ vitamins and such), we know that that simply is not true!

Unfortunately in Russia it was very difficult to find fresh greens.  I could occasionally find fresh spinach, and usually red and green leaf lettuce if I went to the market.  The grocery stores might have one or two types of old, gross looking greens, arugula maybe once or twice a year, and we found baby spinach one time right before we got ready to move.  Anyway, it was hard to find greens!  And the one green that I absolutely never, ever found – kale!

For a nutritarian, kale is the gold standard for nutrient density.  It scores a perfect 1000 on the nutrient density chart.  Now that we are in the states, I am super excited by the abundance of greens at my local HEB, and most especially the kale!

Here is a snapshot of all of the nutrients that can be found in a single cup of kale!

kale chart

For more information on kale and its health benefits, visit World’s Healthiest Foods kale page.

Any kind of green is difficult for little mouths to chew and kale has a slightly bitter flavor, so I think it might be difficult for an epicutie to love.  I want to focus on a few easy to eat, delicious kale recipes that will make it attractive for your little one’s developing palate.

Look for these kale recipes in the upcoming weeks -

  • Kale Chips
  • Tomato, Carrot and Kale Spaghetti
  • Green Smoothies

Does your family eat kale on a regular basis?  If so, I would love to know some of the recipes that you love!

I am a warrior!


Little Tummy Yummies

About the Authors

This blog was started by two Babywise pen pals to document our adventures in high chair manners, making our own baby food and doing our bests to raise happy, healthy, thriving little ones!

Epicutie #1

Epicutie #1

Little Joy at 2 years, Sept 2012

Epicutie #2

Epicutie #2
Little Frances

Epicutie #3

Epicutie #3
Little Asher at 11 months, Sept 2012

Epicutie #4

Epicutie #4
Little Elizabeth, July 2013

  • Yummy in the Tummy: Epicutie thoroughly enjoyed each bite
  • Somewhat yummy: Epicutie seemed to somewhat enjoy the food at first, but seemed to like it less with subsequent bites
  • Not so sure I like it...yet: Epicutie somewhat rejected the first bites, but seemed intrigued. The next exposure may be better!
  • Confused: Epicutie rejected the first bites, perhaps due to texture or strong flavor.
  • Sour Puss: Epicutie gave a sour face indicating she did not like the food. However--if at first you do not succeed, try, try again!


  • Munchkin Land Designs Elements by Crisdam Designs

    Click Here for Other Awesome Giveaways!

    Labels

     
    Designed by Munchkin Land Designs • Copyright 2011 • All Rights Reserved