



HomeAbout the BlogMeet the ChefsMeet the EpicutiesMeal IndexContact Us

Monday, March 14, 2011

French Chicken Stew


This is a fabulous family meal!!! My mom made this when I made a visit a month ago and after seeing how much Little Joy seemed to like her few bites, I decided to try it on my own. I love family foods because (on Sundays) we can all eat together. This recipe comes from Better Homes and Garden.

I have listed the ingredients as they appear on the site but in BOLD you will see some changes we made. Although there are a lot of ingredients and some chopping this is a crock pot recipe which means those of you who work....this is a great option; assemble in the morning and then a meal ready to enjoy when you get home!

Allergy Warning: Again, there are many ingredients in here so be on the watch for allergic reactions.

Ingredients
  • 4 cups sliced button and/or shiitake mushrooms
  • 1 14.5-oz. can diced tomatoes, undrained
  • 2 medium carrots, thinly diagonally sliced (I used a couple more since Little Joy eats these)
  • 1 medium onion, chopped
  • 1 medium red potato, cut in 1-inch pieces (I used two)
  • 1/2 cup fresh green beans, cut in 1-inch pieces
  • 1/2 cup pitted ripe olives, halved (I skipped this since my husband and I both do not like them)
  • 1 cup reduced-sodium chicken broth
  • 1/2 cup dry white wine or chicken broth (I used white wine, remember the alcohol cooks out!)
  • 2 Tbsp. quick-cooking tapioca
  • 1 tsp. herbes de Provence or dried Italian seasoning, crushed (I used Italian seasoning)
  • 3/4 tsp. dried thyme, crushed
  • 1/4 tsp. coarsely ground black pepper
  • Pinch of garlic powder
  • Pinch of salt (I did not add this to mine, but it need just a tiny bit---and I am NOT usually a salt person)
  • 8 skinless, boneless chicken thighs (1-3/4 to 2 lb. total)
  • 1/2 tsp. seasoned salt
  • Pinch of paprika
  • 1 14-oz. jar tomato pasta sauce or one 16-oz. jar Alfredo pasta sauce (I used Alfredo)
  • Serve with French bread (optional) (I gave Little Joy toast)

Steps
  1. In a 5- to 6-quart slow cooker combine mushrooms, undrained tomatoes, carrots, onion, potato, green beans, olives, broth, wine, tapioca, herbs de Provence/Italian seasoning, thyme, garlic powder, salt and pepper. Stir VERY well (I think I messed up here and my tapioca did not get mixed in well, so my stew was a little runny but still yummy).
  2. Place chicken on top; sprinkle with seasoned salt and parika. Cover and cook on low-heat setting for 6 to 7 hours or on high-heat setting for 3 to 4 hours.
  3. Remove bones and cartilage from chicken (be careful because I did not know about the cartilage and it was in our stew...no biggie, just annoying).
  4. Stir in pasta sauce.
  5. If desired, serve with French bread.
Yield: 8 adult servings.

Serve: We served as a finger food only the green beans, carrots and chicken to Little Joy; we took it out of the stew juice. Mushrooms are hard to chew and she does not LOVE potatoes. We had to give her seconds of chicken. She seems to like meats when they are soft and FULL of flavor like this.

Timing: 11-12 months. This is jam packed with flavor and requires very good chewing skills. I would advise this as a finger food for the more advanced chewer or mashed up.
Storage: Several days in the fridge and a month in the freezer. Although, it is too good to freeze...I bet we eat it up fast!

Difficulty: 3 out of 5. Once you chop....you are pretty much done with this dish. The only hard part was de-boning because I have never done that before :)

Epicutie Rating: Yummy in the Tummy--see right side of page for descriptions
Little Joy gobbled up one plate and signed for MORE!!! We love this dish because we can enjoy it as a family or with friends too!


Step 1: All veggies and spices in crock pot, just before stirring

Step 2: Chicken skinned, place on top and sprinkled with season salt. This was just before cooking.
Ready to serve!

Little Joy's plate; most of the stew juice removed. Only carrots, green beans and chicken here.

YUMMY!

Stuffing her face!
After Little Joy devoured it; what a happy plate!

After stew, toast with homemade peach puree!

Friday, March 11, 2011

Vegetable Lasagna

I do not know what else to say about this recipe but it is THE BEST. This was the first recipe that I made for the whole family to enjoy together! Every time Addison sees it coming on her plate she waves her hands excitedly (this is how she always shows excitement) AND she eats/wants to eat so much at some point I have to cut her off because I am scared she will make herself sick. This recipe is also fabulous because it is full of vegetables and dairy!

I know it seems like a lot of ingredients and although it is slight time consuming, it is worth it if your little one loves it as much as mine! Allow me to warn your pallete, it is a southwestern take on lasgana so be prepared--it is very different.

ALLERGY AND TASTE WARNING: There are MANY ingredients in this recipe. Be sure to introduce these one by one to eliminate any potential allergies OR be on the lookout for any reactions after your Little One eats this. Also, tomato and tomato sauces are acidic and some babies (and toddlers) do not like tomatoes until their taste buds are a little more developed. Little Joy had eaten spaghetti with tomato sauce before and loved it so I did not figre we would have trouble.

**This is adapted from a Southern Living recipe**

Ingredients
  • 2 large eggs, lightly beaten
  • 1 (15-ounce) container ricotta cheese
  • 1 (10-ounce) package frozen chopped spinach, thawed and well drained
  • 1/4 cup chopped fresh cilantro
  • 1/2 teaspoon salt
  • 4 cups (16 ounces) shredded Monterey Jack or Mozzarella cheese (if making for adults only use Monterey jack cheese with peppers)
  • 2 (16-ounce) cans black beans, rinsed and drained
  • 1 (2-pound, 13-ounce) jar pasta sauce
  • 1/2 teaspoon ground cumin
  • 9 precooked lasagna noodles
  • Garnish: chopped fresh cilantro

Steps:
  1. Preheat oven to 350°
  2. Stir together first 5 ingredients and 1 cup cheese; set aside.
  3. Mash beans with a potato masher or fork in a large bowl; stir in pasta sauce and cumin.
  4. Spread one-third of bean mixture on bottom of a lightly greased 13- x 9-inch baking dish.
  5. Layer with 3 noodles, half of spinach mixture, and 1 cup Monterey Jack cheese
  6. Again, Layer with 3 noodles, half of spinach mixture, and 1 cup Monterey Jack cheese.
  7. Spread with one-third bean mixture
  8. Top with remaining 3 noodles and remaining bean mixture.
  9. Bake, covered, at 350° for 1 hour
  10. Uncover and top with remaining cheese. Bake 5 more minutes or until cheese melts. Garnish, if desired.
Yield: LOTS (see pictures to follow)

Timing: This depends on your baby's ability to chew/grind. If your baby demonstrates the ability to chew well and has some teeth, this would be appropriate. Test a few small bites first to make sure they grind some. After this is cooked everything is very soft but since it is hard to cut up/mash very very small it is important your little one be an efficient chewer.

Serve: Serve to your baby warm and cut or mashed up to whatever consistency appropriate for you baby's age and chewing ability. Try to avoid the edges of the lasagna when serving to your Little One because it tends to be tough/hard.

Storage: We saved it in the fridge and ate off of it for 5 days and then froze Little Joy sized portions in ziplocks. I plan to use within 1-2 months.

Miscellaneous: Ok, this is totally gross but I need to share it.....spinach is one of the dominate ingredients in this dish and it does not digest completely. Yes, that means you will see it when it comes out. I am sharing this so you are not alarmed it honestly grossed me out a bit.

Difficulty: 5 out of 5. Of all the foods I have served to Little Joy this one was the most time consuming and involved the most steps and ingredients. BUT as you will see in the Epicutie Rating, it was worth it. I would make it everyday just to see her excitement!

Epicutie Rating: YUMMY IN THE TUMMY-- see right side of page for descriptions
As I said in the opening, Little Joy cannot get enough of this. Hands down, this is her favorite dish ever of all times ever thus far.


Precooked noodles

Step 2: Stir together first 5 ingredients

Step 3: Mashed black beans, pasta sauce and cumin

Step 8: This is just before coving and cooking

FINISHED, as you can see we were anxious to dive in and forgot to take the picture until after we served it up :)

Before Little Joy attacked it (thats a lot of food and we gave her seconds!!)

She SEES the new food!

After Little Joy attacked it!

She loved it!
Can you tell she loved it???


Thursday, February 24, 2011

Salmon with Carrots and Tomato

It isn’t very often that two pen pals get together (less than 2 times in three years to be precise)!  So when we found out that Little Joy and Little Frances were going to have the opportunity to finally meet, we mamas wanted to make something extra special to commemorate the occasion!  As a rule, we try not to make things that are very fancy on this blog, but sometimes it fun to experiments and I love to celebrate a special occasion with food.  :)  I have been wanting to try to make fish, so I decided to try our luck with salmon.  I found this recipe in The Healthy Baby Meal Planner by Annabel Karmel.  Like most fish, salmon is filled chock full of essential fatty acids (EFA), also known as omega-3s.  EFAs help fight off many diseases are important for brain development… some people say they can make you “smarter”.  You can find more about the health benefits and hazards of fish here.  Some fish may contain high levels of mercury, which can lead to mercury poisoning, however salmon is not generally considered hazardous.

Ingredients:

  • 4 pen pals :)

Good All 2

Good of All

  • 2 1/4 cups carrots, peeled and sliced
  • 5 oz salmon filet, deboned
  • 1/2 tablespoon milk (or enough to cover the salmon, see method below)
  • 2 tablespoons butter
  • 2 medium ripe tomatoes, skinned, seeded and chopped.  To eliminate this step and make the recipe easier, you could also purchase a can of petit, diced tomatoes and measure out just under 1 cup.

DSC_0270

  • scant 1/2 cup Cheddar cheese, grated – i.e. do not pack the cheese into the measuring cup, there should be a lot of air cushion.

Steps:

  1. Steam the carrots for 15-20 minutes, or until carrots are tender. 
  2. Place the fish in a microwave dish, add the milk, dot with half the butter, and cover, leaving an air vent.DSC_0286
  3. Microwave on HIGH for 1 1/2 to 2 minutes or until fully cooked.***See below for alternative cooking method
  4. Melt the remaining butter in a saucepan, add the tomatoes, and sauté until softened and slightly mushy.DSC_0290
  5. Remove the saucepan from the heat, and stir in the cheese until melted.
  6. Mash the cooked carrots in the tomato mixture.  DSC_0292
  7. Drain the cooking liquid from the fish, remove the skin, and double check that there are no bones.
  8. Flake the fish and mix with the carrots and tomatoes.  You can also blend these two for younger babies or babies with no teeth.DSC_0296

DSC_0299

Miscellaneous: I really like kitchen gadgets and so I try to get a couple every few months.  I bought this microwavable dish on Amazon.com for $6, and it has come in handy for several recipes.  If you do not own a microwavable dish with a vent, you can always cook the fish in the following way:

  1. Place the salmon in a pan.
  2. Pour over enough milk to cover the entire fish.
  3. Simmer for 4 minutes or until cooked.

Timing: Fish can be introduced as early as 9 months, however as with any food, consult with your Doctor first.  The carrots and salmon break up quite small and so even without chewing this recipe (in my opinion) is safe for babies who are using their gums to mash, however, if you ever in doubt, puree!

Storage: Store in the fridge for up to two days.  This recipe makes quite a bit, so I could consider halving the recipe if you think that you will not be able to use it all in that time.  I would not freeze this recipe.

Difficulty: 4 out of 5.  This may be difficult for those with little cooking experience, and it also has several ingredients and steps.  I will be on the hunt for simpler fish recipes to try out!

Epicutie Rating: Yummy In The Tummy! Both Little Joy and Little Frances gobbled this one up!  They loved it.  Little Frances enjoyed it so much, Kelly suggested that we make a new rating called Yummy In The Tummy to the Max.  Even though this recipe was a little bit more complex than other recipes, it was worth it to see our girls enjoying the new flavors so well!

Little Joy clapping for JOY she loved this recipe so much!DSC_0308

Little Frances grunting for MORE!DSC_0302 

Our Epicuties!

Cutie Pies

SUgar

Cutest Babies

Monday, February 21, 2011

Chicken Cheesy Pasta

Little Joy has started to prefer foods jam packed with spices and flavor and I am just not a good enough cook yet to know what spices, flavors and foods go well together. I have been on the look out for recipes that contain spices so I can learn better how to use them!

Little Joy loves pasta and cheese so when I saw this recipe on wholesomebabyfood.com (Chicken Cheesey Pasta), I just had to try it! Sometimes I have to remind myself that pastas and cheeses are very rich and filling so she wont eat quite as much of it. This was a very easy recipe and in fact---I LOVED IT TOO!!!

Ingredients:
  • 1/2 cup cooked diced or shredded chicken (I did it shredded)
  • 1/2 cup cottage cheese
  • 1 cup pasta - ditalini; slightly cooled
  • 1/4 cup steamed broccoli*
  • 1/8-1/4 cup steamed carrots (or sweet potatoes) diced or smashed*
  • dash of pepper, garlic powder and basil
*You can steam these together

Steps:
  • Mix all ingredients together well
  • Serve
  • NOTE: This doesnt make the greatest finger food because its got little chunks of cottage cheese and veggies. Serve as is for those accustomed to lumps & textures or chop/mash down or puree if needed.
Timing: In my opinion this depends on the amount of teeth your little one has. If your little one demonstrated a good ability to grind and chew then this would be great. Also, if your little one has a mouth full of teeth, this would be appropriate as well. Remember, you can puree or finely chop this if you are scared of choking. All in all, 9-10 months would be my recommendation if I had to pick an age.

Reminder: Please ensure you have introduced these ingredients separately first to test for allergies particularly dairy.

Storage: Refrigerator for 3- 4days. I have not tried to freeze this YET, but when I do---I will share the result.

Difficulty: 2 out of 5. Easy, easy especially if you have a steamer. I always give everything a 2 if there are more than 3 ingredients :)

Epicutie Rating: Yummy in the Tummy--see right side of page for descriptions
Little Joy really enjoyed this dish; I think she loved it because of the variety of flavors!!! We tried it the next day and she wasnt as keen on it, but we have learned she seldom wants the same food two days in a row. We have to have a day or two between foods.


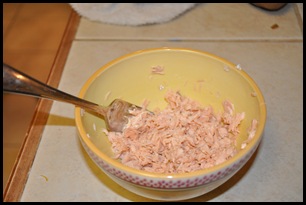
Shredded Cooked Chicken

Veggies Steaming (Thanks Mom for giving me your unused steamer)

Final Product


Checking out the new food. She must inspect everything before she eats it now :)


YUMMO!


Chicken Cheesy Pasta

Little Joy has started to prefer foods jam packed with spices and flavor and I am just not a good enough cook yet to know what spices, flavors and foods go well together. I have been on the look out for recipes that contain spices so I can learn better how to use them!

Little Joy loves pasta and cheese so when I saw this recipe on wholesomebabyfood.com (Chicken Cheesey Pasta), I just had to try it! Sometimes I have to remind myself that pastas and cheeses are very rich and filling so she wont eat quite as much of it. This was a very easy recipe and in fact---I LOVED IT TOO!!!

Ingredients:
  • 1/2 cup cooked diced or shredded chicken (I did it shredded)
  • 1/2 cup cottage cheese
  • 1 cup pasta - ditalini; slightly cooled
  • 1/4 cup steamed broccoli
  • 1/8-1/4 cup steamed carrots (or sweet potatoes) diced or smashed
  • dash of pepper, garlic powder and basil
Steps:
  • Mix all ingredients together well
  • Serve
  • NOTE: This doesnt make the greatest finger food because its got little chunks of cottage cheese and veggies. Serve as is for those accustomed to lumps & textures or chop/mash down or puree if needed.
Yield: A TON

Serve: By spoon or for an older baby they could do it as a finger food or at least SOME of the parts of the meal as a finger food.

Timing: 10 months; I only say 10 months because it has some strange textures going on all at once not to mention strong flavors.

Difficulty: 2 out of 5; it is only a 2 because it has more than a couple ingredients

Miscellaneous: Be sure your chicken stays moist, this will help ensure it is easy to mash up or for baby to grind

Epicutie Rating: Yummy in the Tummy--see right side of page for descriptions

Holy Guacamole...this has been in my drafts for months, I forgot to press publish!!!!

Monday, February 14, 2011

Feeding a Baby While Traveling

As a rule, I hate to give Little Frances store bought baby foods, even when we are traveling. I think its because I like to know exactly what she’s eating and also I think the fact that she eats home made food is a huge part of the reason why she is such a great eater! I have been doing a lot of traveling since she has been born, and right now we are in the middle of a move that will involve temporarily living in a hotel for several weeks before we leave for our final destination. I have learned a few things about traveling with a baby that might help those of you who would like to continue feeding your baby healthy, and when possible home-made food while you are gone! If you can’t, I have a few tips for you too.

General Traveling Tips:

  • Wherever you travel, you can usually find a grocery store nearby. There are a lot of foods that you can buy that you can easily prepare without a stove if you don’t have one where you are visiting. You can check out our no cook recipes for some help. Most foods that are easily mashable also make great finger foods when chopped, like banana and avocado.
  • Most hotels now have a fridge and some even have a microwave to help with food preparation or storage. There are a lot of vegetables can be cooked in the microwave in a steam-able bag. I have used the Steamfresh Sweet Peas in many recipes and they make a great finger food!

steam fresh

  • Whenever possible, I try to bring my small KitchenAid Chopper with me. These are very inexpensive and a great investment for preparing smaller quantities of food, both cooked and uncooked.
  • I try to be flexible. (I am the type of person that has to remind myself to be flexible!)
    • There are things that I would not normally feed Little Frances that I will give her when we are on vacation. For example: I have given her reduced fat fruit yogurt on a plane or saltine crackers at a restaurant, which I would never give her at home. I try to remember that this is just one meal, and then do my best at the next one.
    • I also have to remember that Isla’s routine pretty much goes out the window when we travel! And that is fine. We will have plenty of time to get back on her routine when we get back home.

Short Trips:

  • If we are just out for the day, I try to bring baby food that I have made. I store them in old baby food jars, and I thaw them before I leave the house. Its just like packing a lunch! I do this for my husband and I too when we make road trips, so it only makes sense now to do this for Little Frances.
  • I also have a little cooler bag that hangs off of the back of my seat, and I will frequently store snacks/purees/expressed milk in.

Weekend/Driving Tips:

  • If we are driving, I always take my Chopper as I mentioned before.
  • I will always bring along homemade baby food in a cooler, along with some breast milk.
  • I try to stick as much to Little Frances’s eating routine as I can. I usually stop close to her usual meal times, although some times I have to be flexible, depending on how fussy she is.

Long Trips, including Airplane Trips:

  • The TSA now allows you to carry baby food, formula, and breast milk on a plane without it affecting your total liquid allowance.
  • Even breastfeeding mothers feel more comfortable bringing a bottle of expressed milk, rather than nursing, when feeding a baby in tight spaces. I usually nurse Little Frances to sleep, which is not a normal practice at home.
  • When traveling with a baby, snacks are a MUST! I personally love to bring Puffs. They are light and easy to carry, and they keep a wriggly, fussy baby very entertained in confined spaces. I normally like to buy HAPPYBABY Organic Puffs.

Happy Puffs

  • My preferred brand baby food when I cannot bring my own is Sprout. I like Sprout for several reasons.
    • Its delicious! I don’t give Little Frances anything I would eat myself, and this is one of the better tasting baby food brands.
    • It comes in re-sealable bags!
      • The re-sealable part is great so you don’t have to throw the entire bag away if your baby doesn’t eat much.
      • These are much lighter weight than the jars that most other organic baby food brands come in, which is a bonus if you are going on a long trip and you need to bring a lot.
      • Best of all, they are easy to reheat - just put them in a hot cup of water; you don’t need a microwave. Almost any restaurant or plane will give you a cup of heated water if you ask for one!

Sprout

Restaurants Outside of the US

When traveling, restaurants a given! And although most of us have the restaurants close to home that are kid friendly figured out, that is not always the case when you travel, especially when you are traveling outside of the United States. In fact in many countries, children are decidedly NOT welcome/expected at restaurants, but sometimes you just can’t help it. Be prepared for some odd looks!

  • If you are traveling overseas, you should be aware that not many restaurants have booster chairs or high chairs for kids. If you will be eating out with your small child, you might consider investing in a portable high chair. They are light weight (as low as 2 lbs) and can be used on almost any table. I learned how important these are the hard way; meals overseas are usually much longer and having to pass a squirmy 9 month old around for two hours is NOT fun! I could do a whole different post on baby gear when traveling, but I am trying to limit this to just food/eating related things.Image Available At: http://www.amazon.com/Regalo-Diner-Portable-Hook-Chair/dp/B0000A1O7P
  • As I mentioned, meals are much longer, and food takes much longer to prepare and get to your table. Depending where you are, there are not a lot of fast food restaurants.
    • Once again, Puffs to the rescue! These are great way to keep little hands occupied while you are eating. Crackers or bread from the bread work well if you run out of puffs.
    • Consider investing in a few high chair toys to put on the table. These toys come with suction cups on the bottom so (fingers crossed) your little one won’t be strong enough to knock them to the ground. Little Frances loves her Melissa and Doug My First Bead Maze.
  • Be prepared for the smoking! I don’t know if I just don’t notice it here in the states, but WOW, I felt like I was taking my girl into cancer factory every time we entered a restaurant. I don’t know what you can do about that, its just something to be aware of.

***********UPDATE***********

I forgot to add one more thing. I found that disposable pocket bibsters, like these found here, are a must have when traveling in an airport, and are very handy at other times outside of the house too. Its so nice just be able to throw them away when done and if they aren’t too messy, they are great for wiping off your babies face. They are also very light weight!

If you have any tips or tricks that you have figured out for feeding your child while traveling, please let us know! We love to hear from other Mommy Experts :).

Saturday, February 5, 2011

Oat Bran Applesauce Muffins

Originally I made these for some guests, but as I looked at the recipe, I thought Little Joy would enjoy these. I also had all these ingredients laying around, so it made it easy.

Let me warn you, Little Joy is way ahead on teething---she had 8 teeth completely in by 7-8 months so she is able to eat SOME things that require more chewing which means she can eat things that may normally be more appropriate for an older baby. These muffins could really cause a choking hazard as they are dry and have raisins (optional). If you little one does not chew things well yet, I would NOT recommend this. She tired these at 10 months, chewed them great and LOVED them. BONUS??? Baby can enjoy them along with Mom, Dad or any other guest!

ALLERGY WARNING: This recipe calls for whole eggs, if you suspect your child might have an egg allergy I would avoid this recipe. Also, when the whole egg is in a baked good, NORMALLY doctors will tell you it is ok since by the time you eat the food, there is little egg in it anyways.

Ingredients:
  • 1/2 c brown sugar, packed
  • 1 1/2 c Natural/Organic Oat Bran (I used Hodgson Mill)
  • 1 1/2 c flour
  • 1 1/2 tsp baking powder
  • 1 1/2 tsp baking soda
  • 1/2 tsp salt
  • 2 eggs or 4 egg whites (I used the whole egg)
  • 1 c applesauce, chilled
  • 4 Tbsp. butter (I think you could use olive oil, but this was all I had handy)
  • Raisins (amount depends on how many you want in the muffins)
Steps:
  1. Preheat oven to 400 degrees F.
  2. Line 12 muffin cups with paper liners or grease muffin cups.
  3. Blend together dry ingredients.
  4. Add eggs, chilled applesauce, butter/olive oil and raisins. Mix until well-blended.
  5. Spoon batter into muffin cups and let stand 10 minutes before cooking.
  6. Bake 15 minutes or until golden brown.
  7. Allow to cool completely before serving to baby and break into size peices appropriate for you baby; you may want to take out the raisins when feeding it to baby BUT the raisins are very soft after cooking.
Yield: 12 muffins

Miscellaneous: This recipe was adapted from a recipe by Hodgson Mill. I recommend serving this along with some fruit for breakfast or as a snack. Each muffin contains 4 grams of dietary fiber which is good for clogged tummies!

Timing: For us, 9-10 months but timing will depend on your baby's ability to chew/grind.

Storage: 3-4 days in an airtight container.

Difficulty: 2 out of 5. Its only not a one because it had more than 2 0r 3 ingredients. Super easy and doesnt make a mess!!!

Epicutie Rating: Yummy in the Tummy! Little Joy gobbled up several bites of the muffin AFTER she had eaten her full regular breakfast! I plan on making these for guests all the time now since I don't have to make her a separate breakfast.


I am a warrior!


Little Tummy Yummies

About the Authors

This blog was started by two Babywise pen pals to document our adventures in high chair manners, making our own baby food and doing our bests to raise happy, healthy, thriving little ones!

Epicutie #1

Epicutie #1

Little Joy at 2 years, Sept 2012

Epicutie #2

Epicutie #2
Little Frances

Epicutie #3

Epicutie #3
Little Asher at 11 months, Sept 2012

Epicutie #4

Epicutie #4
Little Elizabeth, July 2013

  • Yummy in the Tummy: Epicutie thoroughly enjoyed each bite
  • Somewhat yummy: Epicutie seemed to somewhat enjoy the food at first, but seemed to like it less with subsequent bites
  • Not so sure I like it...yet: Epicutie somewhat rejected the first bites, but seemed intrigued. The next exposure may be better!
  • Confused: Epicutie rejected the first bites, perhaps due to texture or strong flavor.
  • Sour Puss: Epicutie gave a sour face indicating she did not like the food. However--if at first you do not succeed, try, try again!


  • Munchkin Land Designs Elements by Crisdam Designs

    Click Here for Other Awesome Giveaways!

    Labels

     
    Designed by Munchkin Land Designs • Copyright 2011 • All Rights Reserved