HomeAbout the BlogMeet the ChefsMeet the EpicutiesMeal IndexContact Us

Friday, September 7, 2012

Tofu Bites

Tofu is full of protein so I like the idea of eating it, but even after all the time I spent in China--I still do not love it.  However, just because I do not love a food does not mean I should push my preferences off on my epicuties; my worst food nightmare could be my children's delight.  It is my responsibility as a parent to provide them opportunities to experience new things (including food) even if my personal preference is against it (i.e. tofu, cheerleading for Addison, football for Caleb, brussel sprouts, peas, tatoo artistry, etc, you follow me).

Here is a simple way to serve up tofu as a finger food.  It is a great food as an early finger food (particularly those without many teeth like Little Asher) because its super soft.

Ingredients:
  • Firm tofu
  • Dusting of your choice (crushed graham crackers, cherrios or infant cereal; wheat germ, etc.)
Steps:
  1. Crush your dusting in a ziplock bag.
  2. Cut tofu into cubes or shapes of your choice.
  3. Place tofu in ziplock bag and shake until well coated.
  4. Serve immediately, discard left overs.
Difficulty:  1 out of 5; super easy, no cooking

Timing:  8 months; Some books say 6-9 months for tofu so I suggest somewhere in the middle around 8 months.  It is soft so it does not require any teeth.

Storage:  Storage any left over tofu according to the package instructions, however I would not save any leftovers of this food.  It seems like the dusting would get mushy--yuck!

Tip:  I would air on the side of too much dusting at first.  I think my children did not like it because it was too lightly dusted.

Epicutie Rating (see left side of page for rating descriptions):
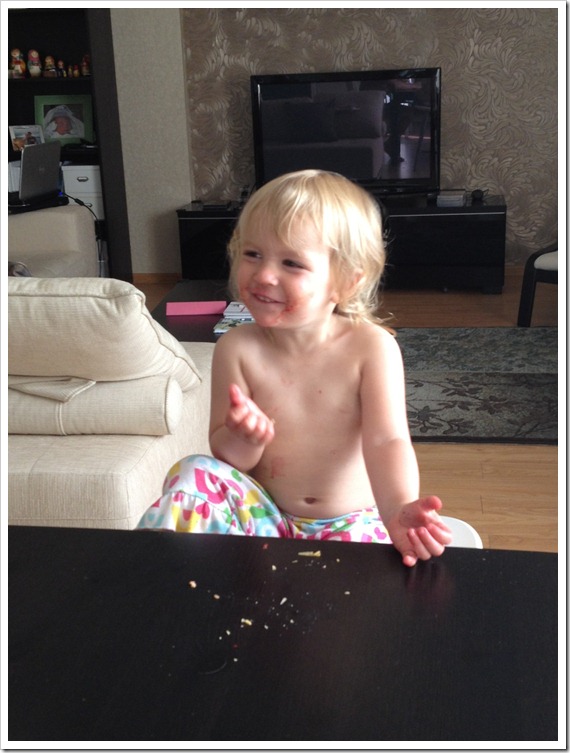
Little Joy (2 years):  Sour Puss; she was a great sport.  She TRIED her hardest to like it but she just did not enjoy it; poor thing.  She rarely turns her nose up at a food so I felt bad she hated it so!
Little Asher (9 months):  Sour Puss; he tried several bites and his face got more and more sour.  It was a texture thing I believe.


HAHAHAHA!

HAHAHAHA!

I AM TRYING MOMMY!

Thursday, September 6, 2012

Alien Patties (Avocado Soy Patties)

My husband is much better about adding the fun spin on foods to encourage our little epicuties to eat hence the name of this recipe--ALIEN PATTIES.  I was not at home when our little ones sampled these peculiar patties, but I heard it received rave reviews.

The dairy free recipe hunt is on for our Little Asher; I have noticed that dairy (cheeses, yogurt, milk, etc.) tends to be a common ingredient in foods that are good finger foods so the search can be difficult at times.  However, I am determined to conquer this challenge!

Again, I was skeptical about this recipe, thinking it would taste terrible.  Why am I always so skeptical, because it was surprisingly delicious?  Little Asher is still young enough that every new food is exciting and Little Joy tends to like most foods the first go round.  Little Joy tends to get bored with the same foods unless its mac and cheese or PB&J.  She still eats what is presented, the quantity she eats varies if monotony  exists :)

This is adapted from a recipe in "Super Baby Food" by Ruth Yaron.

Ingredients:
  • 1 medium avocado
  • 1 cup cooked soy beans (I used fresh frozen and steamed them in my steamer)
  • 1/2 cooked brown rice (I prefer to use short grain brown rice, it is simply delicious in taste and texture)
  • 1/4 cup onion
  • 1 tablespoon prepared mustard (I used stone ground mustard, see picture)
  • 1 tablespoon tomato paste
  • 2 tablespoons wheat germ
  • 1/3 cup (give or take) bread crumbs (I use the kind with herbs/spices already in it)
  • 2 tablespoons olive oil
Steps:

  1. Cook brown rice according to package instructions (this takes the longest).
  2. Steam/cook soy beans according to package instructions; I steamed using a steam.
  3. Coarsely chop onion and place in small food chopper; I almost make a puree out of my onions when feeding it to my kids because I am not the best chopper.  Place in medium bowl, set aside.
  4. Place cooked soybeans in small food chopper **you do not need to rinse the chopper between uses because all the ingredients will be mixed together at the end** and chop as finely as possible (without adding water); place in bowl with onion
  5. Place avocado meat in small food chopper and puree; place in bowl with onion and soy beans.
  6. Mix remaining ingredients together in the medium bowl; add more or less bread crumbs to make the mixture into patties.  Make them thinner than you think so they will hold together while cooking.
  7. Heat olive oil in large skillet.
  8. "Fry" patties in hot oil until browned on both sides.
  9. Serve warm.
Serve:  Warm

Yield:  Depends on the size you make the patties.

Difficulty:  2 out of 5; pretty easy as long as you have made the rice and soy beans ahead.

Tip:  Make the patties a little thinner than you think because the crispy outside is the best part!

Storage:  I have not tried to freeze these, but I imagine they would freeze well.  If I froze them, I would thaw and then toast in the toaster oven.  They would be fin in the fridge for several days.

Timing:  10 Months; Since I pureed the soy beans, avocado and onions it was very soft.  Little Asher only has his two bottom teeth all the way in with the top just barely poking out and he gobbled this up just fine.  As always, be sure to introduce the ingredients individually before testing this on your Epicutie.

Epicutie Rating (see left side of page for rating descriptions):
Little Joy (2 years):  Yummy in the Tummy; she liked it the first time but did not enjoy it as much as a left over.
Little Asher (9 months):  Yummy in the Tummy; he loved this every time I served last week!

Ingredients

Avocado puree

Soy bean puree

Not a great photo but this is them cooking; not sure why it looks so yellow in the pan; there was not much olive oil in there.

Plating/presentation has never been my strong suit

mmmmm

Chewing

Pretty good stuff.


Thursday, August 30, 2012

Cream of Spinach (revised for Dairy Free)


I love the Cream Spinach with Lentils Over Brown Rice that we posted in April 2011; I have made it countless times for Little Joy and still do!  Little Asher cannot have dairy at all until he is 15-18 months so this limits me on what I can cook for him and I prefer not to cook separate meals for my two epicuties (even though I know it is inevitable as this stage).

I decided to really test my cooking abilities and wing making this recipe dairy free, below is what I came up with and it was quite tasty, surprisingly.  If you look at our previous post, you will see it is very similar.  

Oh and for the record, this tasted great to me too!

Ingredients:
  • One bag baby spinach
  • 1 tablespoon grated sweet onion (about 1/3-1/2 of a large onion)
  • 1 small clove garlic, minced or through a garlic press
  • 1 tablespoons olive oil
  • 1/4 cup imitation cream cheese (see photo below)
  • 1/4 cup firm tofu
  • salt and freshly ground black pepper, to taste
  • 1 tsp dried fresh basil
  • Cooked red lentils (cooked according to package)

Steps:
  1. Cook red lentils according to package instructions or if there are not any, check out this website about cooking lentils
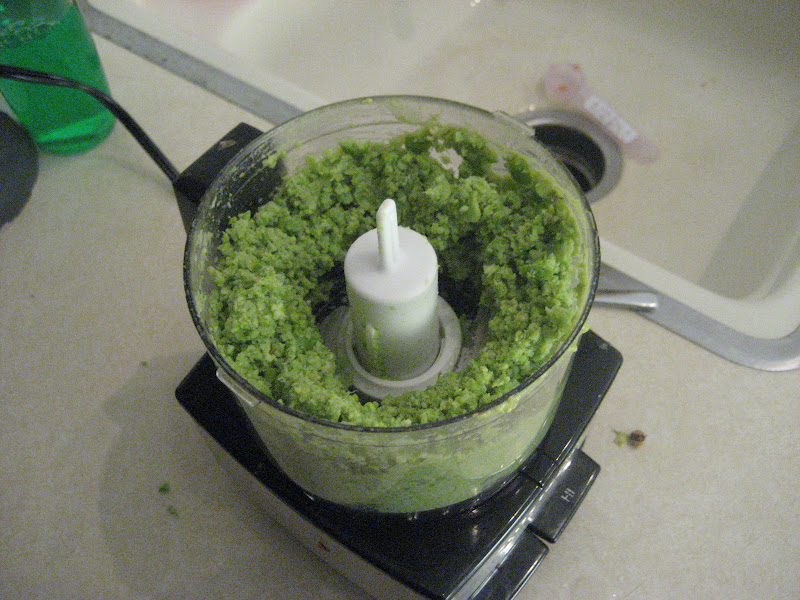
  2. Wash and trim  spinach (if needed), place in food processor along with minced/pressed garlic and grated onion.
  3. Pulse it in food processor several times until the spinach reaches your desired consistency.  Be careful not to over process it, the goal is the finely and evenly chop it (in the previous post I said to chop it with a knife, but I found the spinach gets to a better size for a younger baby when the food processor is used--not to mention its MUCH quicker).
  4. Combine cream cheese and tofu in small chopper and puree until smooth (you might be able to use 1/2 tofu and omit the imitation cream cheese but I wanted the consistency to be smooth since the original recipe called for yogurt).
  5. Place spinach mixture in large sauce pan (spinach cooks down a lot so if your pan looks full...do not worry).
  6. Cook over medium heat covered for approximately 5-8 minutes. Be sure to shake the pan often to ensure the veggies do not get burned.
  7. Drain veggies well (if needed).
  8. Stir in Olive Oil and continue to cook for 3-5 minutes, continue to stir constantly (I am not good at doing anything constantly when the epicuties are awake, so just do your best)
  9. Remove from heat and stir in tofu mixture, salt, pepper and basil.
  10. While warm, mix in about a 1/3 lentil to 2/3 spinach mixture.
Yield: 3-4 servings

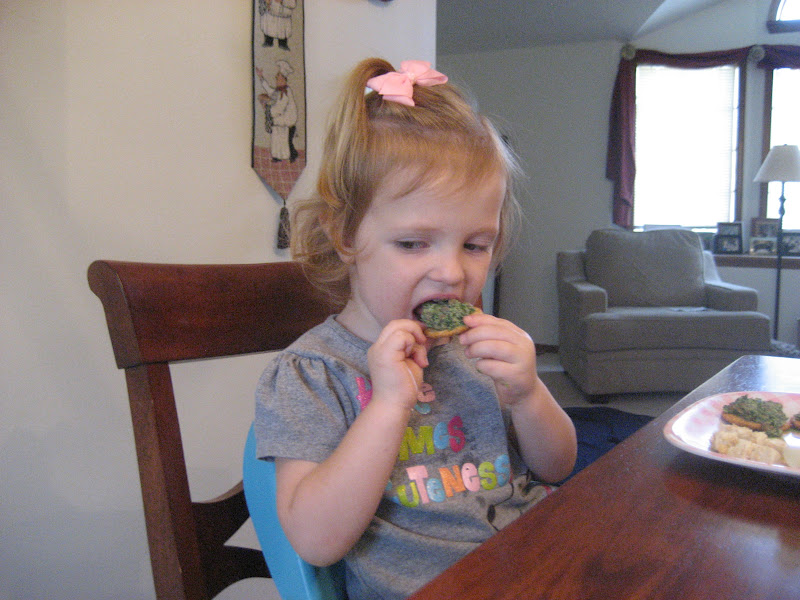
Serve:  Warm; can be served over cooked brown rice.  I spoon fed this to my 10 month old (Little Asher) and my toddler fed herself with the cream of spinach on a cracker.

Variation for a Toddler:  Little Joy enjoyed the dairy version of this on top of crackers (in the original post it was served over brown rice, but tried something new to liven things up).  So it was kinda like a dip!

Timing: 10 months or later; there are some strong flavors in here and lentils are best to wait to introduce until 10 months. This food does not require much chewing/grinding so if your Little One does not have many teeth, do not despair!

Storage: I would say 3-5 days in the fridge; freezer for about a month.  I froze the dairy version of this and it tasted fine frozen and reheated.
Difficulty: 2 out of 5 using the food process made this quick and easy

Epicutie Rating:  (see left side of page for rating descriptions)

  • Little Joy:  Yummy in the Tummy: She loved eating this as a dip.  We also tried it in a quesadilla and she was not as keen on it.
  • Little Asher:  Yummy in the Tummy:  He kept opening his mouth for more!!!  He even loved it on the second day.
Step 3:  Pulse spinach, onion and garlic in food processor

Step 9: After adding tofu mixture


Step 10:  Add lentils and stir

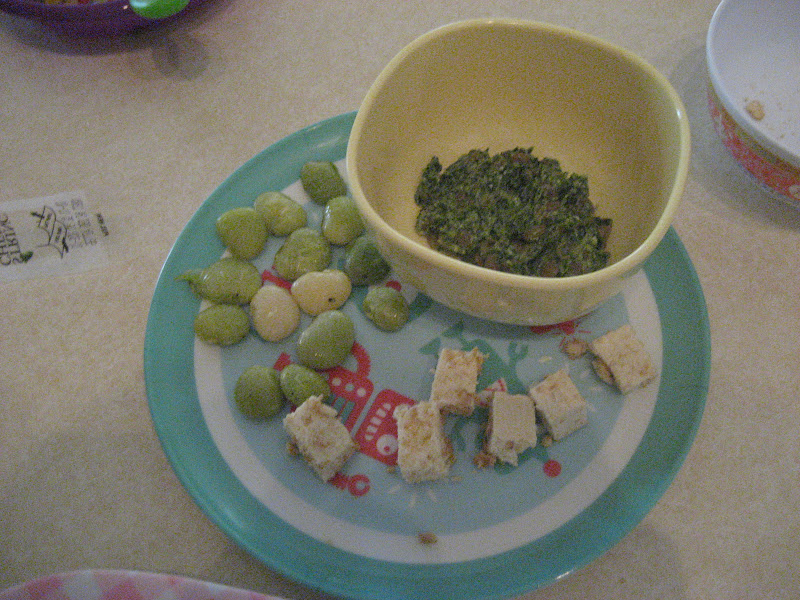
Little Asher's Meal; served with lima beans and tofu cubes dusted with graham crackers (post for that coming soon)

Little Joy's meal; cream spinach served over crackers with tofu cubes, cheese and lima beans


Little Joy trying it

She's saying "Its gonna be yummmmy"

"I like it Mommy" she said

Little Asher getting ready for the first bite

Seeing if Big Sister liked it

After several bites, he got into it and he liked it!!


Tuesday, July 3, 2012

Sweet Potato "Fries"

This was fairly easy and Little Joy LOVED them. She never eats much quantity of a finger food since I usually give it to her after a nearly full meal, but she gobbled down several of these after dinner one night.

Of course this Sweet Potato "Fry" recipe comes from wholesomebabyfood.com; thats where I get most of my recipes. I need to test some from "Super Babyfood" soon; the book has so many it is overwhelming!

Updated on 7.3.12
*I am re-posting to share that Epicutie Little Asher these on July 3, 2012 and gave them  a YUMMY IN THE TUMMY*

Ingredients:
  • 3 Sweet Potatoes
  • Olive Oil
  • Cinnamon
  • Pinch of Brown Sugar (optional)

Steps:
  1. Preheat oven to 400 degrees.
  2. Wash and peel potatoes (if your baby can eat skins, you can leave them)
  3. Cut potatoes to the size you want to serve and set aside. I cut mine in strips so that I had the option of breaking them into small dices or leaving them large for Little Joy.
  4. Mix olive oil, some cinnamon and a tiny bit of brown sugar in a large bowl (amount of oil and cinnamon depends on how many sweet potatoes you have, you want the potatoes to be lightly coated) .
  5. Add sweet potatoes and toss to ensure they are well coated.
  6. Pour mixture evenly on a large baking sheet and drizzle any remaining oil over the potatoes on the pan.
  7. Bake at 400 degrees for 30-45 minutes or until tender
  8. Allow to cool and serve; freeze and extras
Yield: See pictures, LOTS!

Storage: Refrigerate for a few days and freezer for 1-2 months. This is not scientific fact, just what I plan on doing.

Epicutie Rating: Yummy in the Tummy - see left side of page for descriptions
LOVE LOVE LOVE, that is all I can say about how much Little Joy enjoyed these treats! She could not shovel them in fast enough!
Little Asher gave these a yummy in the tummy too almost 18 months later!

Difficulty: 2 out of 5; its a bit time consuming to peel and chop and a tad messy but worth it!!


Step 2: Wash potatoes
Step 3: Cut potatoes into the desired size


Step 8: Allow to cool. They look the same before and after cooking. They will NOT get crispy like white potato french fries will

I think she likes them!

***Epicutie Little Asher these on July 3, 2012 and gave them  a YUMMY IN THE TUMMY***


Little Asher, YUMMMM!!

Sunday, July 1, 2012

Oatmeal Cookie Pancakes (Gluten, Soy AND Dairy free!)

We are still Gluten, Dairy and Soy free over here so a friend sent me a link to a pancake recipe that nearly fit the criteria.  I altered it so that even I could enjoy this dish with my family!  AND we LOVE LOVE LOVE this!  It will be great to try on Little Asher in a couple of months since we are avoiding all dairy and gluten with him. Let me know how you all like it!

Ingredients
  • 1 very ripe medium banana
  • 1 teaspoon baking powder
  • 1 egg (you can substitute a flax egg here, COOL---1 Tbsp flaxseed meal + 2.5 Tbsp water)
  • pinch salt
  • 1/2 teaspoon vanilla extract
  • 1 Tablespoon natural Jif peanut butter (Jif natural peanut butter has no dairy or soy; you could use any nut butter like almond butter, hazelnut butter etc.)
  • 1 Tablespoon canola oil (or other oil such as coconut oil)
  • 1 Tablespoon honey or molasses
  • 3 Tablespoons unsweetened coconut milk (or substitute any other milk such as almond or rice; if you do not care about being dairy free regular milk is fine too)
  • 1/2 cup quick oats rolled oats (gluten free)
  • 1/4 cup tapioca flour (or substitute other flour; if you do not want to be gluten free use whole wheat flour)
  • 3 Tablespoons semisweet chocolate chips (non-dairy kind)
Instructions

  1. Preheat a griddle to medium heat (about 225-250 degrees.
  2. **IF you using Flax eggs prepare those here by mixing flaxseed meal and water and letting set for 3-5 minutes.****
  3. Mash banana with baking powder.
  4. Add egg, oil, salt, vanilla, butter, honey, milk, and stir.
  5. Stir in oats and flour until just combined.
  6. Sprinkle in chocolate chips and fold gently.
  7. Scoop scant 1/4 cup measurements onto griddle.
  8. Cook for 4 minutes on each side or until golden brown.
  9. Serve plain or with a small drizzle of maple syrup.
Yield: 7-8 2 inch pancakes.  I will double this next time I make it.

Serve:  Serve immediately and warm. 

Storage:  Refrigerate leftovers and use within 2 days.

Timing:  Since there is honey in here I would wait until 2 years.  BUT if the honey is omitted I think a skilled 12 month old could easily eat these and be ok with all the ingredients.

Difficulty: 2 out of 5; this does not take any longer to make than any other homemade pancakes.  Easy and delicious!

Epicutie Rating:  YUMMY in the Tummy<---see left side of page for rating descriptions
Little Joy LOVED these, in fact...it only made 7 pancakes and she ate three leaving my husband and I only 2 each.  She ate more than us!  But let's be honest, what toddler does not want a few chocolate chips in their breakfast?


YUMMMMMMM!

Little Asher---Eating Gluten and Dairy free puffs while we enjoyed the pancakes.  It wont be much longer that he will be spectating!  

Thursday, June 21, 2012

Honey Garlic Chicken Thighs-Slow Cooker

It has been a while since I have posted and it's because Little Asher has been a handful!!!! We found out that he has reflux and my diet exacerbates it. In our journey to determine the culprit and have a happy baby, I eliminated diary, soy, gluten, wheat and all derivatives. Doesn't seem too bad until you read labels, these ingredients are in everything!!!!!! The quest to a happy Little Asher, has brought about a new way of eating and I happy to post this recipe which is dairy, soy and gluten free and......is EASY (the best part). This recipe is from two sites: Once A Month Mom (my new favorite site) and Cooking Gods Way.

Chicken Ingredients
1 1/2 to 2 pounds Chicken thighs, without skin (about 4 to 6 thighs)
3 garlic cloves, smashed and chopped
1 teaspoon dried basil
1/2 cup soy sauce alternative (recipe below; if you want you can use soy sauce in lieu of the soy sauce alternative)
1/2 cup ketchup
1/3 cup honey


Soy Sauce Alternative Ingredients
4 teaspoons balsamic vinegar
2 teaspoons unsulphured molasses
1/4 teaspoon ground ginger
1 pinch white pepper
1 pinch garlic powder
1 1/2 cups organic chicken broth
salt, to taste (if needed)


Soy Sauce Alternative Instructions
1) In a saucepan over medium heat, stir together all of the ingredients, except salt.
2) Bring to a boil. Continue to boil gently until liquid is reduced to about 1 cup, for about 15 minutes.
3) Store the sauce tightly covered, in the refrigerator for up to a week. Shake before using
Use as a substitute for Soy Sauce or Worcestershire Sauce


Chicken Instructions
1). Use a 4-quart slow cooker (if using a 6-quart, this will cook faster. Check after 3 hours on high, 5 hours on low).
2) Put the chicken into your cooker.
3) In a small bowl, combine the rest of the ingredients, then pour evenly over the top.
4) Cook on low for 6 hours or high for 3-4 (Low does a little better)


Serve: Serve warm with basmati rice and steamed or roasted vegetables.

Difficulty: 1 out of 5. EASY EASY. Just dump and go!

Timing: 12 to 18 months, your little one should have some teeth to mash and grind the chicken, but the chicken is very very soft!!!

Epicutie Rating: Yummy in The Tummy (see rating descriptions on right side
Little Joy loved this with some if the sauce of rice. Everyone in the family liked it. The best part is Little Asher loved that my milk had no diary or soy or gluten!!!

Note: This is a great freezer meal! Put the chicken and sauce in a freezer bag. Thaw overnight the night before you want to cook it, them dump it in the crockpot the next day and you are set!

- Posted using BlogPress from my iPad

Friday, May 18, 2012

Bean Nachos with Enchilada Variation

This yummy little recipe was taken from Eat to Live by Joel Fuhrman and modified to my tastes and kitchen ingredients. It also happens to be gluten-free, dairy-free if you are interested in that! This recipe seems like it would be great for working moms as it makes up in such a short amount of time.

Ingredients:

  • 2 medium bell peppers, any color
  • 1 small white onion
  • 1 14 ounce can diced tomatoes
  • 2 cans black, kidney or pinto beans
  • 1/2 cup frozen corn, thawed or fresh corn off the cobb
  • 1 tablespoon dried or fresh cilantro
  • 1 1/2 tablespoon chili powder
  • 1 1/2 teaspoon ground cumin
  • 1 1/2 teaspoon onion powder
  • cayenne pepper to taste (optional)
  • 8 corn tortillas OR a bag of corn chips

Steps:

  1. In a food processor or chopper, dice bell peppers and onion
  2. Combine all ingredients on low heat until warmed through (approximately 10 minutes)
  3. For nacho variation: Sprinkle bean mixture over nacho chips and serve.
  4. For enchilada variation: Spoon bean mixture into corn tortillas, wrap and put in the oven and bake for 15 minutes at 375 degrees. Remove and serve.

photo (27)

Yield: Approximately 4 servings.

Miscellaneous:

  • The original recipe called for the veggies to be more thoroughly cooked, but these particular veggies are so delicious and fresh tasting raw, especially with the cilantro, that I recommend just letting the recipe heat up enough to be warm.
  • The original recipe also called for more corn, I do not like corn so I reduced the amount of corn.  I also used canned corn instead of frozen or fresh.
  • I pureed one can of beans before adding it as Little Frances has been so picky about eating beans lately!
  • Although Little Frances and I had this completely dairy free with some avocado on the side (I also added some jalapenos to mine), her dad added shredded cheese to the top.  I find that the flavors are delicious enough without the cheese.

Storage: Store bean mixture or enchiladas in the fridge for up to one week, reheat before use.

Timing: If you wanted to puree the bean mixture after cooking, this can be introduced as early as one year, however in its normal form, I recommend waiting until your child is a toddler as some of the chopped veggies and chips require molars to grind.  As with many foods, it is not ingredients, so much as how finely you chop them that determines how easily your little one can eat them.

Difficulty: I am giving this a 1 out of 5, although since it does involve using your stove I probably should give it a low 2.  It’s so easy – just chop, mix, warm, serve!

Epicutie Rating: Somewhat yummy! (See left side of the page for descriptions)

This gets a solid Yummy in the Tummy in enchilada form from Little Frances, however in nacho form she realized that she could hold the chip a certain way and all of the bean mixture would just slide right off so that she could get to what she really wanted – the chips!

Daddy, with his mountain of cheese!

Nick

Little Frances, so excited because she managed to get her hands on some of it!
Little Frances

Here is Little Frances eating this at a previous time in enchilada form (with white tortillas).

Bean Enchiladas

I am a warrior!


Little Tummy Yummies

About the Authors

This blog was started by two Babywise pen pals to document our adventures in high chair manners, making our own baby food and doing our bests to raise happy, healthy, thriving little ones!

Epicutie #1

Epicutie #1

Little Joy at 2 years, Sept 2012

Epicutie #2

Epicutie #2
Little Frances

Epicutie #3

Epicutie #3
Little Asher at 11 months, Sept 2012

Epicutie #4

Epicutie #4
Little Elizabeth, July 2013

  • Yummy in the Tummy: Epicutie thoroughly enjoyed each bite
  • Somewhat yummy: Epicutie seemed to somewhat enjoy the food at first, but seemed to like it less with subsequent bites
  • Not so sure I like it...yet: Epicutie somewhat rejected the first bites, but seemed intrigued. The next exposure may be better!
  • Confused: Epicutie rejected the first bites, perhaps due to texture or strong flavor.
  • Sour Puss: Epicutie gave a sour face indicating she did not like the food. However--if at first you do not succeed, try, try again!


  • Munchkin Land Designs Elements by Crisdam Designs

    Click Here for Other Awesome Giveaways!

    Labels

     
    Designed by Munchkin Land Designs • Copyright 2011 • All Rights Reserved