HomeAbout the BlogMeet the ChefsMeet the EpicutiesMeal IndexContact Us

Saturday, October 29, 2011

Meet Epicutie Asher!

Baby Manna is a BOY!

2011-10-29 09.05.21_Alexandria_Virginia_US

facebook_65990

Caleb Asher arrived on October 27th, 2011 and he’s a BIG one, just like Mama Kelly wanted Smile.

His stats:

  • Time of Birth: 8:55 pm
  • Length: 21.25 inches
  • Weight: 9 lbs 6.7 oz

We are rejoicing at LTY over the healthy mom and baby, especially Epicutie Joy, who is crazy over her little baby brother.

Praises,

Stori

Saturday, October 22, 2011

7 Grain Bread

Yet another recipe submitted by my friend Heather.  I give the bread SHE made a 5 of 5 stars, but mine was not nearly as good!  I do not have a bread maker so it takes several attempts at making the bread from scratch to get it right so I am posting this recipe exactly how she sent it to me (using the bread machine).  My family and friends still enjoyed the bread, but it was really dense and did not rise well; the flavor was still there though!

Ingredients:

  • 1 1/3 c water
  • 1/2 c Grape Nuts or other 7 grain cereal, like Kashi
  • 1/2 c rolled oats, blended finely in a mini-food processor (or oat flour)
  • 1 1/2 tsp salt
  • 3 T molasses
  • 3 T olive oil
  • 3 1/2 c bread flour
  • 1 pack active dry yeast


I mix all these together in a bread maker first on the dough setting, but if you don't have one, you can start by hand: Heat water to 130 degrees, add to cereal in large bowl, let stand 10 mins. Add yeast, oat flour, salts, molasses, and oil. Beat well. Cover, let stand 15 mins. Slowly add bread flour, and beat until smooth. Turn dough out onto lightly floured board and knead until smooth and springy about 5mins, adding flour if necessary. Grease another bowl, place dough in bowl and roll until greased on all sides. Cover and let rise in warm place until doubled, about 1 hour.

Here, either take dough out of bread maker or bowl and do the following (or you can just bake whole thing start to finish in bread maker and skip dough cycle): Grease 9 x 5 inch loaf pan or 8 or 9 inch round cake pan. Turn dough onto lightly floured board. Punch dough down and shape it into loaf. Place with smooth side up into pan. Cover and let rise again in a warm place until almost doubled, about 45 minutes. Preheat oven to 375 degrees. Bake 25 to 30 mins, until loaf is golden. Remove from pan immediately and cool on rack.

Yield:  One loaf

Timing:  This is just bread so as soon as your little one has eaten grains with no issues and can gum foods, this is perfect.  I would say about 9 months

Difficulty:  5 out of 5; not using a bread machine makes this very time consuming, but I still think its worth it it's YUMMO!

Epicutie Rating:  YUMMY IN THE TUMMY--see right side of page for descriptions.
I had to make Little Joy stop eating this stuff.  She has taste buds like her Daddy.....BREAD :)  She used to hate bread now it is her best friend---go figure!

Lentil Minestrone Soup

This recipe was submitted by my dear friend Heather; she always cooks fresh, healthy, organic and FUN things. I LOVE dinner parties with her family :) Her Epicutie Little Ray is still a little young to be sampling something like this, but I have a feeling very soon I will be featuring some of her recipes!!! Heather adapted this Lentil Minestrone Soup from "Vegetarian Cooking for Everyone" by Deborah Madison.

Ingredients:
  • 2 T olive oil
  • 2 onions, chopped
  • 3 T tomato paste
  • 1/4 c chopped parsley
  • 3-4 cloves chopped garlic
  • 2 tsp salt
  • 3 carrots, diced
  • 2-3 ribs celery, diced
  • 1 c green lentils, sorted for rocks and rinsed
  • Aromatics: 2 bay leaves, 8 parsley branches or celery leaf stalks, 6 thyme sprigs (or whatever herbs you have on hand)
  • 9 cups water
  • 2 c small pasta, cooked
  • fresh ground pepper
  • 1 T Dijon mustard (KEY ingredient)
  • 1 T red wine vinegar (KEY ingredient)
Steps:
  1. Heat oil and onion in soup pot over high heat, stirring regularly, until lightly browned, about 10 mins.
  2. Add tomato paste, parsley, garlic, veggies, and salt and cook 3 mins more.
  3. Add lentils, aromatics, and water and bring to a boil.
  4. Lower heat and simmer, covered, for 15 minutes.
  5. Add pasta, stir and cook for an additional 15 minutes.
  6. Add salt and pepper to taste.
  7. Remove aromatics from soup before serving.
  8. Serve warm.
Yeild: About 8 servings

Serve: Serve with 7 Grain Bread (post coming soon!) or other bread along with a salad for the adults.

Timing: Everything in the soup is very soft so if your little one demonstrates the ability to chew and has several teeth I would think this appropriate. Keep in mind, there is a lot going on in this dish and it can be messy since its a soup. So it might be more appropriate for the pre-toddler (12-18 months). Since Little Joy had teeth and loved finger foods, I would have offered it to her as early as 10-12 months I think.

Variations: Although I have not tried it, I think sliced mushrooms or lima beans or cut up green beans would be a great addition to the soup. Be adventurous and add more veggies your family likes!!

Difficulty: 3 out of 5; I only give it a 3 vs 2 because of the overall time involved including cook time. This is VERY easy and worth the effort.

Epicutie Rating: Yummy in the Tummy--see right side of page for descriptions
Little Joy loved this...especially the lentils, she calls them beans (and she loves beans for some reason). She made a big ole mess with it, but really liked it. Little Joy is starting to like leftovers so by the third day she was kinda over it :)

No pictures this time, with Baby #2 due TWO DAYS AGO I am not totally on my game with documenting our food adventures!

Wednesday, October 19, 2011

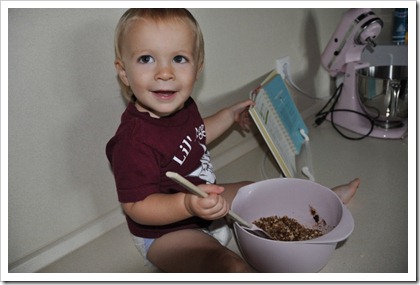
Banana Bread with Cinnamon Streusel Topping


This another one from Deceptively Delicious!  I promise this blog is not just for Deceptively Delicious recipes, but I was looking through my cookbooks last night and I had all the ingredients on hand for this one so I couldn’t resist.  I have a history of my banana bread not turning out, and once upon a time, I tried every banana and banana nut bread recipe that I could get my hands on and I was never happy with how they turned out.  After making this, I still feel like I am searching for that perfect recipe, but in the mean time this healthy, easy version will definitely scratch the itch!

Cinnamon Streusel Topping (Optional)

Ingredients:

  • 2/3 cup old-fashioned oats
  • 1/4 cup firmly packed brown sugar
  • 1 teaspoon cinnamon
  • 2 tablespoons melted butter or margarine

Steps:

  1. Stir together dry ingredients in a bowl. Stir in the butter or margarine. Set aside.
014 (640x425)

Banana Bread

Ingredients:

  • Nonstick cooking spray
  • 3/4 cup whole wheat flour
  • 1/2 cup all-purpose flour
  • 1/2 teaspoon baking soda
  • 1/4 teaspoon baking powder
  • 1/2 teaspoon salt
  • 1/2 teaspoon cinnamon (optional)
  • 1/2 cup firmly packed brown sugar
  • 1/4 cup canola or vegetable oil
  • 2 large egg whites
  • 1 1/2 cups banana puree
  • 1/2 cup cauliflower puree
  • 1 teaspoon pure vanilla extract

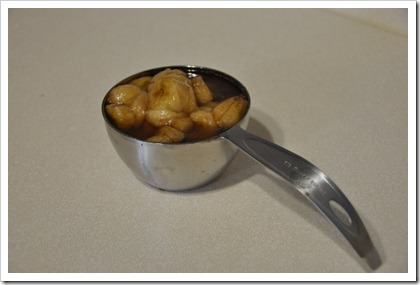
***I used 4 thawed frozen bananas to make 1 1/2 cups and I did not puree them beforehand.

016 (640x425)

Steps:

  1. Preheat the oven to 350 degrees F.  Coat a 9x5 inch loaf pan or 2 mini pans with cooking spray.
  2. In a bowl or a zip lock bag, mix the flours with the baking soda, baking powder, salt, and cinnamon, if using. Set aside.
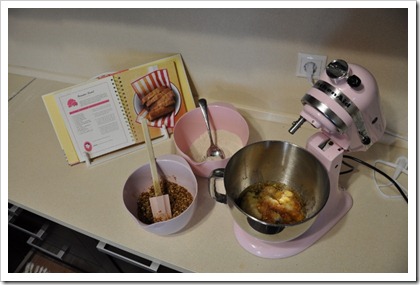
  3. In a large mixing bowl, mix the sugar and oil with a wooden spoon until well combined. Mix in the egg whites, banana and cauliflower purees, and vanilla. Add the flour mixture and mix just until combined.018 (640x425)
  4. Pour the batter into a loaf pan.  Cover evenly with the streusel topping if using.
  5. Bake until a toothpick inserted into the center comes out clean, 55 to 60 minutes for the large loaf, 25 to 30 minutes for the mini loaves. Let cool on a rack for 5 minutes, then turn the bread out of the pan to cool before serving.

023 (640x425)

Timing: This could be given as early as 9 months, but be aware of the egg whites if your little one has an egg allergy.  Usually it does not affect children if it is cooked in something. I personally would not give

Difficulty: This was pretty simple, but I am giving it a 3 out of 5 because I had to get so many pans and bowls dirty!  Very few dirty dishes is a requirement for me to give something a low rating Smile.

Miscellaneous:

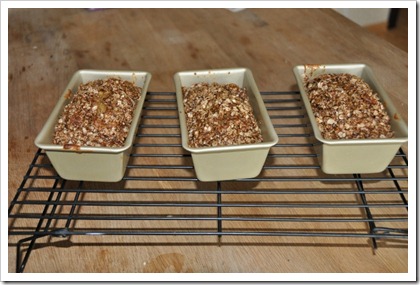
  • I used 3 mini loaf pans instead of 2.  I have a history of not evenly cooking my banana bread so I wanted to be cautious and not put too much batter into the pans.
  • When I put the cinnamon streusel topping on the batter, I gently mixed it with the top layer of the batter so that it would stay on the bread once baked.  It turned out very well.
  • To make cauliflower puree, simply steam raw cauliflower florets for 10 to 12 minutes and then puree.

Epicutie Rating: Yummy in the Tummy!!! ---See right side of the page for descriptions.

029 (640x425)

Friday, October 14, 2011

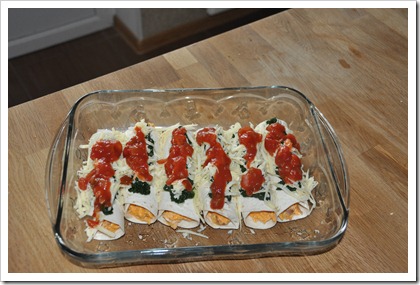
Chicken Enchiladas with Spinach

This is another recipe from Double Delicious, my second favorite cookbook!  This is such an easy, super healthy recipe, and I love that it gets Little Frances (and her Daddy) to eat such a large amount of spinach.  Plus, its delicious too.  This is one of my favorite things to cook (and eat)!
Ingredients:
  • Nonstick cooking spray
  • 1 T olive oil
  • 2 boneless, skinless chicken breasts, cubed (about ¾ lb)
  • ½ t garlic powder
  • ¼ t pepper
  • ½ c sweet potato puree or carrot puree
  • ¼ c sour cream
  • 1 c shredded cheddar cheese
  • 6 (9 inch) whole wheat tortillas
  • ½ c spinach puree
  • ½ c mild tomato salsa
Steps:
  1. Preheat the oven to 350 degrees F.
  2. Coat a 9 x 12 inch baking dish with cooking spray.
  3. Warm the oil in a large skillet over medium-high heat.
  4. Sprinkle the chicken with garlic powder and pepper.
  5. Cook the chicken 4 to 5 minutes, stirring occasionally, until it is cooked through and no longer pink in the center.
  6. Off the heat, mix the sweet potato or carrot puree, sour cream, and half the cheese into the skillet.
  7. Fill each tortilla with the chicken mixture and roll up. Place seam-side down in the prepared baking dish.
  8. Dot the tops of the enchiladas with spinach puree. Spoon the salsa over the enchiladas and sprinkle with the remaining cheese. DSC_0008
  9. Cover the dish with aluminum foil and bake until the cheese melts and filling is hot, 35 to 40 minutes.
Tips:
  • When I am in a hurry, I just buy rotisserie chicken at the grocery store and use the meat to skip steps 3-5.  Then I warm a skillet to melt the cheese mixture.
  • To make a 1/2 cup spinach puree I steam 1 large back of baby spinach for 2 minutes and then puree.  This purees easier with an immersion blender (which I don’t have).
Yield: 6 enchiladas
Timing: Because this is a difficult food to chew, I recommend no earlier than 15 months or until your baby has at least 8 teeth. I would NOT think that this would puree well for smaller children.  This is definitely a toddler food.
Difficulty: 2 of 5… super easy, super delicious!
Epicutie Rating: Yummy in the Tummy! --See right side of page for descriptions
Little Frances LOVES these!  It is her favorite food next to hamburgers.
Little Joy gave this a YUMMY IN THE TUMMY as well!  She gobbled it up and asked for more!  We served this along side some Mexican rice.


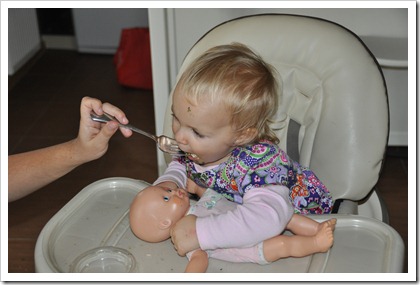
But before she will eat it, we must first feed baby!
DSC_0011
Ok, now Little Frances will eat them. Smile Yum yum.
DSC_0012

Wednesday, October 12, 2011

Butternut Squash Puree

I realized we have never posted the basic Butternut Squash puree recipe!!!

Ingredients:
  • One Ripe Butternut Squash
Steps:
  1. Preheat oven to 400 degrees
  2. Cut squash lengthwise
  3. Scoop out seeds
  4. Place flesh side (squash meat side) down on a cookie sheet or in a casserole dish
  5. Add 1-2 inches of water to pan
  6. Place in oven for 35-45 minutes or until the skin begins to pucker and when a knife is inserted its soft.
  7. Allow to cool slightly.
  8. Scoop out meat and puree to desired consistency using water (not from the pan) or breast milk to thin as you feel necessary.
  9. Place in ice cube tray, cover and freeze for 24 hours.
  10. Remove cubes from tray and place in freezer bag for long term storage.
Storage: Refrigerator for 3-5 days; freezer for 1-2 months.

Difficulty: 1 out of 2

Timing: 6 months; this is a great food to introduce as a first or second veggie

Miscellaneous: This puree (without any thinning) can be used in a number of other dishes too!!

Epicutie Rating: Yummy in the Tummy--see right side of page for descriptions
Little Joy has always loved squash!!!

Monday, October 10, 2011

Chicken and Biscuits

Thus I continue on my adventures in cooking through the "Double Delicious" cookbook by Jessica Seinfeld. I have made a dozen or so recipes from this cookbook and have posted hardly any of them! I am determined to catch up before Baby #2 arrives (due in 10 days)! Also, most of my posts here on out will be geared for family meals.

Ingredients for Chicken:
  • 1 tablespoon olive oil
  • 2 boneless, skinless chicken breasts cubed OR about 10 boneless skinless chicken tenderloins which is what I use (about 1 lb; add more or less depending on how much you need)
  • 1/8 teaspoon fresh ground pepper
  • 1 can reduced fat cream of chicken soup
  • 1/2 cup low fat milk
  • 1/2 cup carrot puree (can also use pumpkin or sweet potato puree)
Ingredients for Biscuit Topping:
  • 1 1/2 cups whole wheat flour
  • 2 teaspoons baking powder
  • 1/4 teaspoon salt
  • 1/2 cup trans-fat-free, soft tub margarine (you can substitute any butter, if using regular butter it should be softened)
  • 1 large egg beaten
  • 1/4 cup honey
  • 1/2 teaspoon cream of tarter
  • 3/4 cup low fat buttermilk
Steps:
  1. Heat oil in an dutch oven or flame proof casserole dish.
  2. Sprinkle chicken with pepper.
  3. Add chicken to the casserole dish until it begins to brown.
  4. Stir in soup, milk and puree until all ingredients are well combine.
  5. Remove from heat.
  6. Preheat oven to 375 degrees.
  7. Prepare the biscuits by combining flour, baking powder, and salt in a large bowl.
  8. Rub the margarine into the flour with your finger tips until the mixture resembles coarse crumbs.
  9. Add egg, honey, cream of tarter and buttermilk all at once.
  10. Mix just until soft dough forms.
  11. Dot the dough over the chicken mixture.
  12. Bake 20-25 minutes, uncovered, until the biscuits are cooked through and golden on top.
Yield: 6 servings

Storage: 3 days in the refrigerator. I do not recommend freezing.

Timing: I would wait until your little one has teeth to grind and chew through the bread and chicken. For us this was 12 months. We gave it to Little Joy at 17 months.

Serve: Serve immediately. This is a great family food and goes great along side sauteed green beans or steamed broccoli. OR a green salad for the adults, YUM!!!

Difficulty: 3 out of 5; easy and fast but does require a little prep time so I gave it a three vs. a two.

Epicutie Rating: Yummy in the Tummy--see right side of page for descriptions
Little Joy seems to like everything the first 2-3 times she has something, then if we have it several days in a row as leftovers, she is waving us off saying "All done" in sign language and verbally saying "All done chicken. No Thank You". HA!

Step 3: Cooking chicken in oil

Step 5: Remove from heat; all chicken ingredients combined.

Step 10: All dough ingredients combine

Ready to serve

Served to Mommy and Daddy with salad :)

I am a warrior!


Little Tummy Yummies

About the Authors

This blog was started by two Babywise pen pals to document our adventures in high chair manners, making our own baby food and doing our bests to raise happy, healthy, thriving little ones!

Epicutie #1

Epicutie #1

Little Joy at 2 years, Sept 2012

Epicutie #2

Epicutie #2
Little Frances

Epicutie #3

Epicutie #3
Little Asher at 11 months, Sept 2012

Epicutie #4

Epicutie #4
Little Elizabeth, July 2013

  • Yummy in the Tummy: Epicutie thoroughly enjoyed each bite
  • Somewhat yummy: Epicutie seemed to somewhat enjoy the food at first, but seemed to like it less with subsequent bites
  • Not so sure I like it...yet: Epicutie somewhat rejected the first bites, but seemed intrigued. The next exposure may be better!
  • Confused: Epicutie rejected the first bites, perhaps due to texture or strong flavor.
  • Sour Puss: Epicutie gave a sour face indicating she did not like the food. However--if at first you do not succeed, try, try again!


  • Munchkin Land Designs Elements by Crisdam Designs

    Click Here for Other Awesome Giveaways!

    Labels

     
    Designed by Munchkin Land Designs • Copyright 2011 • All Rights Reserved